Contacts
ClariNet LS provides CRM functionality for managing contacts which includes both companies and people.
CRM: A dataset within ClariNet LS which includes contact information
for Companies and People connected with a Client's Cases. The CRM is
controlled by the Client
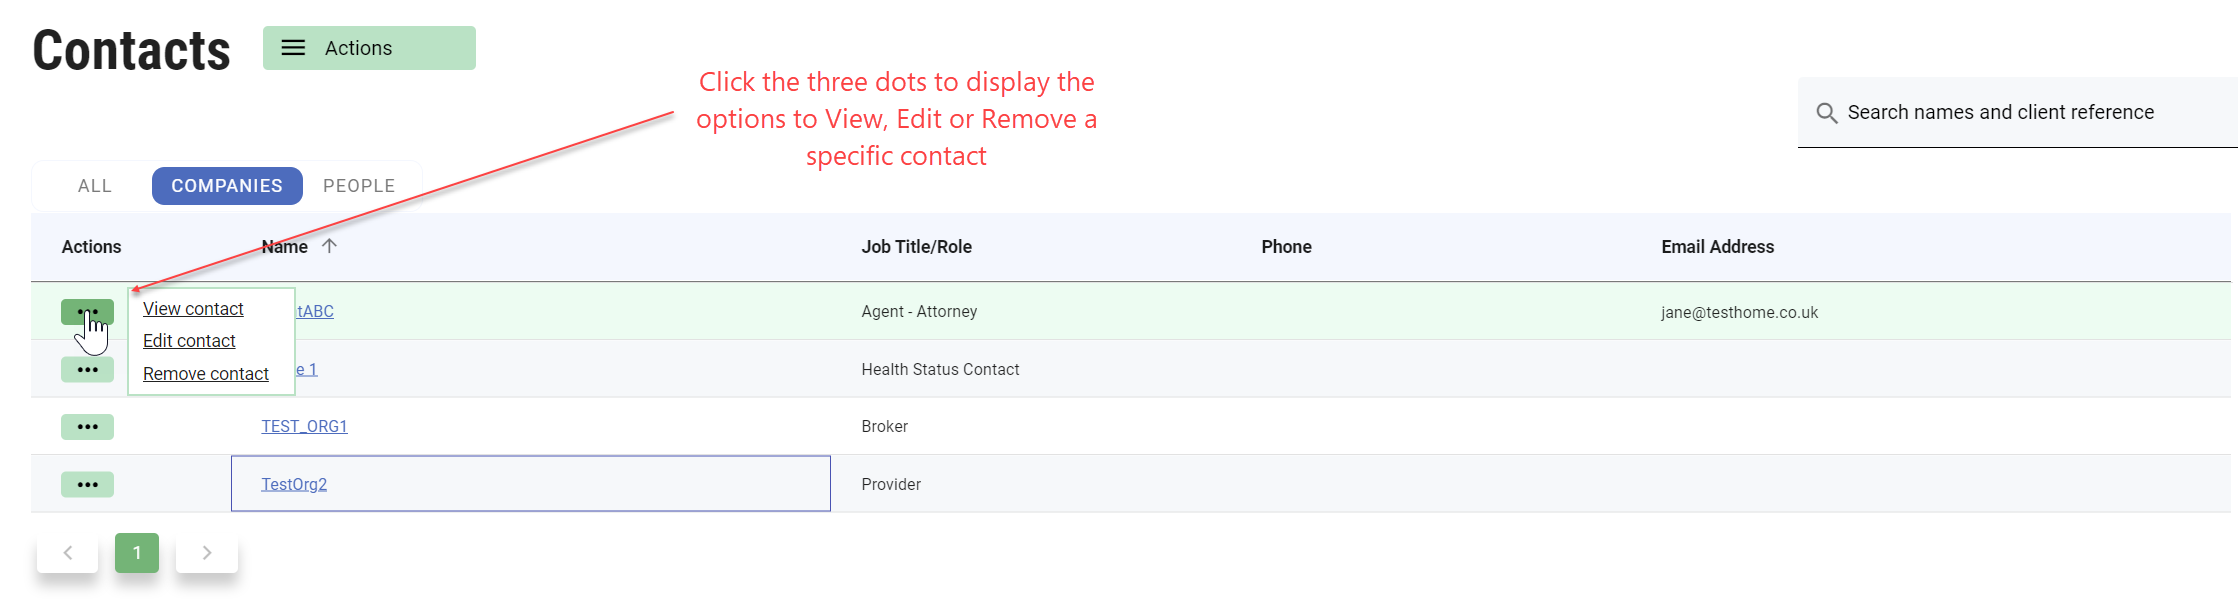
The Contacts page lists Companies and People and can be sorted by name, job title/type, phone and email address. You can filter the list of contacts; click ALL to show the complete list, or filter by company or people using the buttons available.
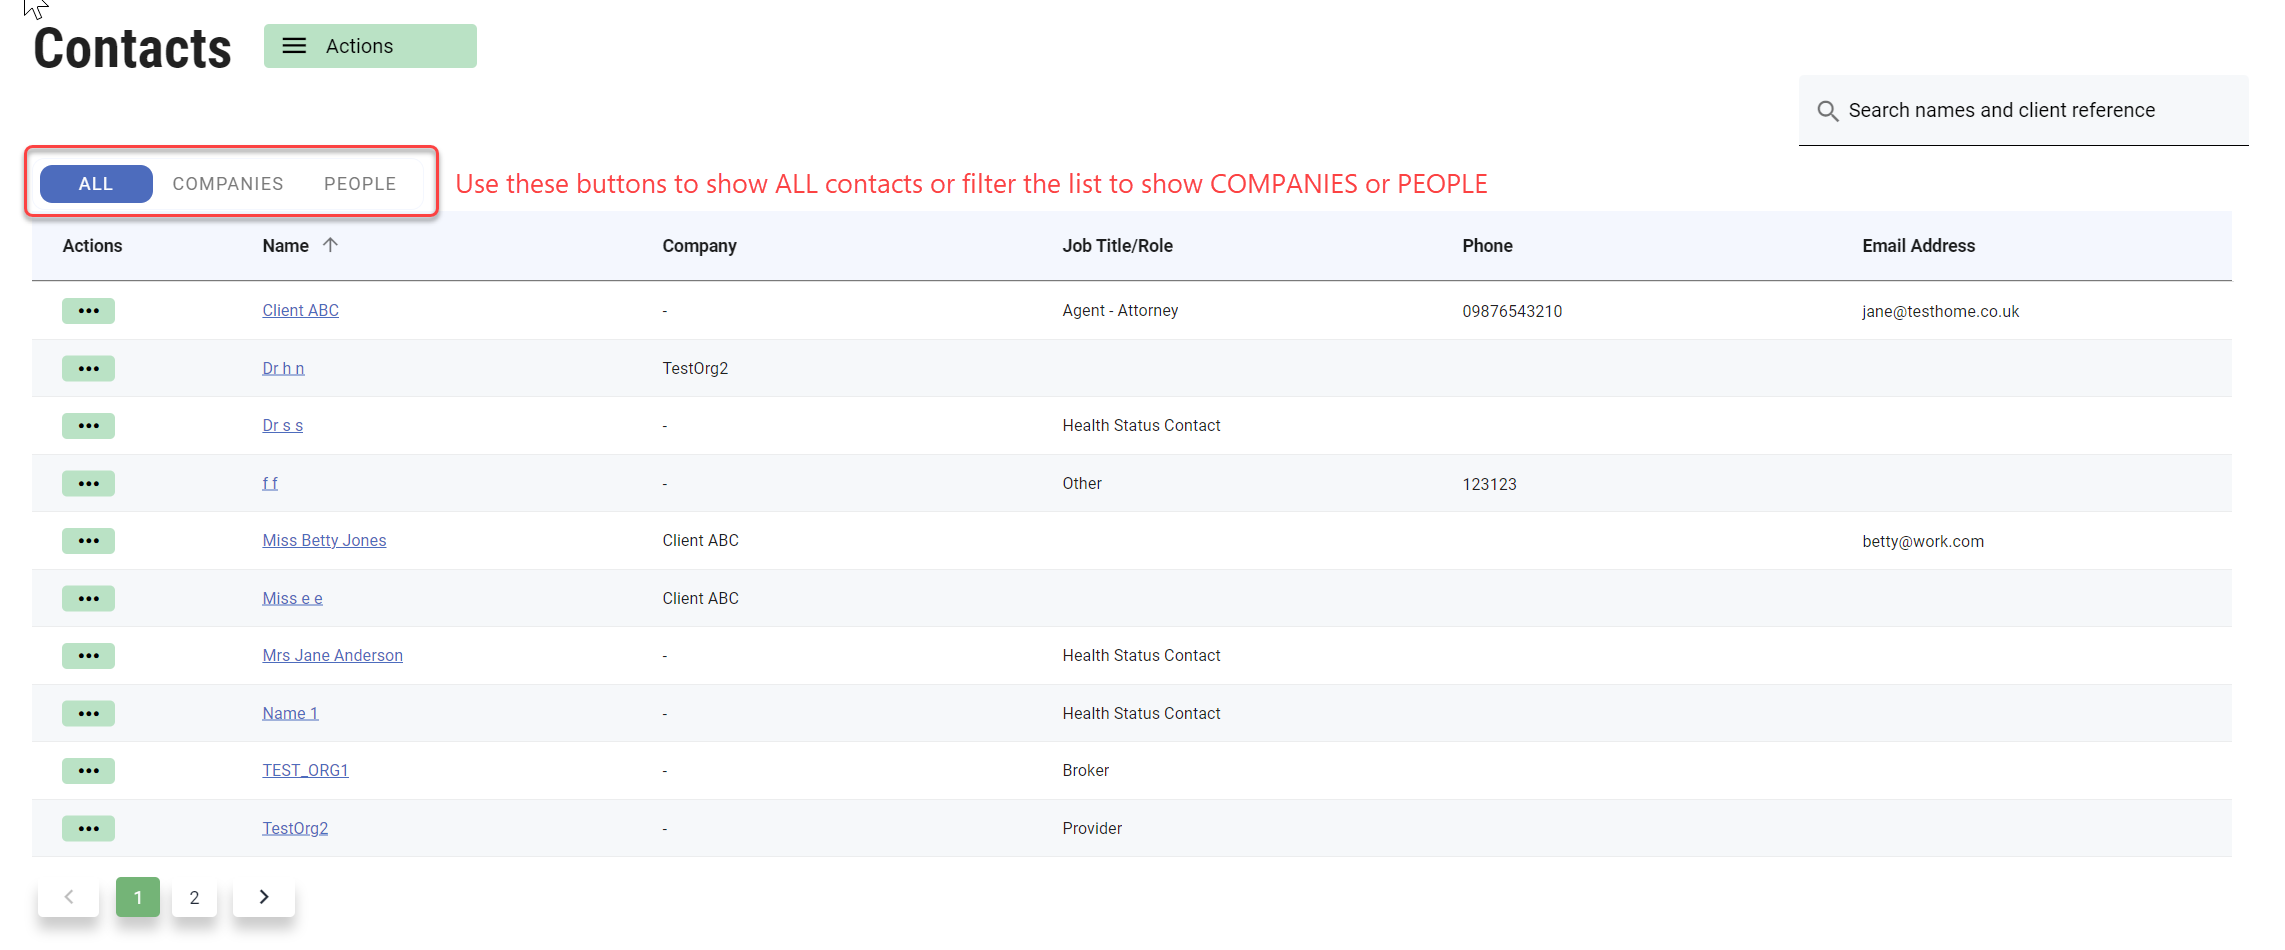
Operations you can perform on this page are indicated on the screen shot and described below:
- Performing a quick search for a particular company or person using the Search box.
- Adding or exporting contacts using the Actions button.
- Viewing, editing or deleting a specific contact using the three dots action button to the left of a Company or Person
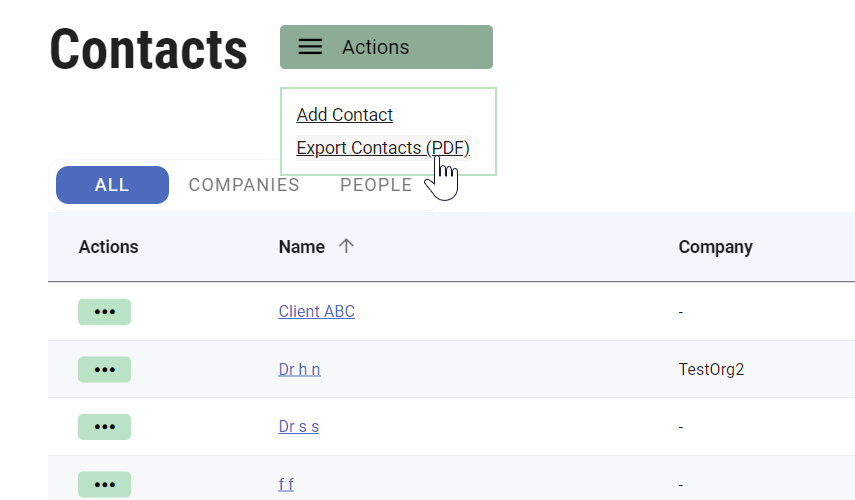
To add a Contact (Company/Person)
- Click the Actions button to view the options.
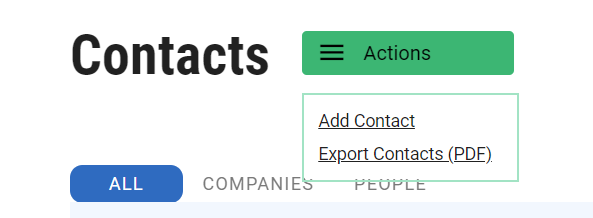
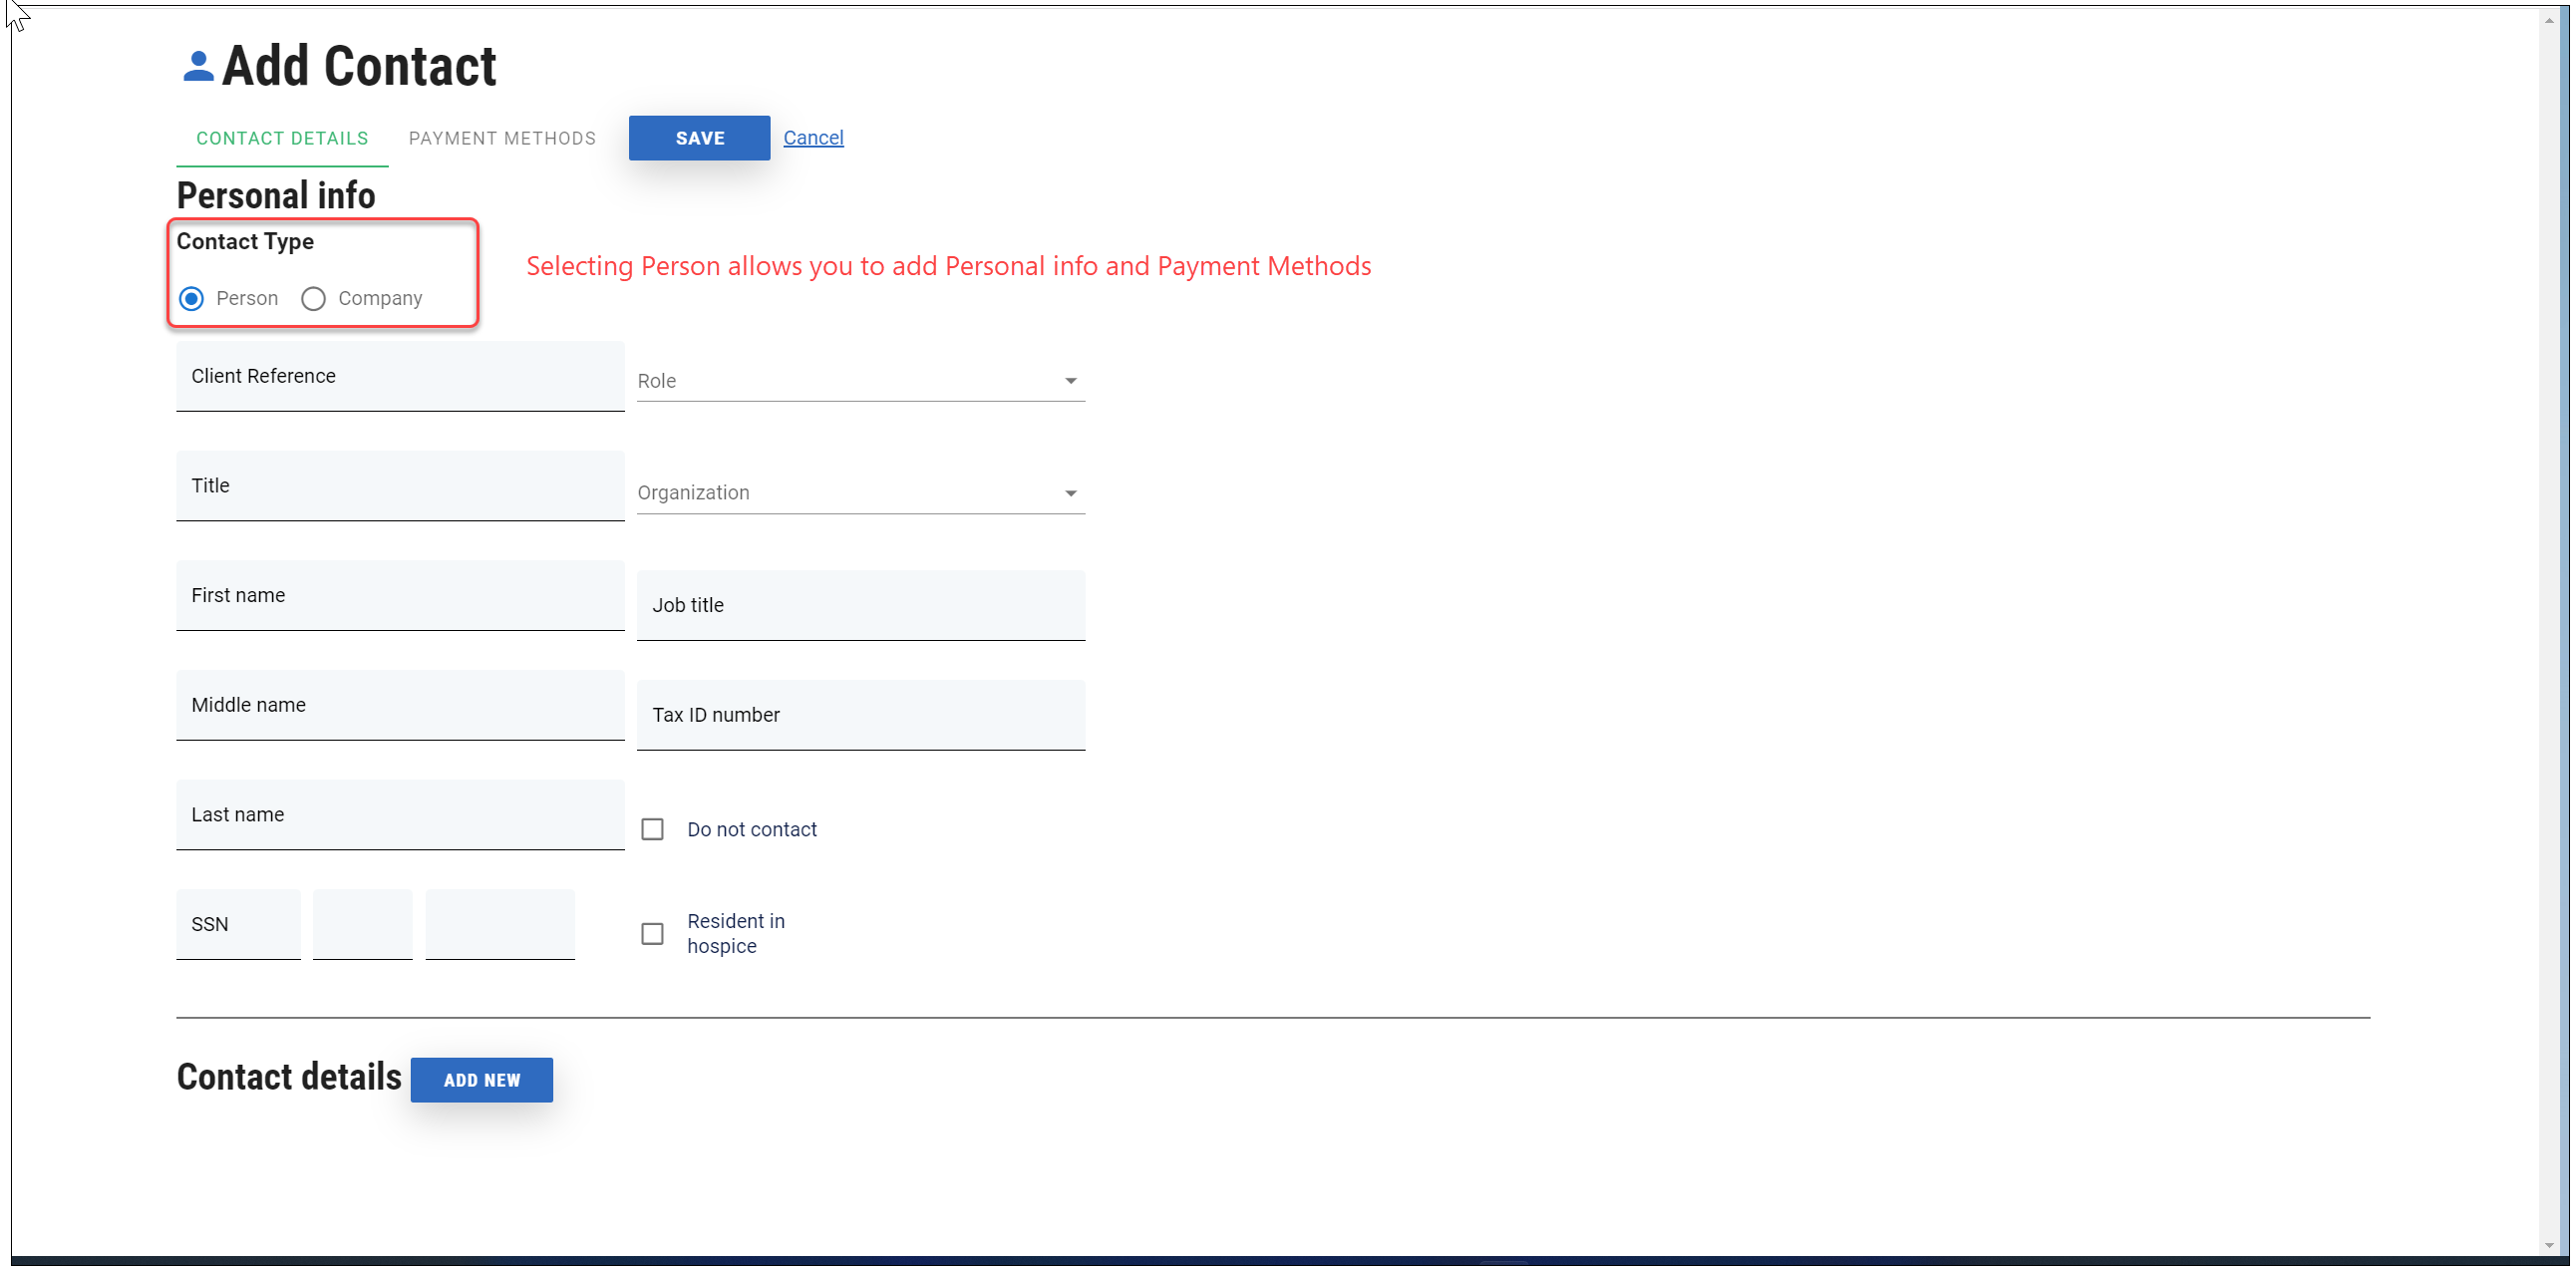
- Click Add Contact to open the Add Contact page on a new tab where you select the type of contact you would like to add. Your selection determines the tabs available.
The default selection is Person which allows you to add contact details and payment methods.
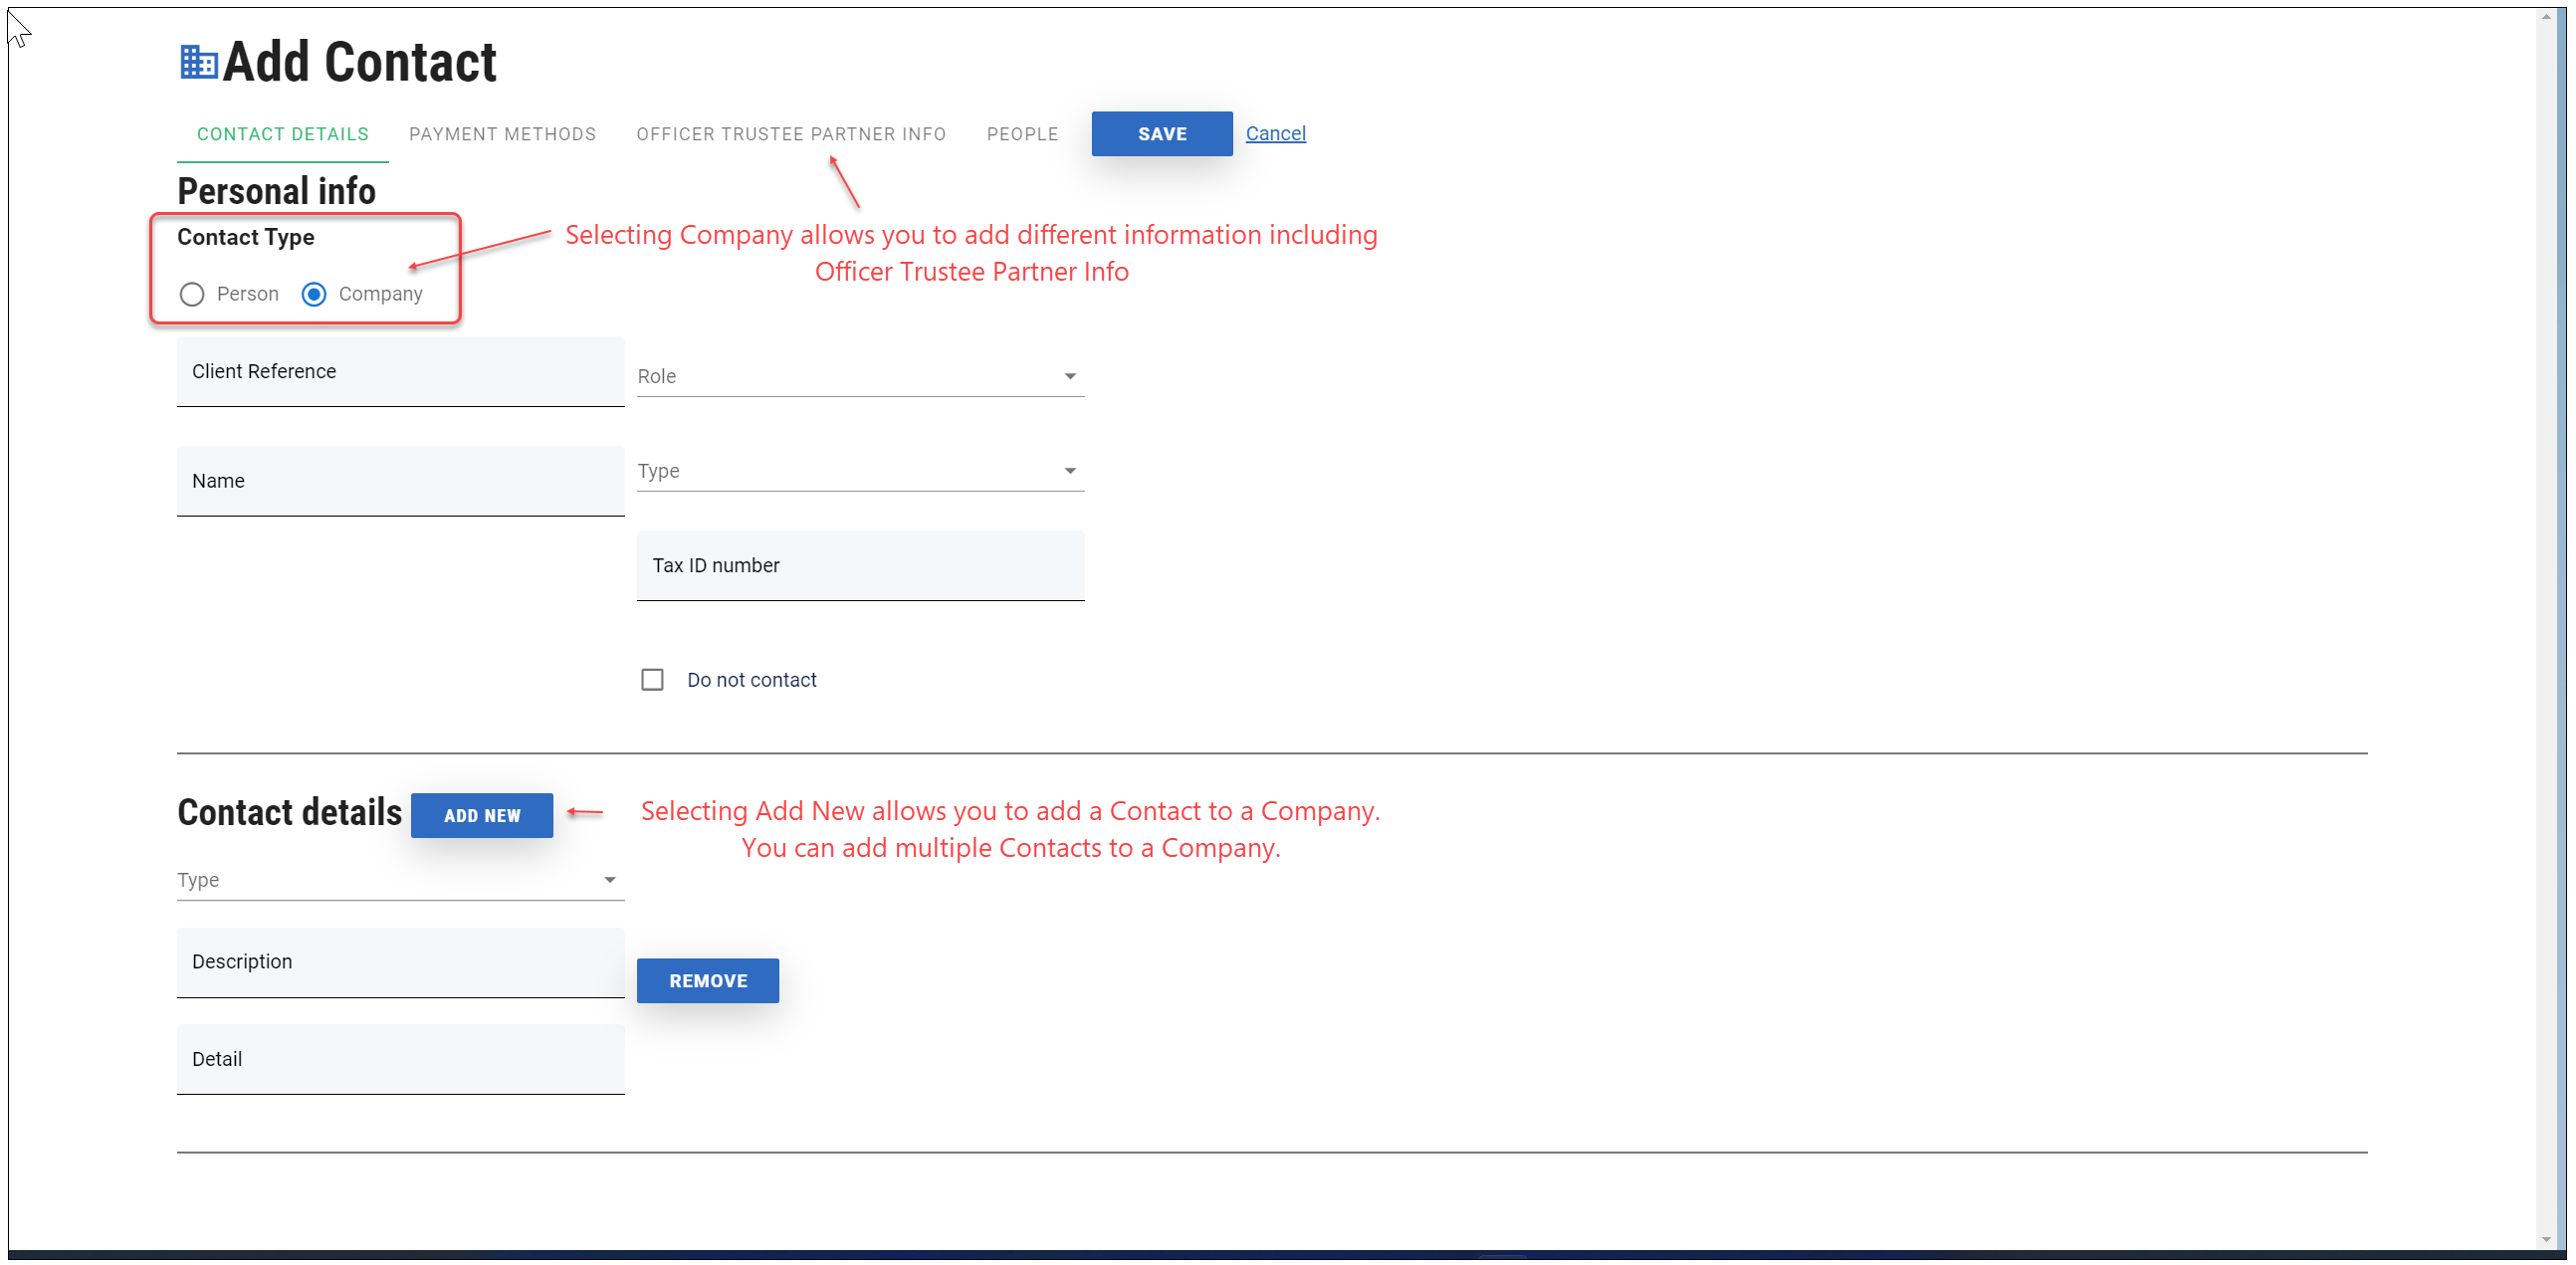
Switching to Company allows you to add Officer/Trustee/Partner Information along with personal information and contact details.
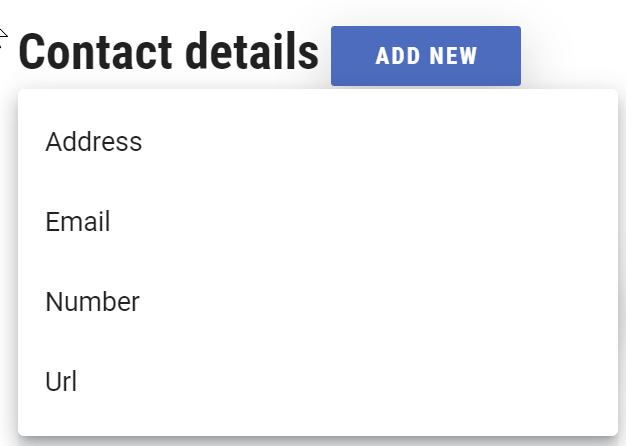
Use the ADD NEW button to add multiple details, i.e. Address, Email, Number, URL.
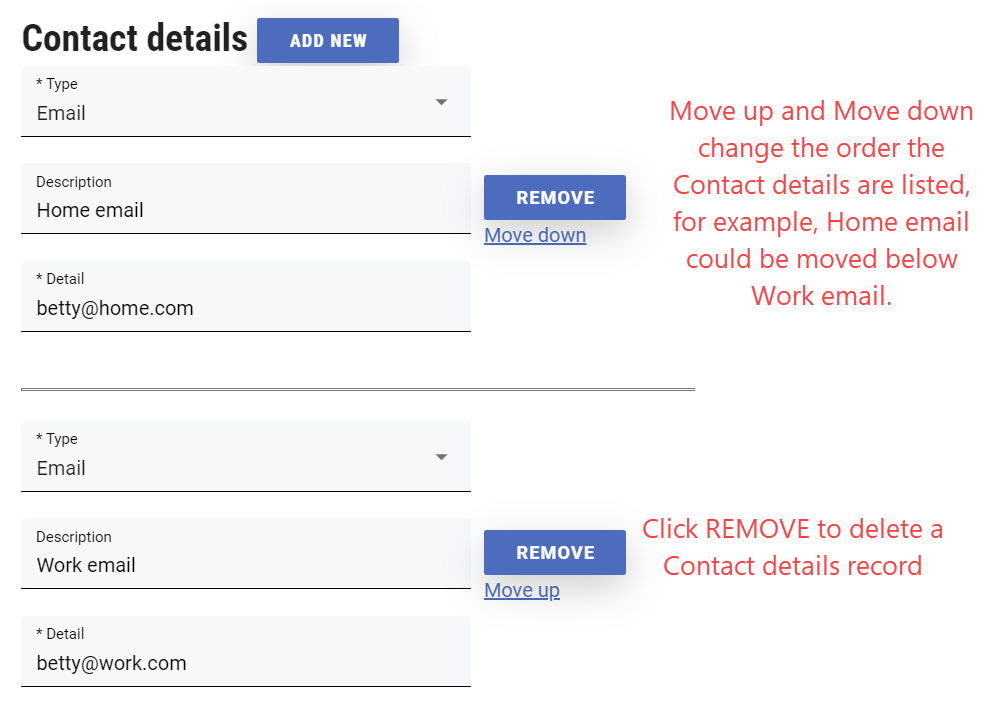
You can change the order these contact details are listed using the up or down and remove a contact.
- Once you have populated the required fields, click SAVE.
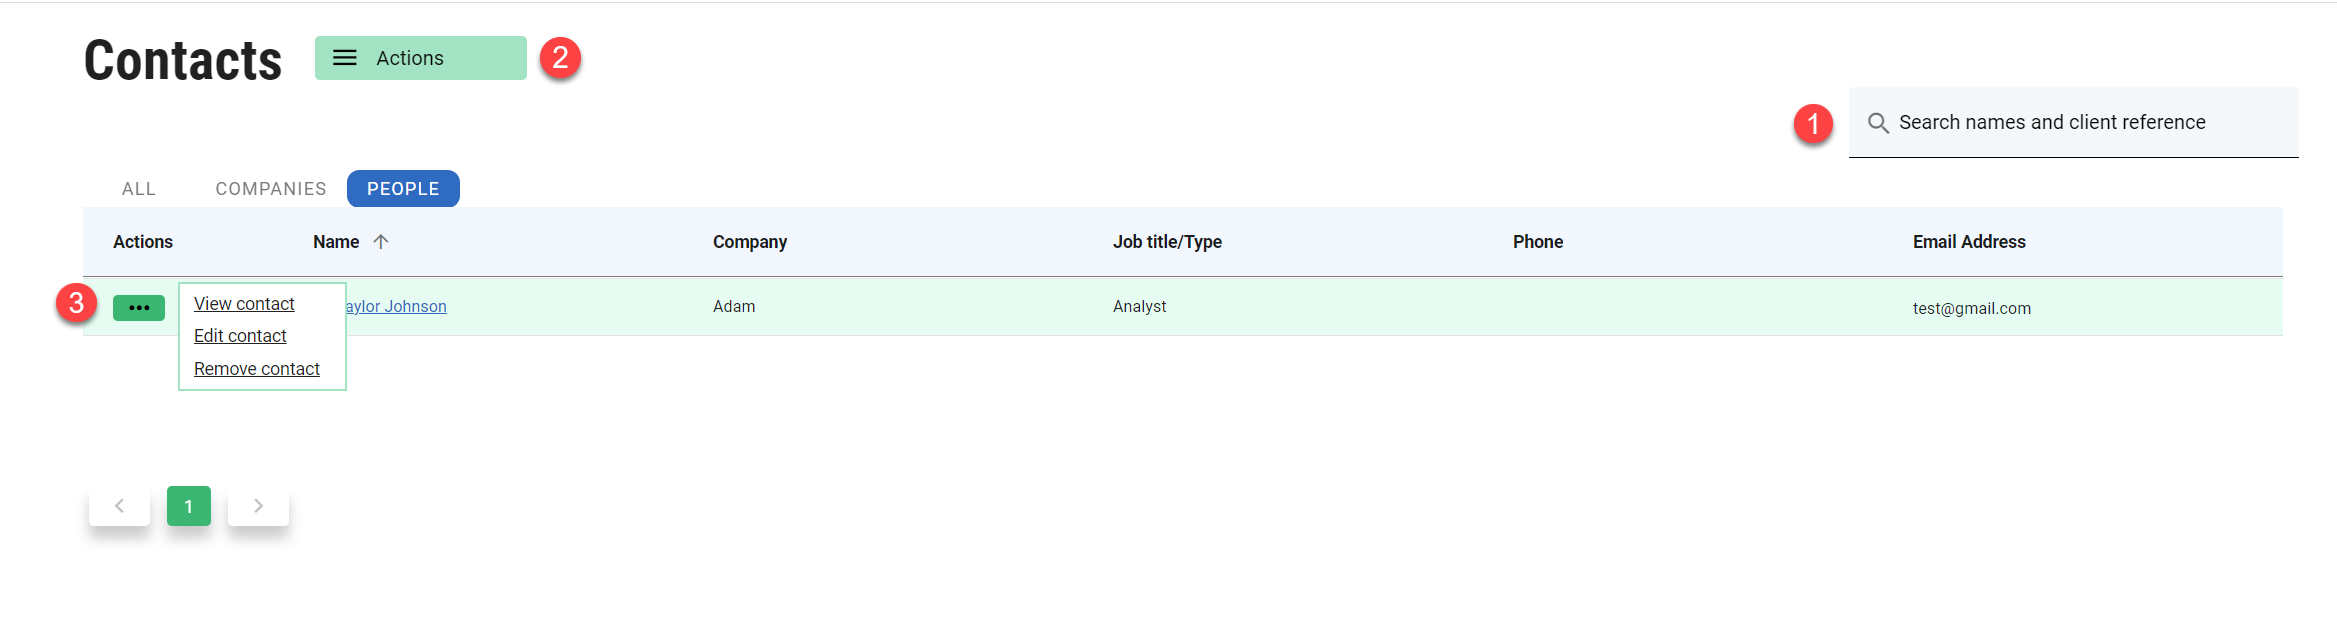
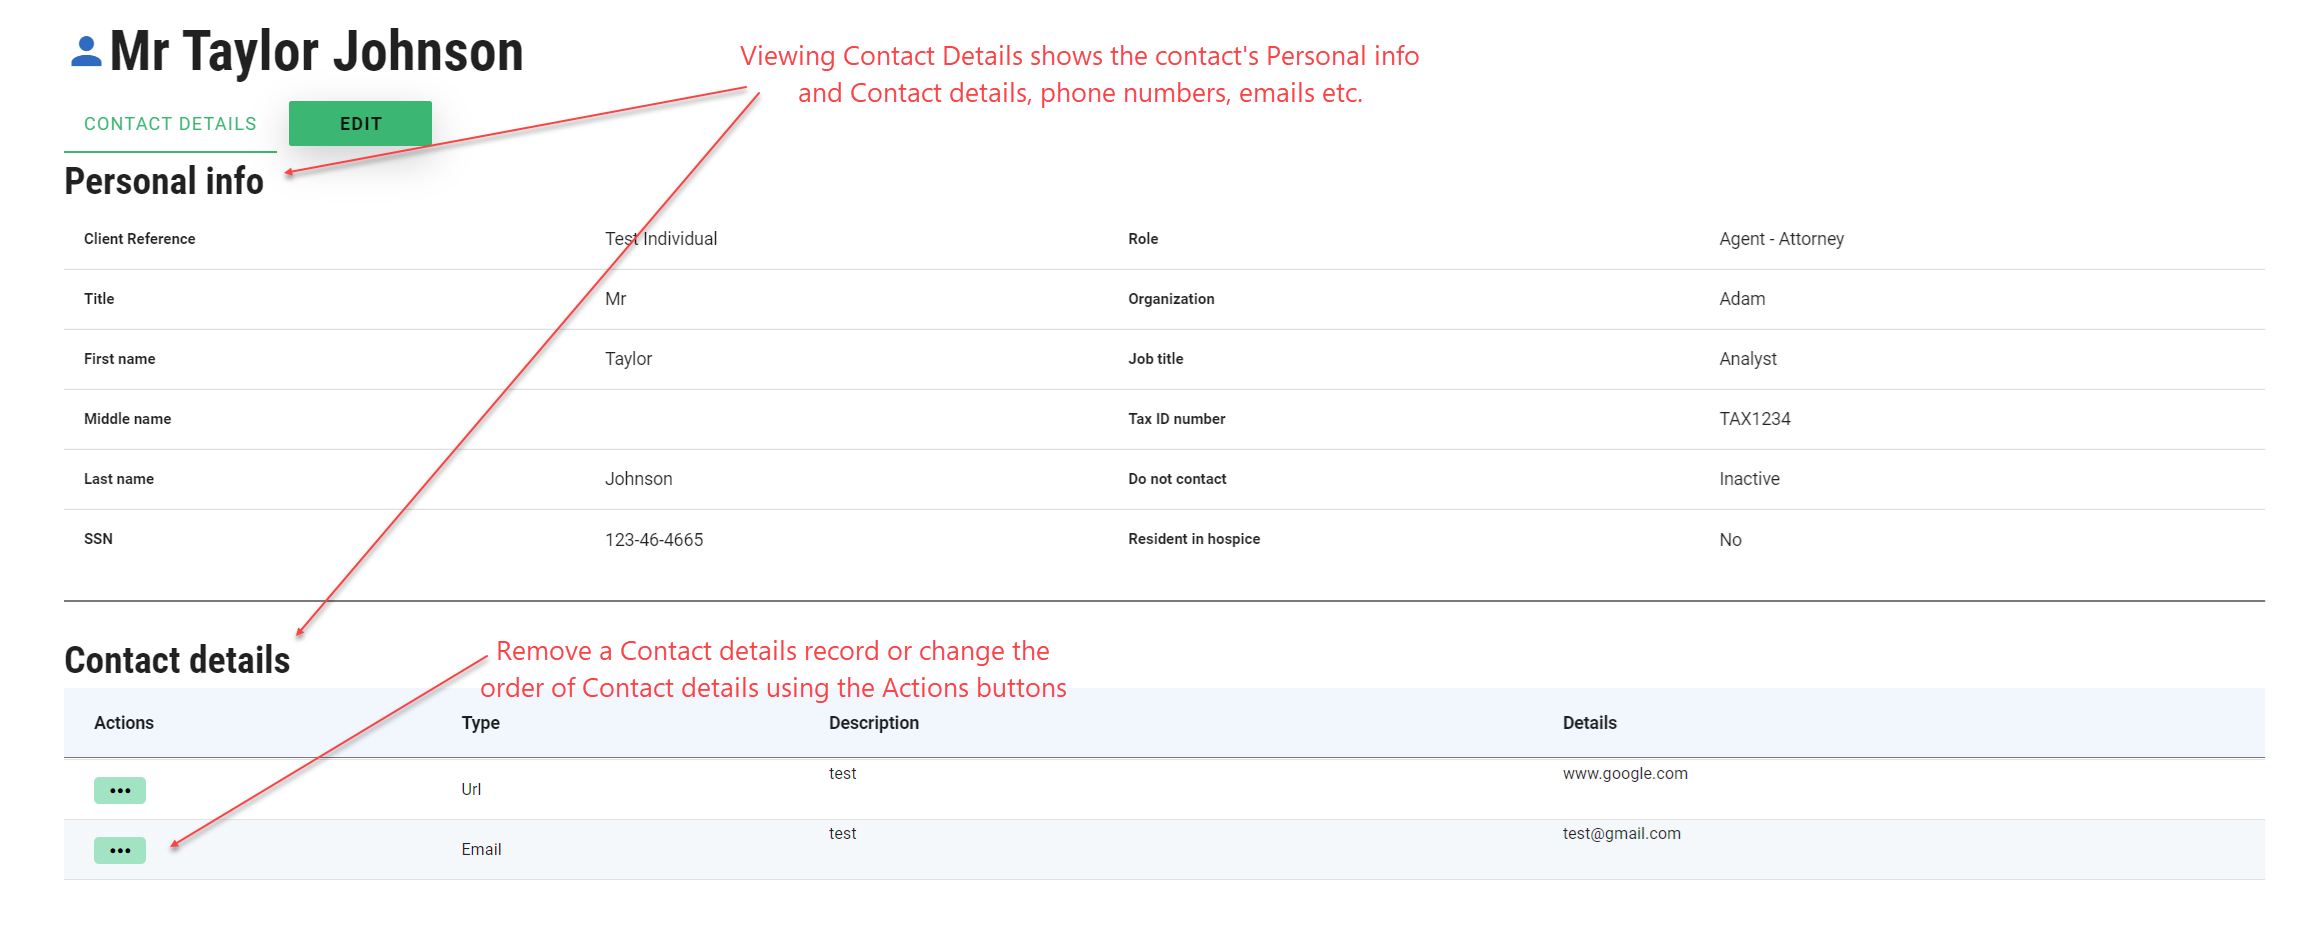
To view, edit or remove a Contact
Once saved, Contacts appear in the Contacts list and can be viewed, edited or removed.
Clicking View opens a new tab showing all personal info and contact details as shown below:
Clicking Edit opens the Contact page in edit mode. Once you have modified the required changes, click SAVE.
Clicking Delete displays a pop up asking you to confirm deletion. Click OK to delete the contact.

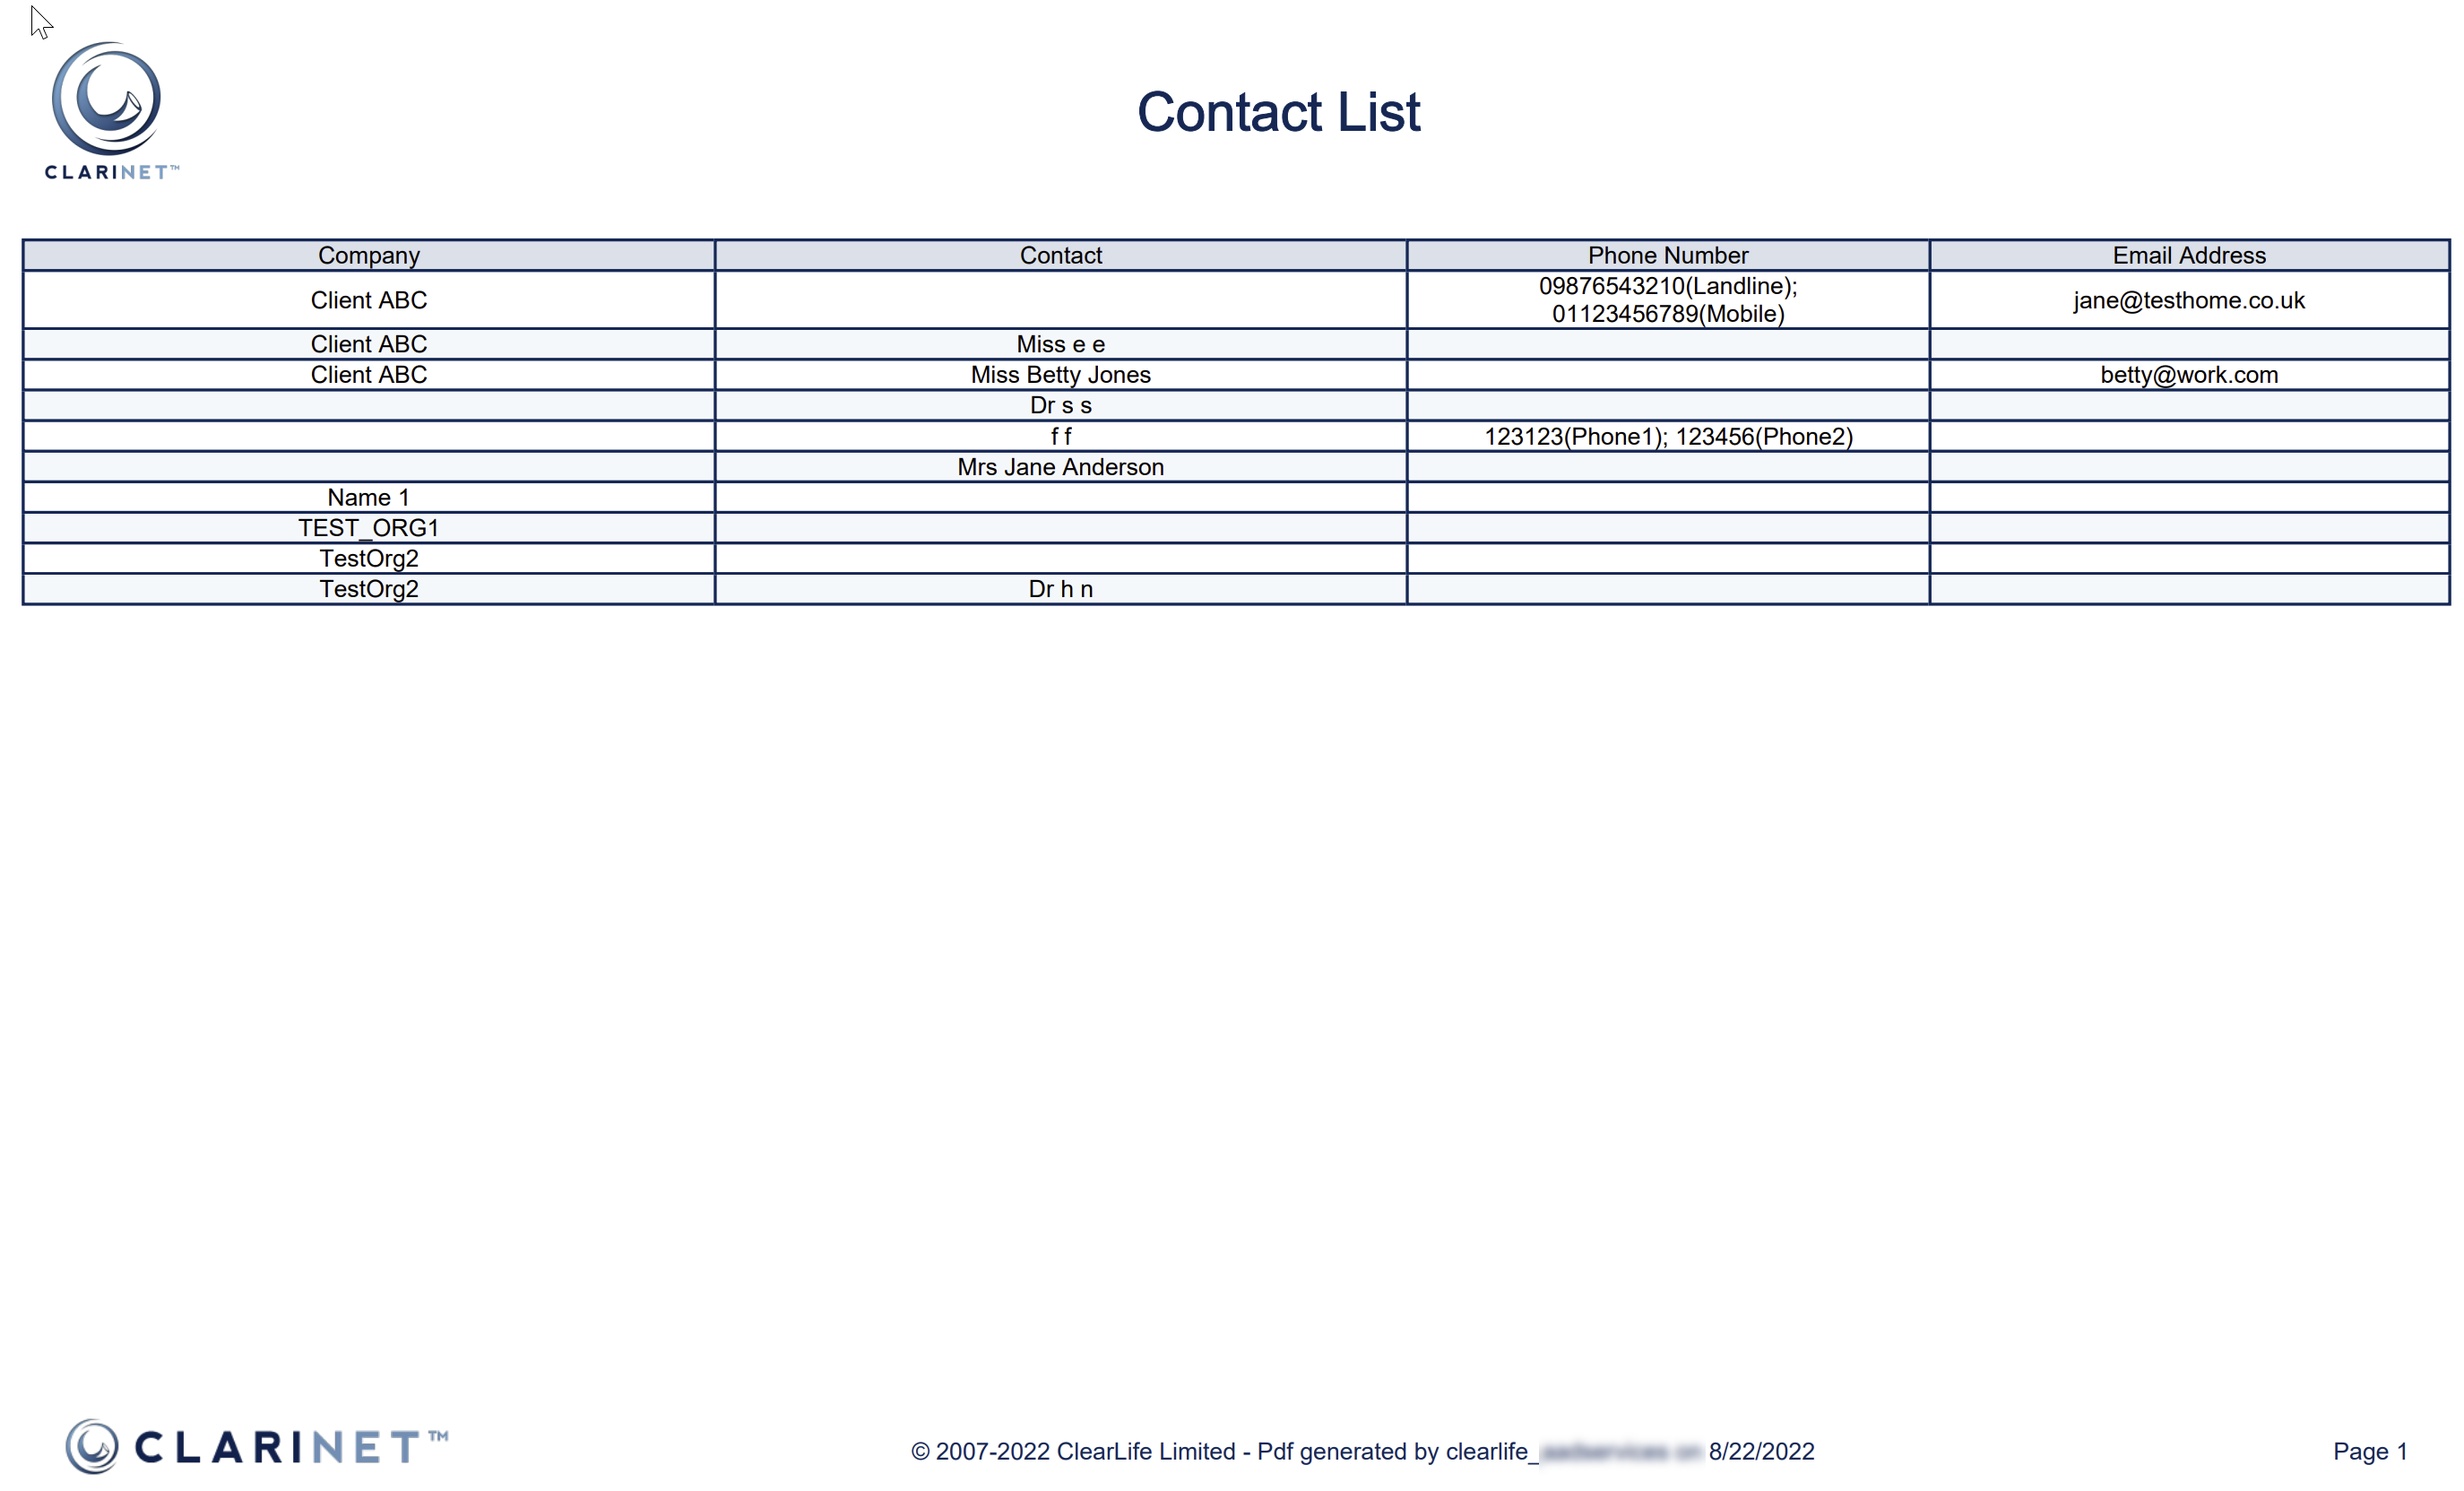
To export a list of Contacts
Select the Export Contacts option from the Actions menu
You can specify which contact roles to export and you must set a Page Format for the PDF output.
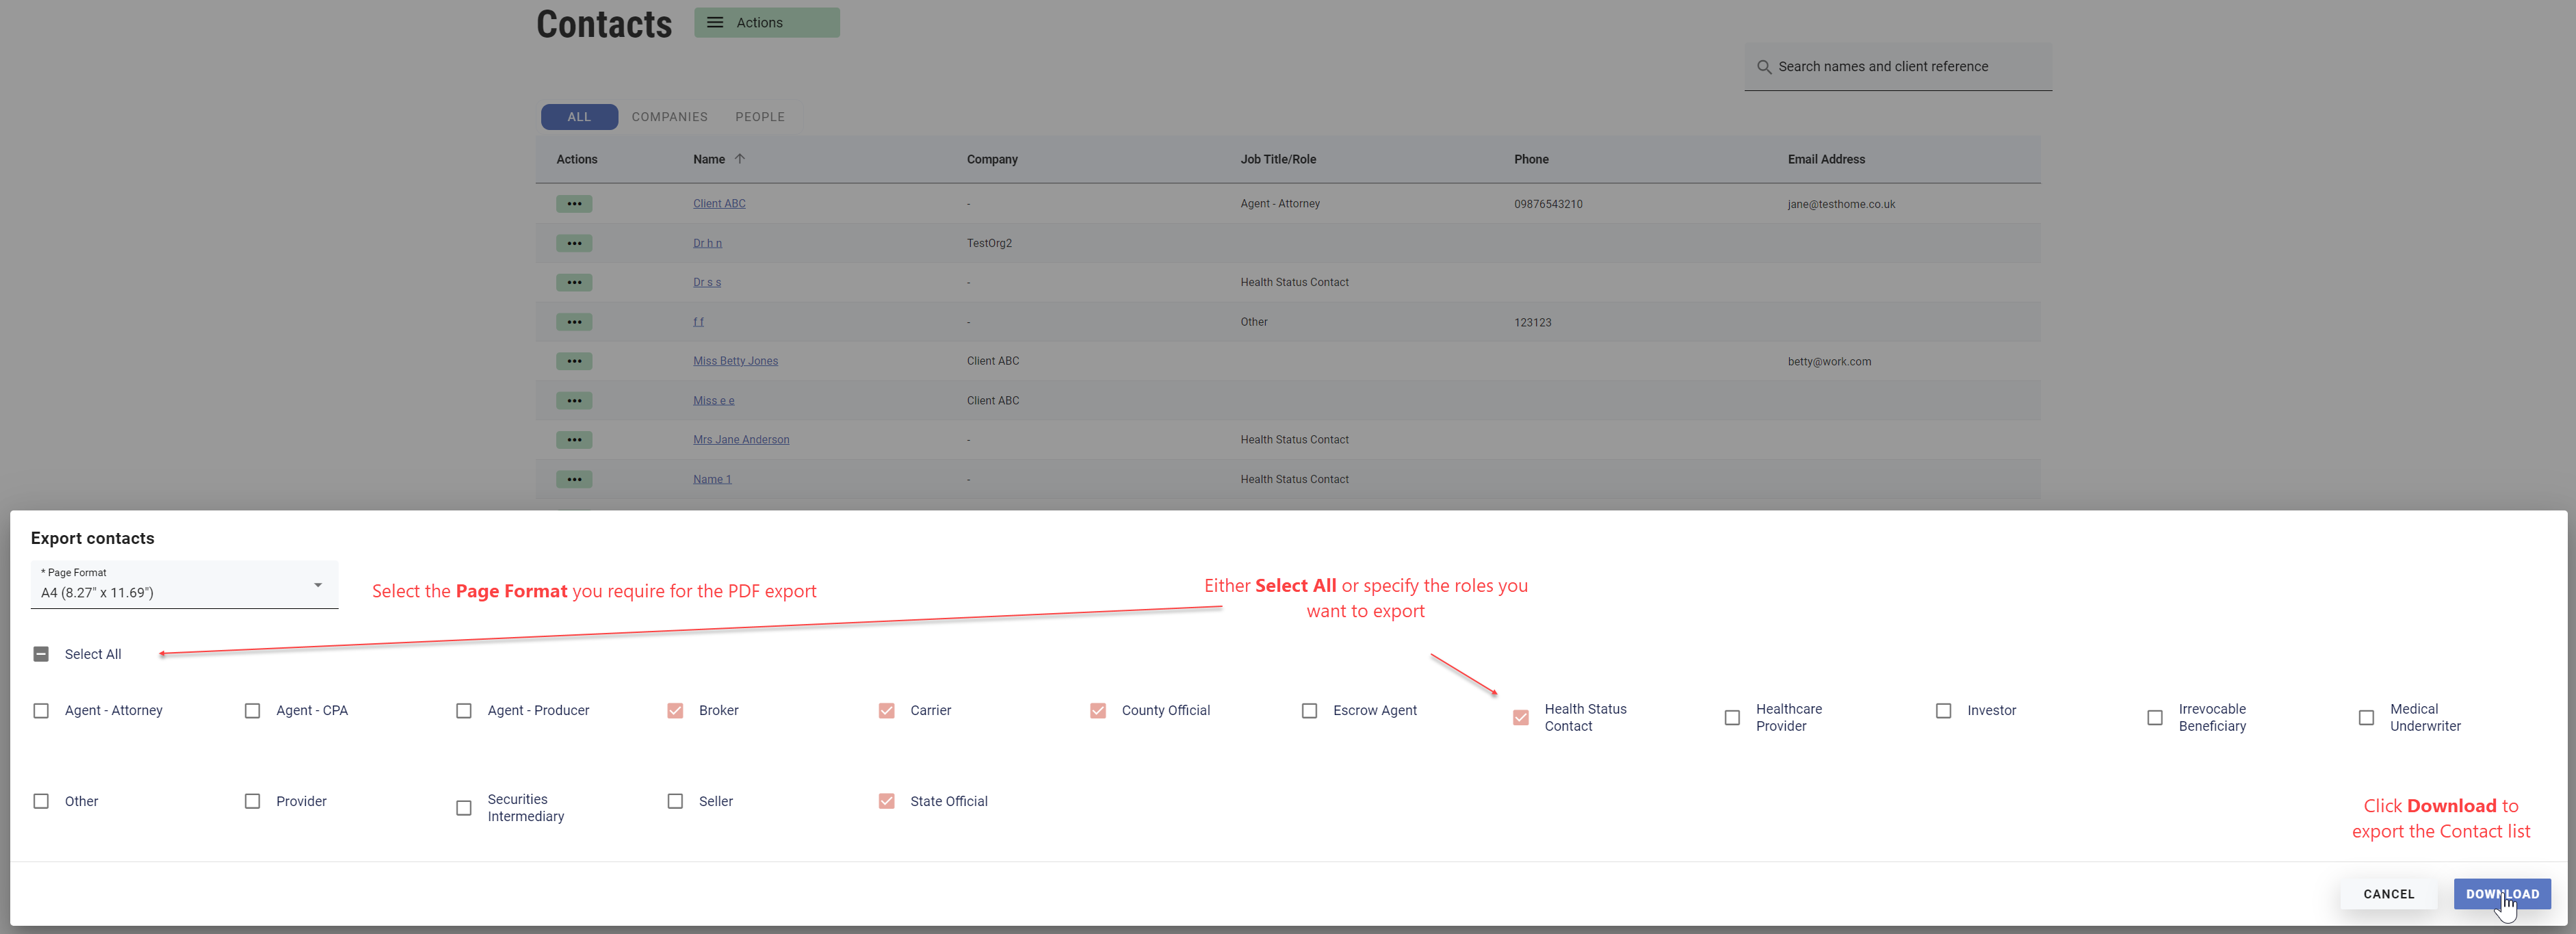
When you click Download the export is performed and a file named Contacts.pdf is created listing the contacts.