Bid Management
ClariNet LS supports sending and receiving cases with both internal (ClariNet Subscriber) and external (ClariNet contact) organisations. The ClariNet functionality aims to allow users to track and progress these transactions across the whole lifecycle of trading policies.
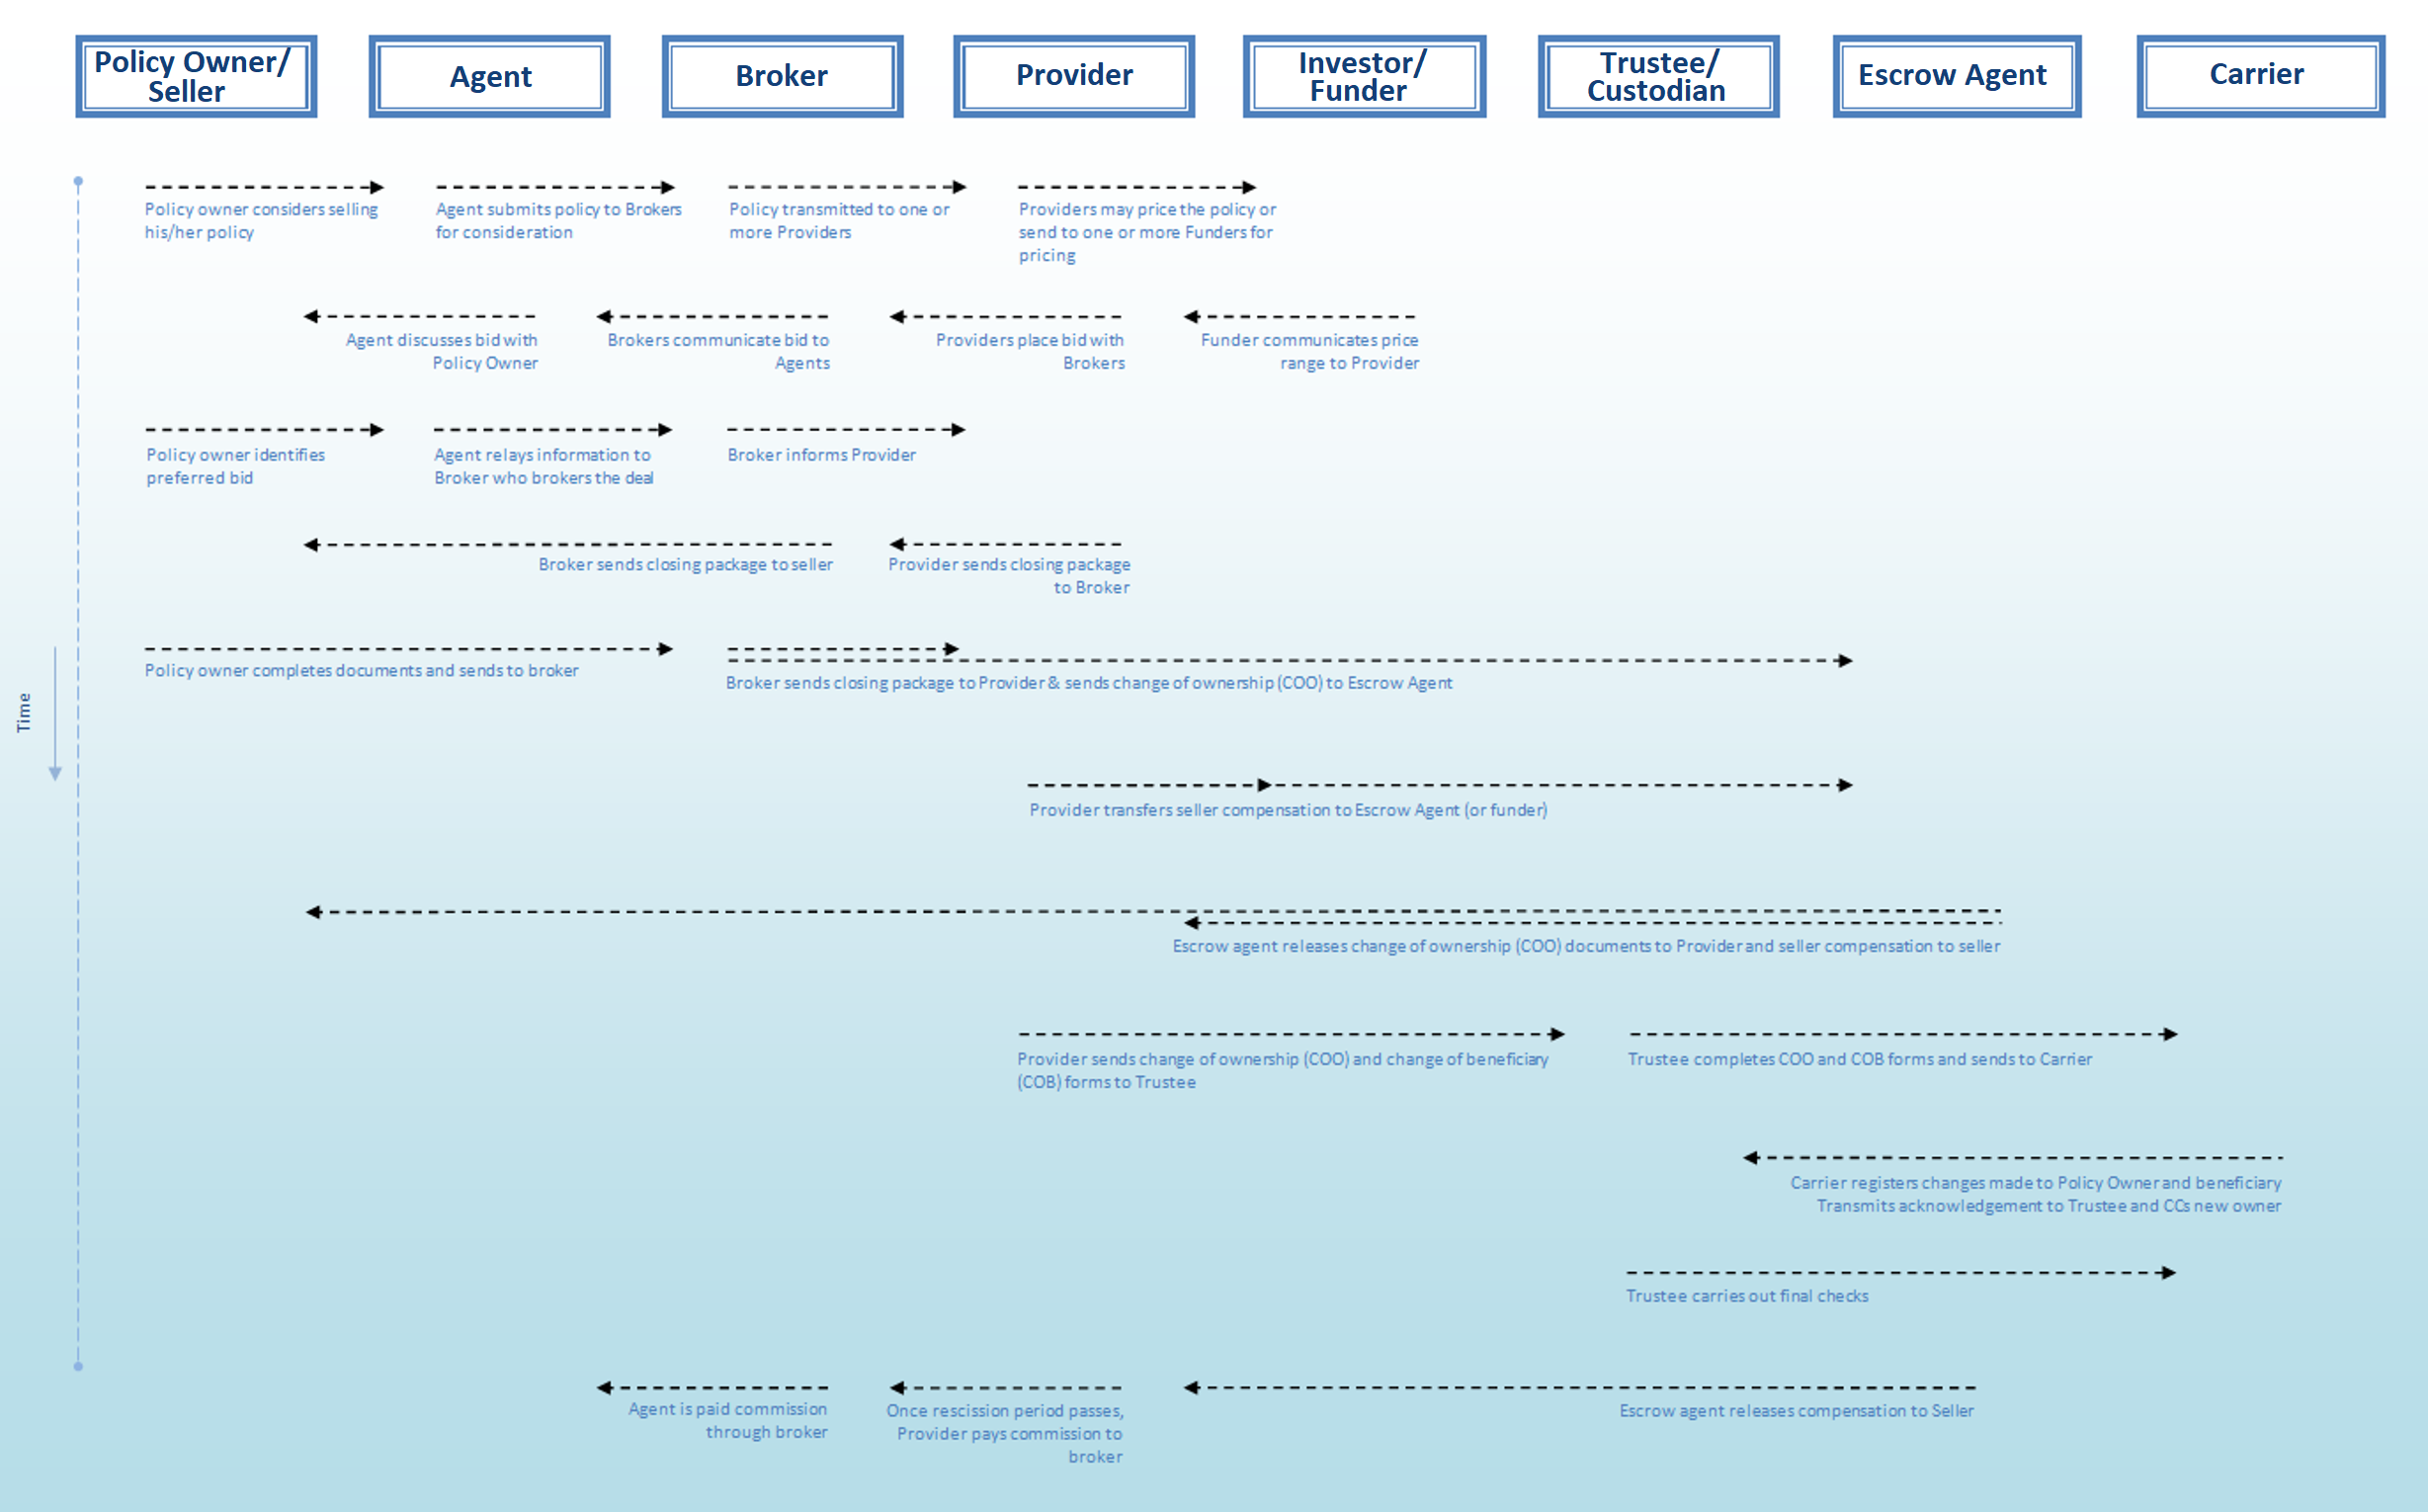
Anatomy of a transaction
Bidding on a policy requires that either a Sent Transaction or a Received Transaction has been initiated by a Client or Event Sender.
Event Sender — Case — Counter Party
Either an Event Sender has to send a case to a Counter party or a Counter party has to receive a case from an Event Sender.
Setting up transactions
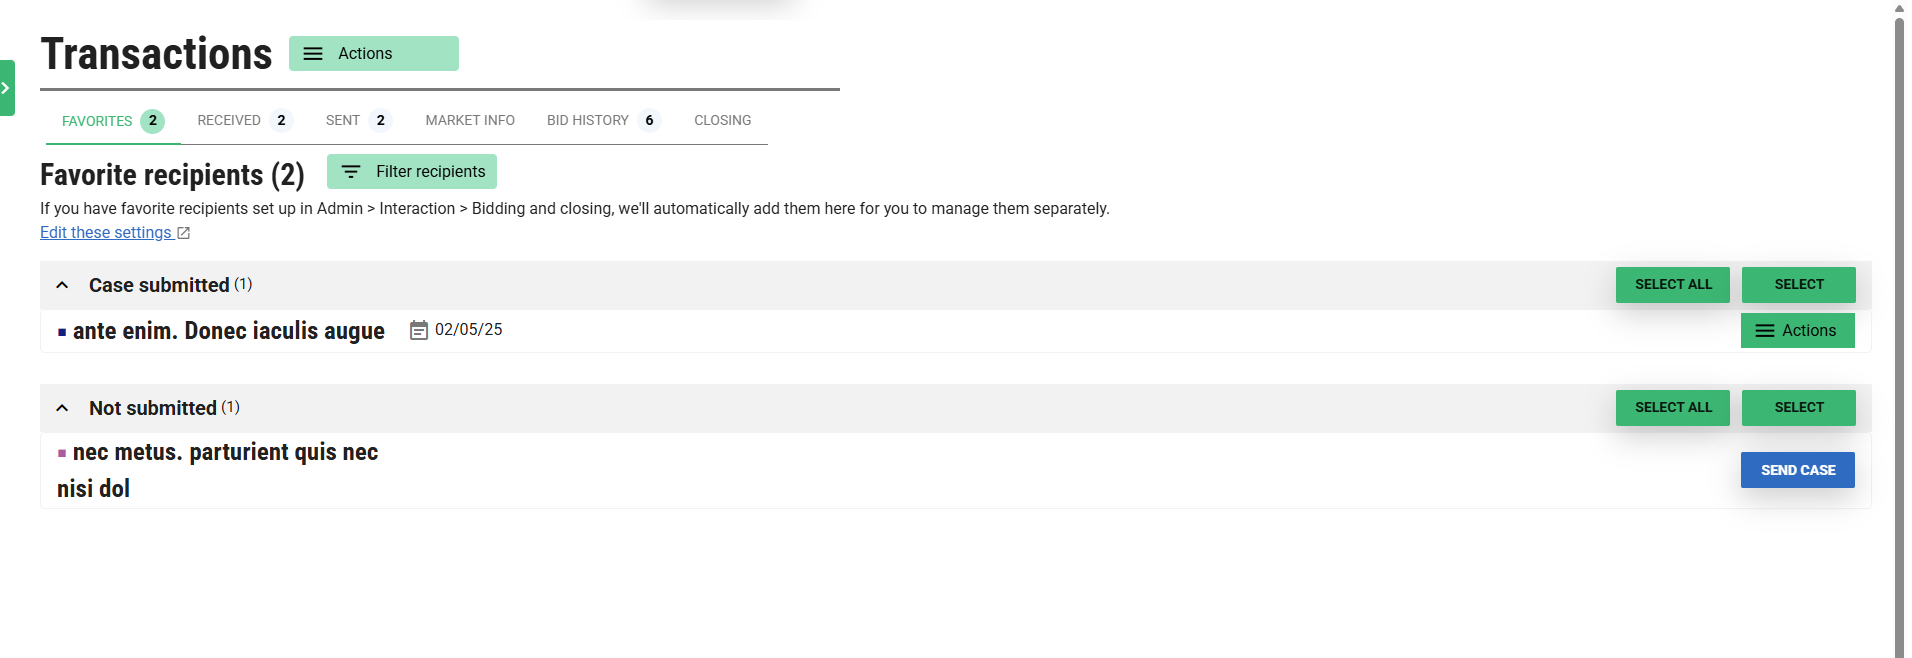
Favorite recipients
If you have any favorite recipients the “Favorites” tab will display them all and group them by the last transaction status. You can easily submit cases to your favorite recipients, email them again with documents or quick action them.
Internal Transactions(From ClariNet to ClariNet)
Navigate to Admin → Interaction(Privacy) page. Check all the boxes on the privacy tab to allow any other client to send cases to you. In order to send cases to a particular Clarinet Subscriber, you need to go to the Admin → Interaction(Access) page and request permission by sending a request to client. On the Interaction(Access) page you need to enter the required Clarinet Subscriber name and email address and tick the relevant checkboxes and hit save. The Counterparty will receive your request and should grant permission in order for you to send cases. More detailed information about this page can be found here: Interactions.
External Transactions (From a Contact/Company)
Create a new contact on the contacts page and ensure the role is set. You will be able to input a received transaction from new contact, provided the required role is selected.
Transactions
Below are the list of operations you can perform on a transactions page.
On the Case, Transactions page:
- Send a case from Client A to Client B (ClariNet to ClariNet).
- Send a case to a contact company (external).
- Add a received transaction from a contact company (external).
- Add market information.
- Progress the transaction.
- Starting a bid: Open for bidding (status for Received transaction), Submitted (status for Sent transaction)
- Place a Bid.
- Query.
- Counter-offer.
- Decline.
- Withdraw from Bidding.
- Accept a Bid & begin closing.
- Email the case or add extra documents to the submission.
- Delete a transaction.
- Add a Custom Bid Status: You can add a custom bid status on
Admin → Interaction (Bidding and Closing tab)page. More detailed information about this page can be found here Interactions.
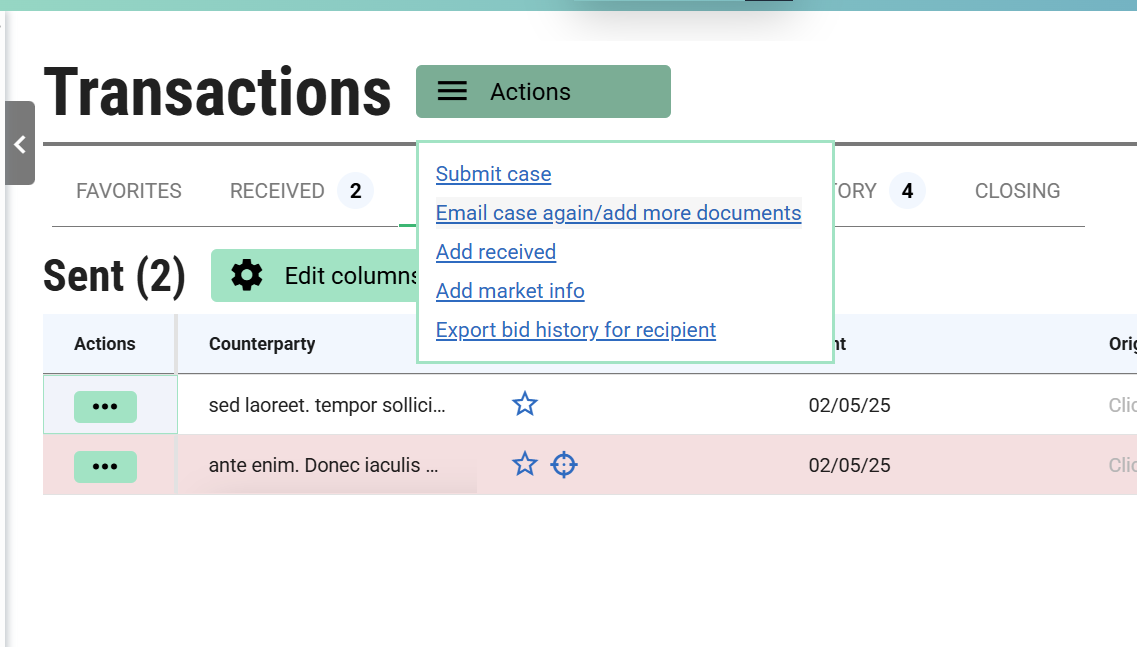
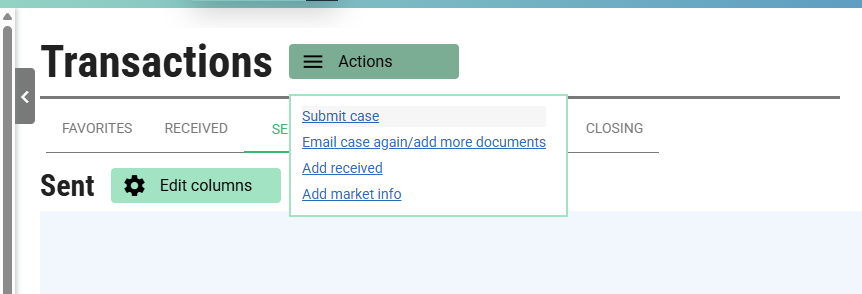
Sending a Transaction:
Click on the Actions menu, followed by “Submit case” to display the Submit Case slide out. Then select the company you need to send the transaction to, followed by the CONTINUE button.
You can choose the list of information that needs to be sent along with the transaction.
- Options And Documents
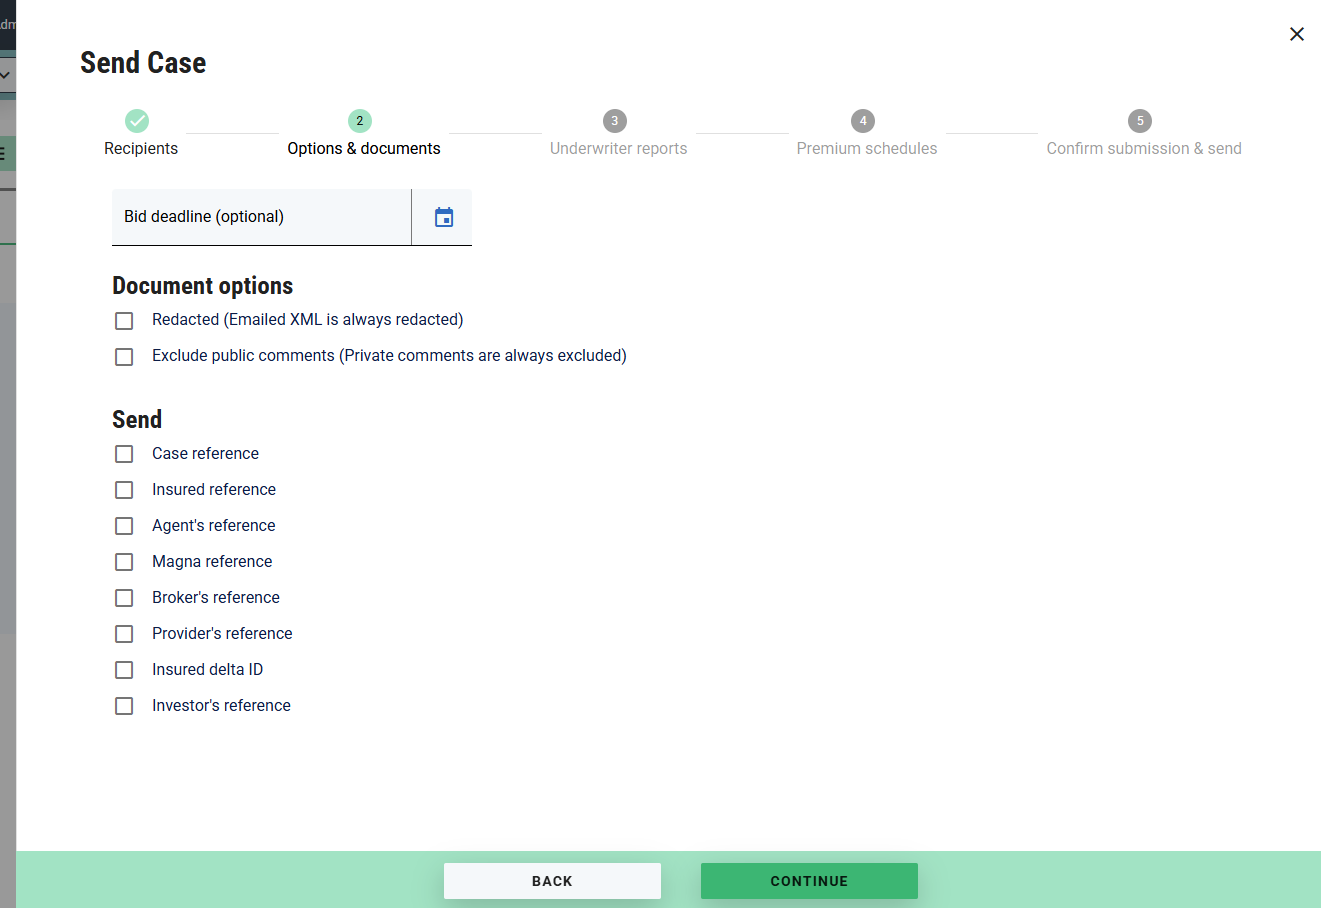
- Underwriter Reports
- Premium Schedules
Finish the submission by clicking on the Confirm and Close button.
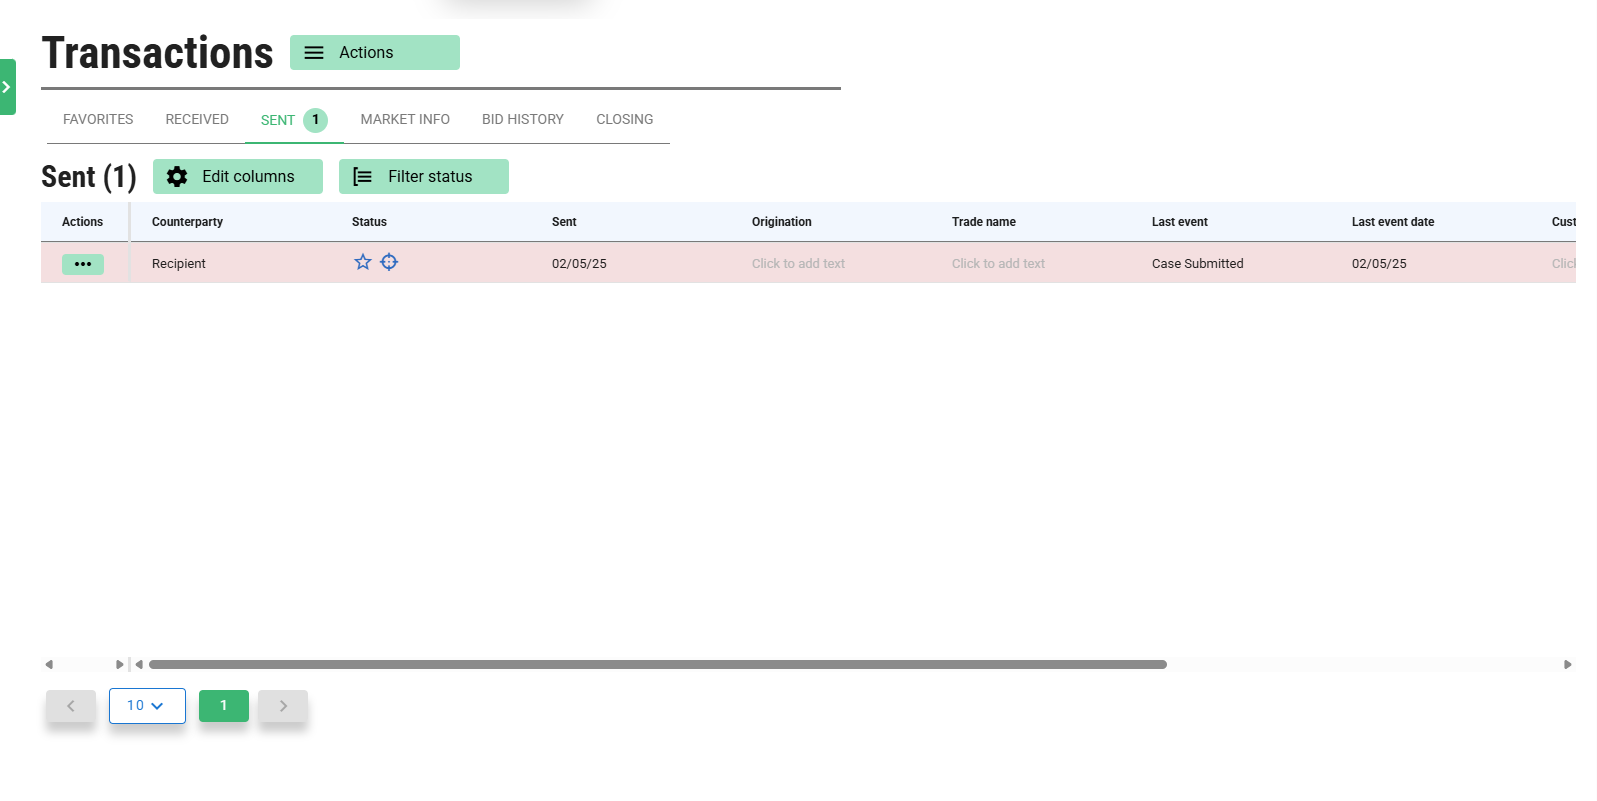
The transaction just sent will be listed under the Sent tab.
Customize Transaction Lists
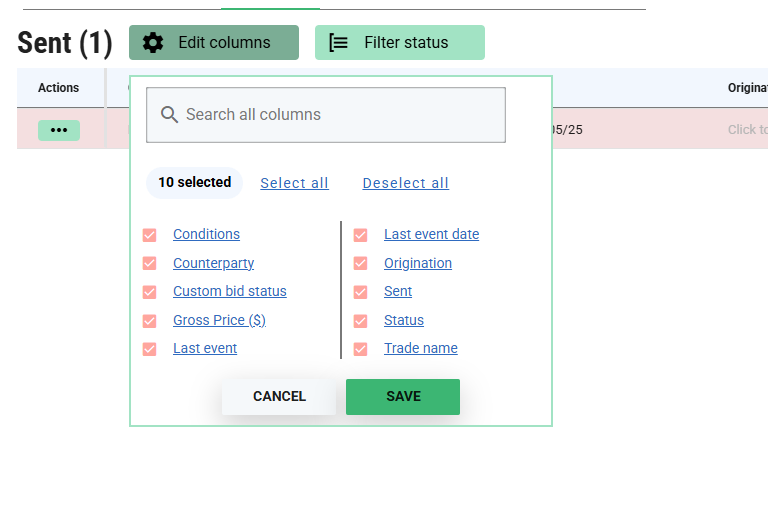
Hide and show columns relevant to you only(remembered per user).
The columns displayed on the table can be edited as per your convenience by clicking the Edit columns button and selecting/deselecting the checkboxes for column names.
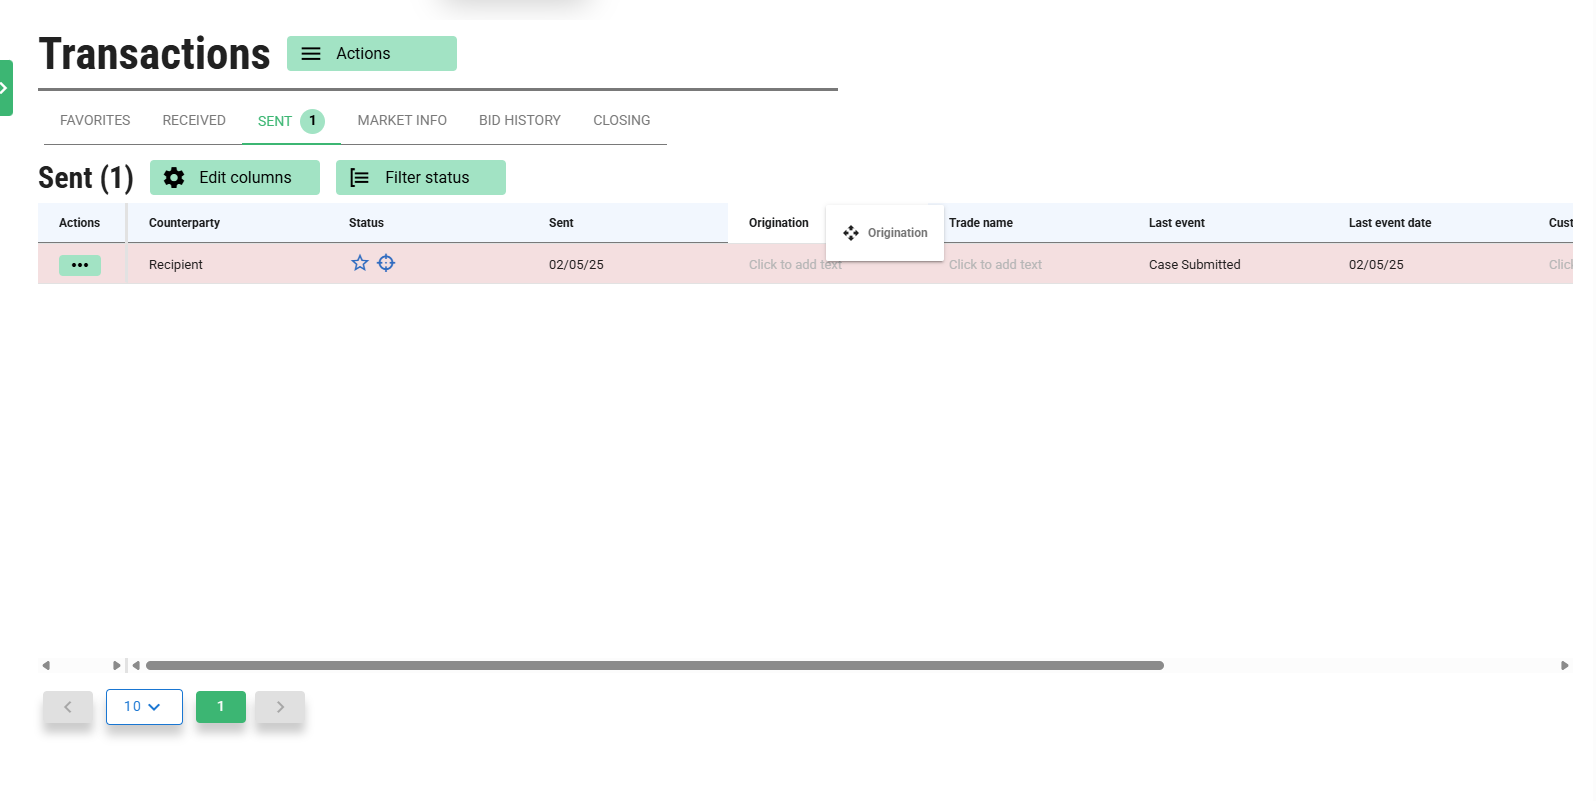
Change the order of the columns.
To change the order of the columns, left-click on the mouse and hold on a column header that you want to move and drag it to a new position in the list. This will be automatically remembered for you.
This Grid allows a few other extra options as listed below
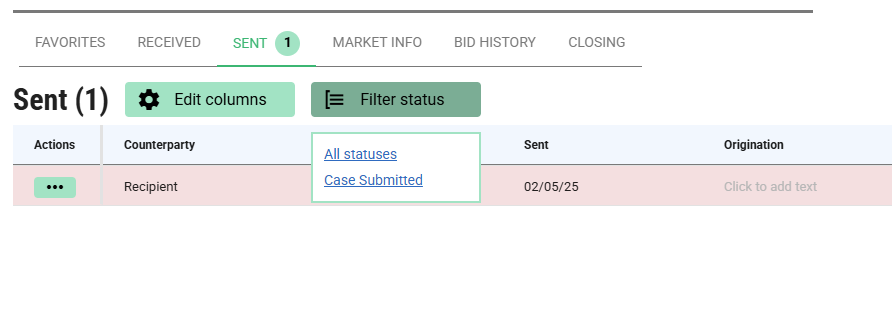
Quick filtering Tabs
- A quick filter button is available to show you all the possible statuses of the cases.
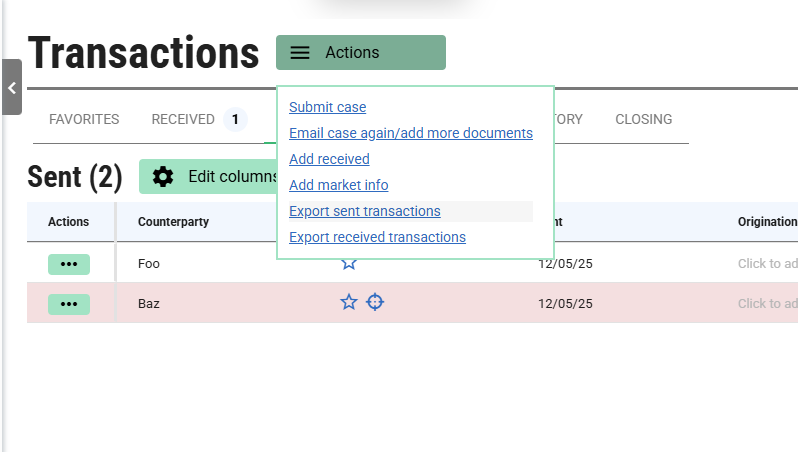
Export Option
- Built-in export
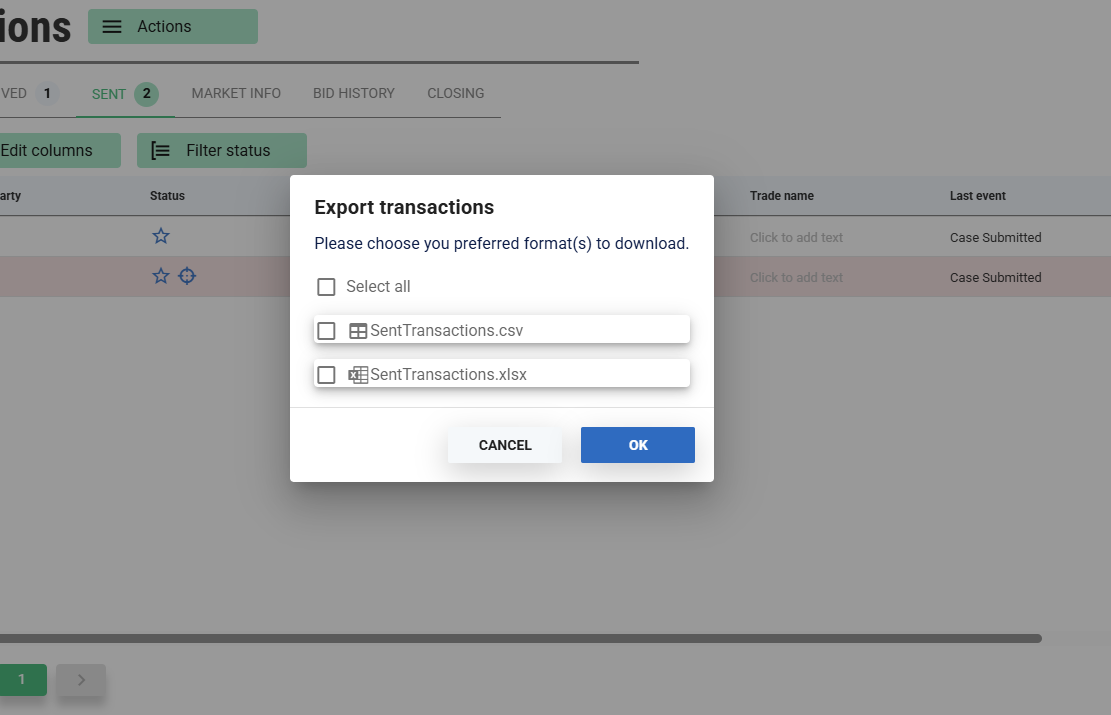
Click on the actions menu and select either “Export sent transactions” or “Export received transactions”.
On the dialog, select the option to export the results as a CSV and or Excel file.
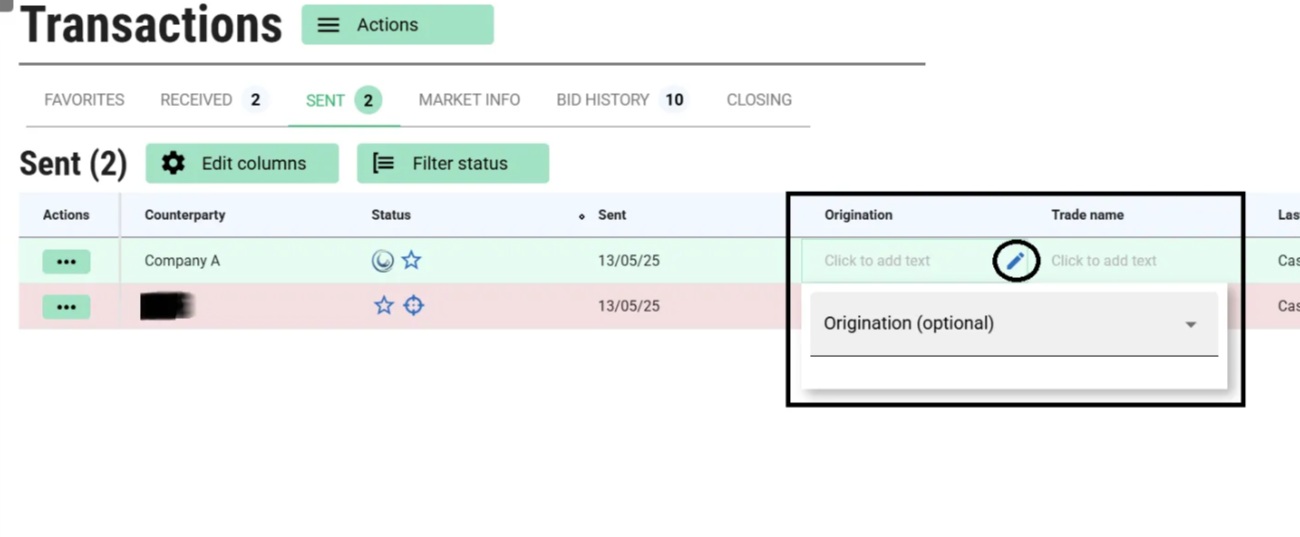
Inline editing of a transaction row
You can inline edit by clicking on a cell if the cell supports it. A pencil icon will appear on hover to show which cells are inline editable. Additionally, you can easily see which empty cells can be edited as they will have placeholder text with the “Click to add text”.
For example, Origination, Trade Name, and Custom Bid Status for a sent transaction. An editable text box will be visible when clicked on these fields.
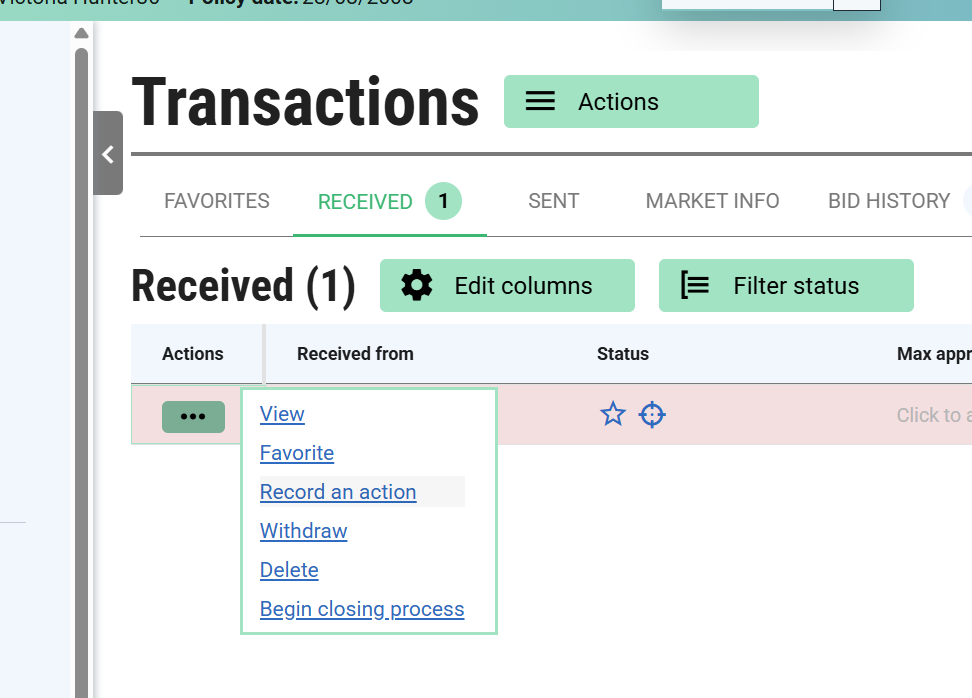
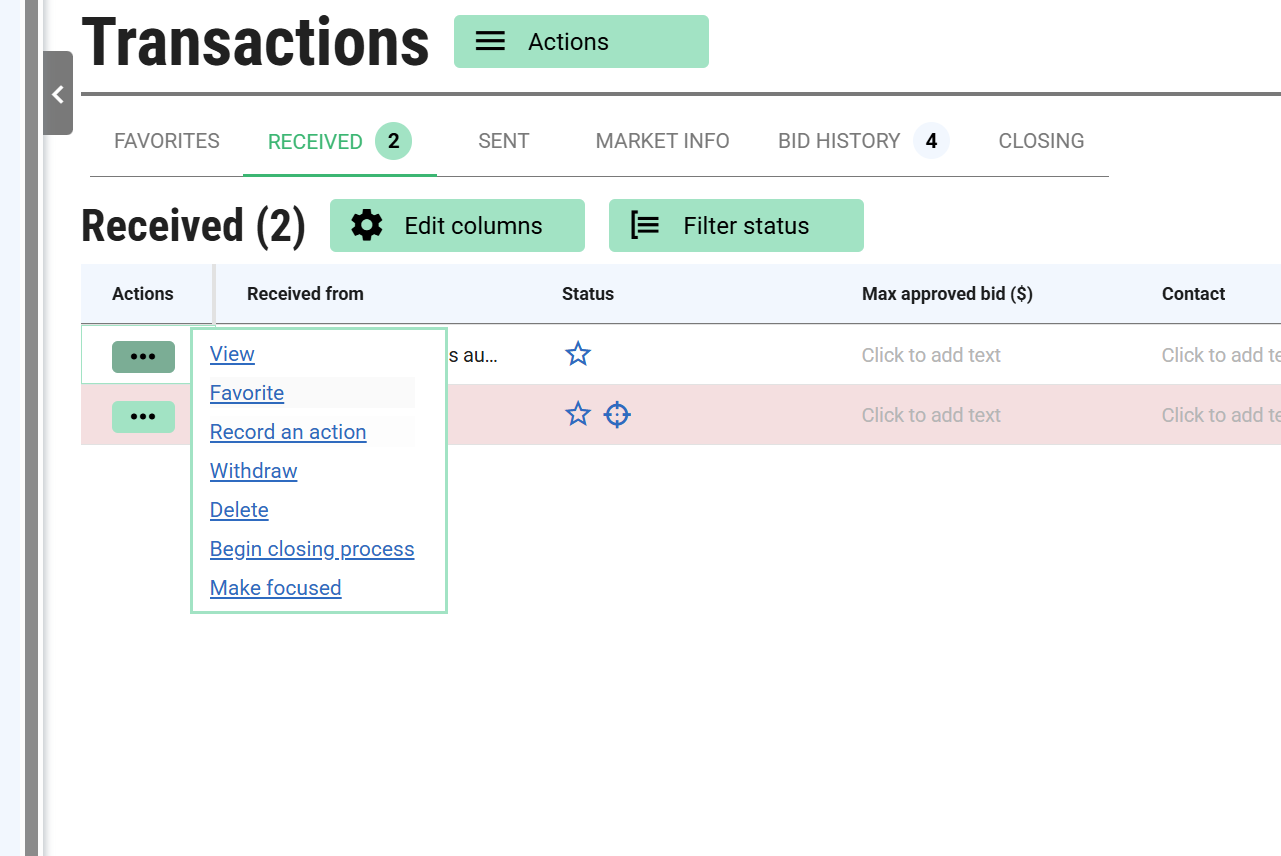
Once the transaction is submitted, the Counterparty needs to progress the transaction by placing a BID or asking a Query or by declining the transaction. This can be done by navigating to the “Received” tab and using the actions menu to “Record an action”.
In case the Counterparty opts for a question, the event sender has to respond with a reply. And if counter party declines the transaction, the event sender can submit the case again to the same counterparty.
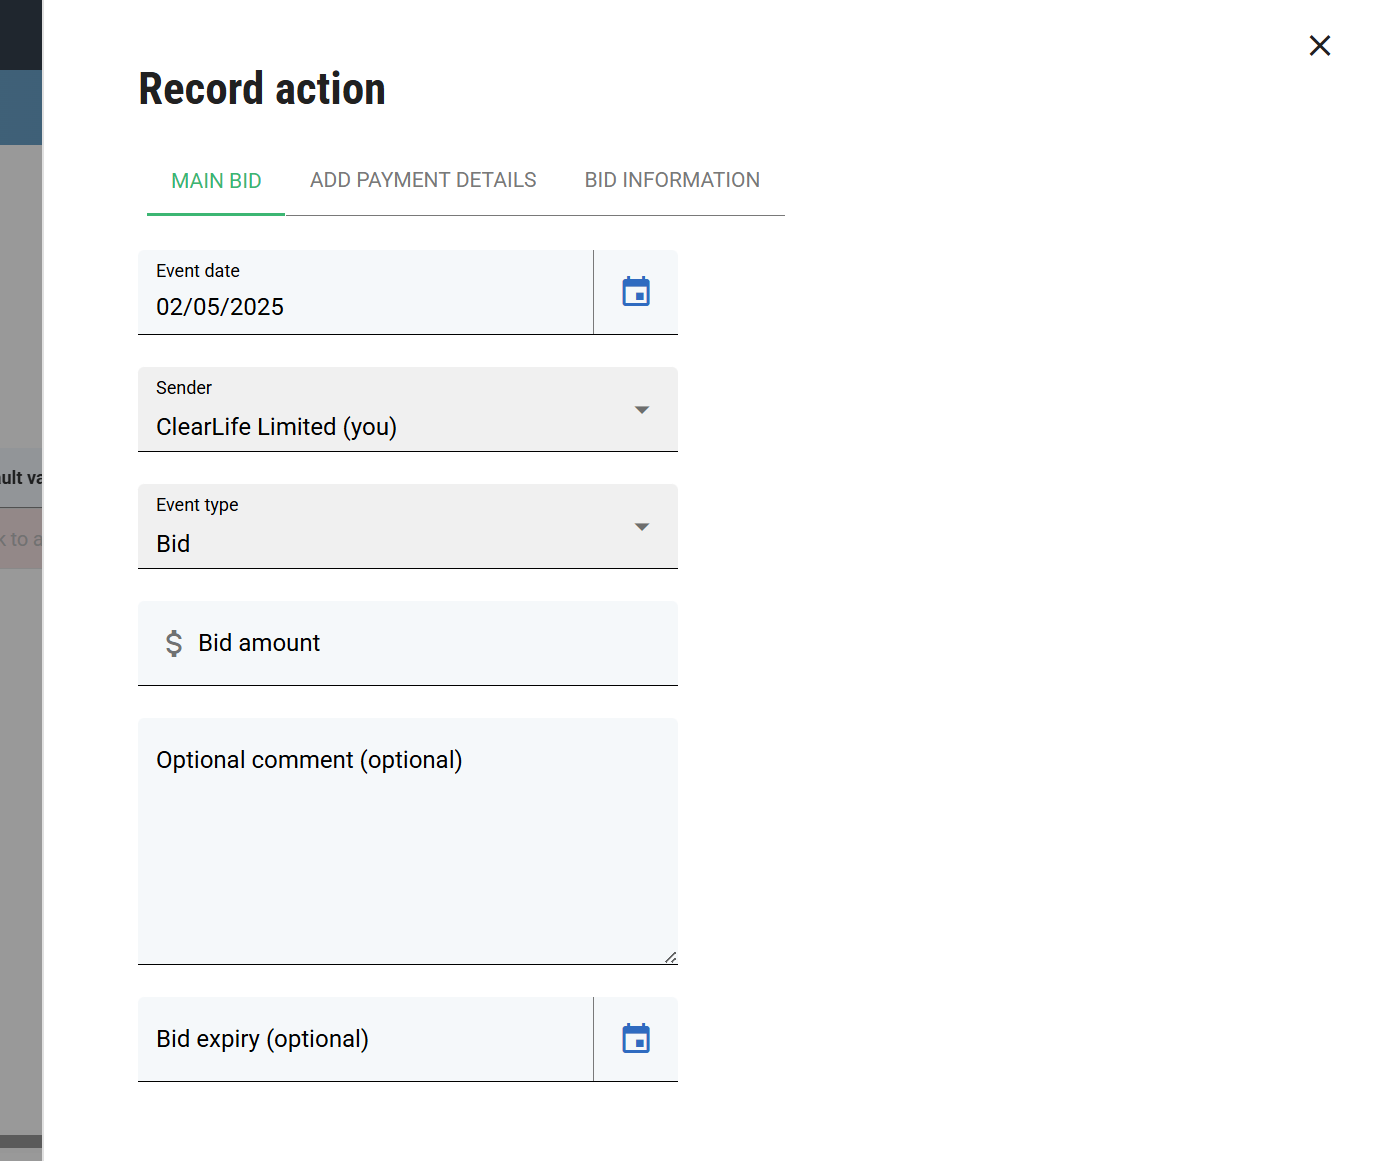
Counterparty can place a BID along with payment and Bid information. The bid expiry date can also be set for a transaction. The Place Bid button will be enabled when you enter the payment information.
The transaction page for Counterparty will be as shown below when opting to place a Bid.
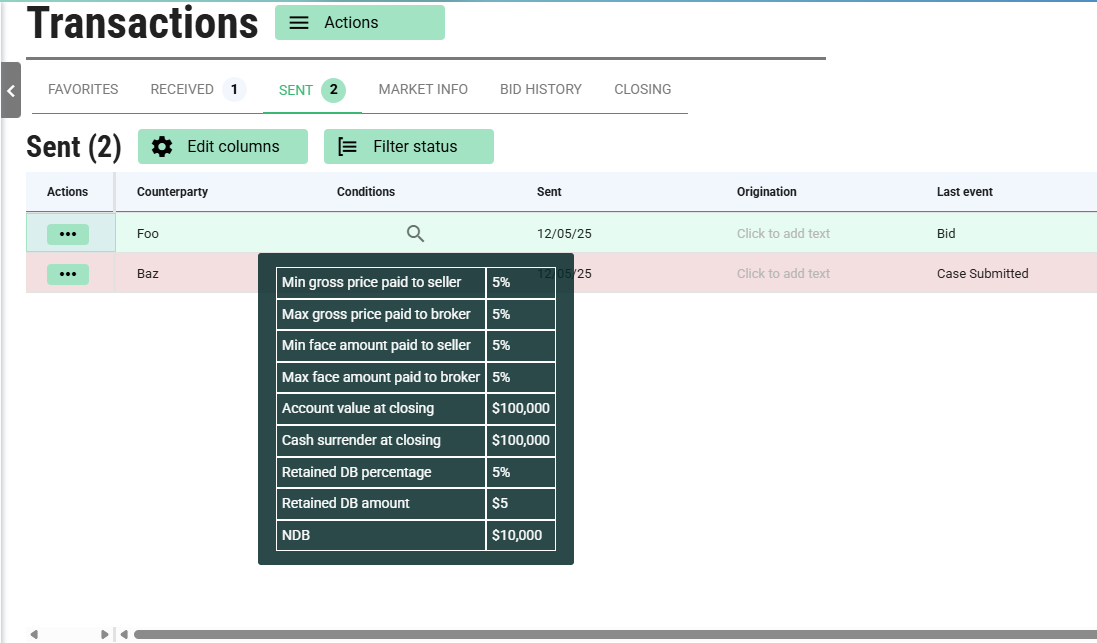
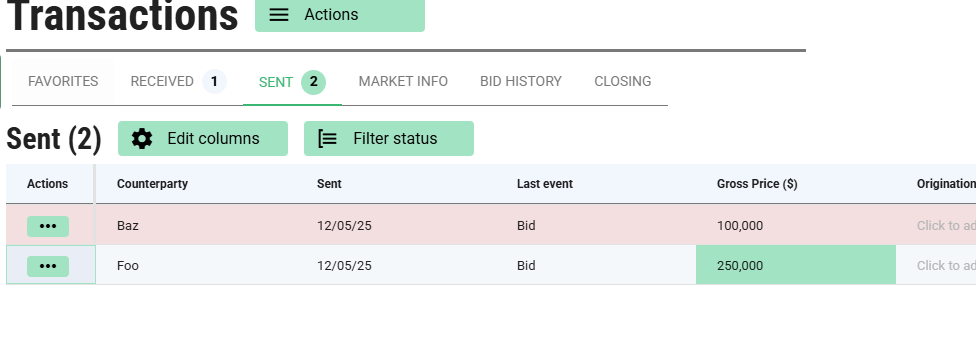
You can see the Bid amount (Gross Price) highlighted in green as shown below and a small magnifier icon under conditions, which will list bid conditions in a dialog box.
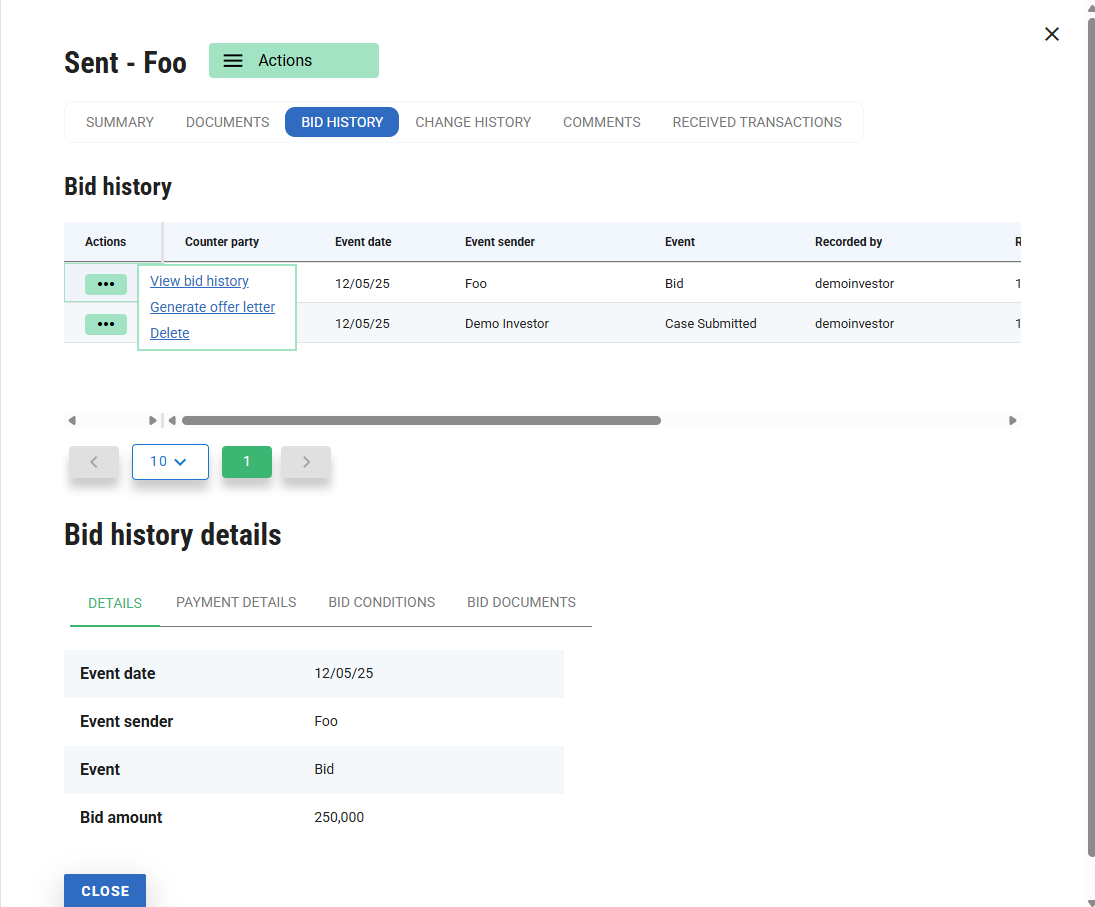
Bid history tab will provide you with the list of all sent transactions with clear visibility of Payment Information and Bid conditions.
To see more details a specific row, click the Actions menu item “View” and view the bid history.
To view more details about the bid, click on the actions column for a particular bid on the Bid history table, or just click the bid history row.
Event Sender can choose to Counter Offer, Accept Build, or Decline Bid by clicking on the “Record an action made by you” in the Actions column.
In case the Event Sender opts for a counteroffer, the counterparty has to respond with a new Bid amount. And if the Event Sender declines the bid, the Counter Party will be notified of the same. However, the Counter Party can place a new Bid once again.
In case the Event Sender opts to Accept Build, the Counter Party will be notified of the same, and the “Begin Closing Process” button will be enabled to proceed with the closing procedure.
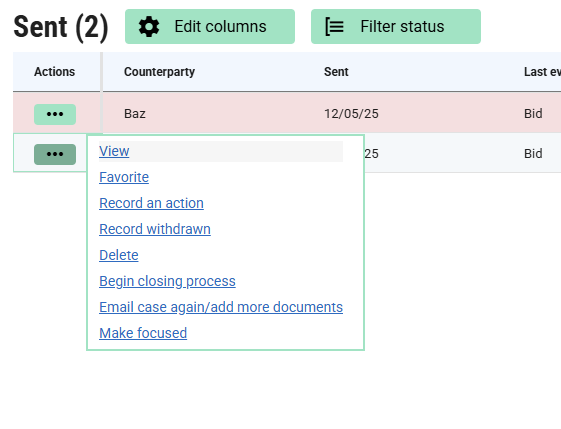
Actions column
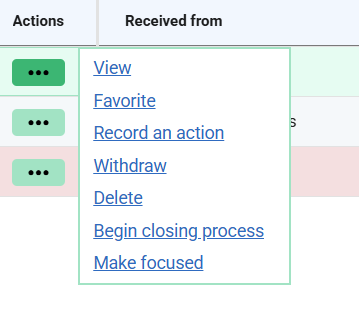
Each transaction contains an Actions column on the left-hand side of the table. You can interact with the transactions in a transaction list using the icons shown in the column. Depending on the case and transaction's current state, the following options can appear.
- View - View the transaction’s: Summary, Documents, Bid history, Change history, Comments, and related transactions. You can also edit the transactions details.
- Favorite/Unfavorite
- Record an action
- Email the case or add extra documents to the submission.
- Withdraw from Bidding. Or mark as withdrawn if you are viewing a sent transaction.
- Permanently delete the transaction. You cannot delete a ClariNet transaction.
- Begin the closing process. Or view an existing closing transaction
- Make focused - Focus the transaction (used in reporting and searches)
The Actions menu item “Email case again/add more documents” can be used to allow you to email the case again or add extra documents to multiple counterparties simultaneously. For example: X, Y, and Z have been sent the same case. A new LE report that needs to be sent to all three counterparties has been added to the case. You can use this bulk email icon to send new reports to all instead of sending them one by one by clicking on the email icon attached to the counterparty row.