First Steps Using ClariNet LS
Welcome to the help pages for ClariNet LS, they provide a great source of information to get you started using the application. Start by familiarizing yourself with the user interface and key concepts before following the recommended steps.
User Interface
When you successfully log in to ClariNet LS, your Homepage shows a collection of cases with a menu bar and a search facility at the top.
As you navigate through various screens you can easily return to your Homepage by clicking ClariNet logo in the top left corner.

The main menu
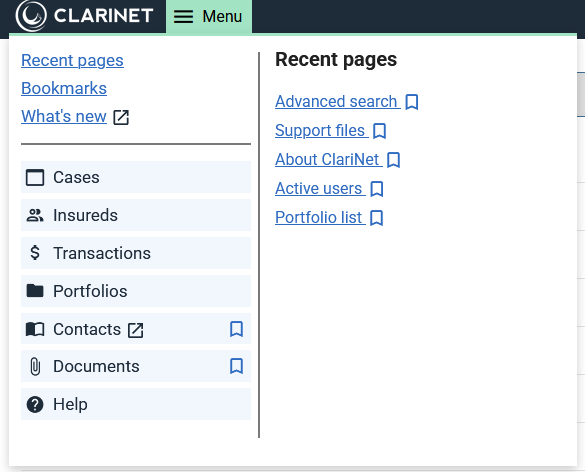
The Main menu is split in to 2 main sections, the left hand being links and your available Modules, while the right shows Recent pages, Bookmarks or changes to show the context of the selected module.
The main modules are different depending on your subscription (see Modules), they are;
- Cases For creating Cases and uploading data into ClariNet LS.
- Insureds For managing Insured Consolidation.
- Transactions For an overview of all transactions, sent transactions and received.
- Portfolios For managing and valuing Portfolios, Monte Carlo analysis, scenario analysis and servicing.
- Contacts For keeping track of individuals and companies outside of your own that you want to keep in touch with.
- Documents The documents uploader, allowing you to view, upload and assign documents to anything in your system.
- Help A link to these help pages, how to contact ClearLife for help and what support information to provide.
My Account
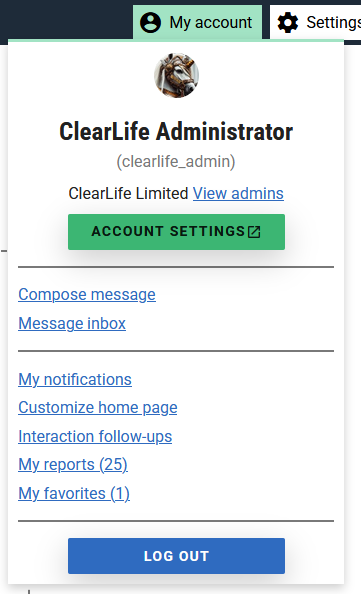
My account is used to give users settings and tools that are specific for the current logged in user. This is where you’ll find your reports, favourites, notifications and more. You can also find a link to change your account settings and security here.
Settings
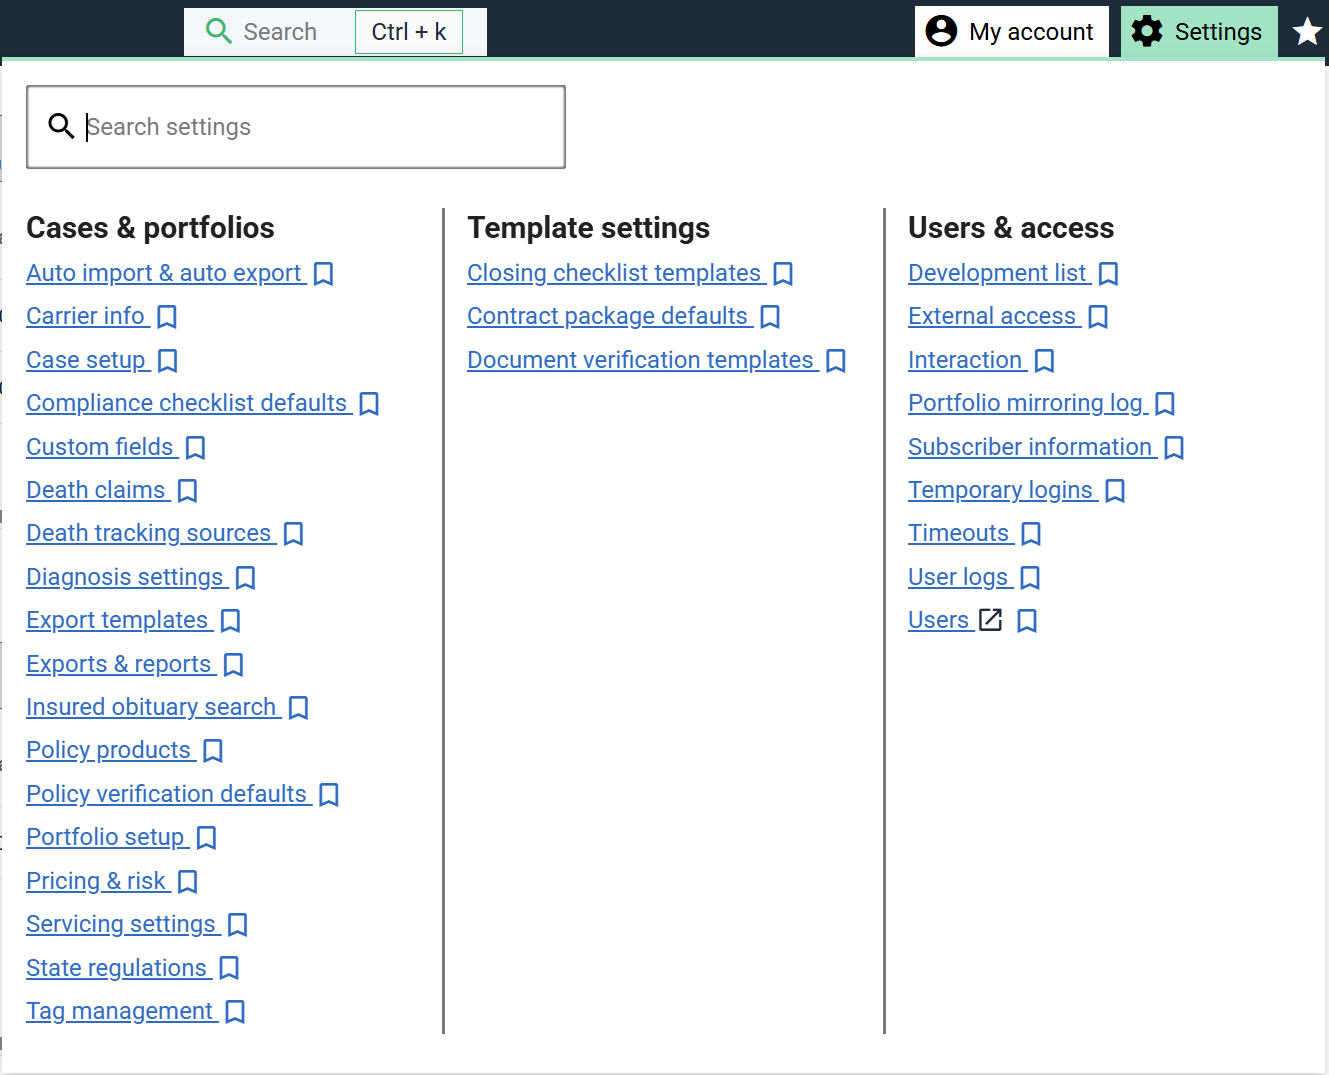
Settings provides various setup and administrative tasks for managing your clarinet client account. Changes here will likely affect all users.
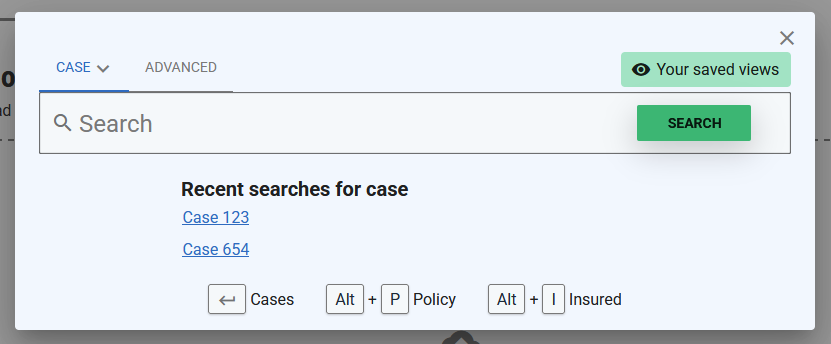
Search

In the middle of the Navigation bar you’ll found your Search which provides functionality for Searching case or insureds information.
Case lists
You can customize your Homepage to show collections of Cases of interest to you as well as customizing which Case List columns are displayed. For more information on sorting and displaying data see Column Headings and Sorting a Case List
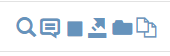
- For each Case List on your Homepage these icons shown below allow you to add a new case, run a report for the cases displayed or add a case to a portfolio.

- For each Case in a Case List these icons shown below under the Go column allow you to interact with Cases, see Case Lists.
Key Concepts
We recommend all users review the following terminology and concepts used throughout the platform:
Our Topics pages contain more detailed information on specific tasks.
Once you have familiarized yourself with the user interface and the key concepts we suggest you follow these steps:
First steps for all users
Customize the Cases shown on your Home Page.
You can show/hide and reorder collections of Cases on your Homepage once you have saved searches, see Searching.
- From the My account, select Customize home page. All Saved Searches are displayed in the list and can be shown/hidden and reordered on your Homepage.
- To show/hide a Case List on your Homepage check/uncheck the box in the Show on Homepage column.
- To reorder Case Lists on your Homepage use the up and down arrows to the left of the list.
See Case Lists for more options on customizing your Case Lists including, choosing which columns to show/hide, the column order and pinning columns to the left or right of the screen.
Add Alerts and Notifications
In My account, My notifications it allows you to select when you’d like to be notified when such event occurs on a Case, or a Document is added.
- From the My account menu, select My notifications, then select Manage.
- Check the boxes you require to set alerts.
Get to know the Case Summary
The Case Summary contains all of the documents and data relevant to a Case.
- Under the Go column next to a Case click the View icon
- The Case Summary is displayed for you to start working.
First steps for Client Administrators
Setting up New Users
To add new users and manage their roles:
- From the Settings menu, select Users.
- Check out Users and Permissions and Roles
Creating your Compliance Checklist
The Compliance Checklist helps you to check the progress of onboarding new Cases. This appears in the Case Summary.
- From the Settings menu, select Compliance Checklist Defaults.
- Click add button to create a new Compliance Section and enter a Section Title.
- You can then add Compliance Checks to a Compliance Section.
- Use the icons to re-order, edit and delete sections/compliance checks.
Interacting with other ClariNet LS Clients
To send Cases to other ClariNet LS Clients or receive Cases from them, visit the Interaction page.
- From the Settings menu, select Interaction.
- From here you can allow all other ClariNet LS clients – or specific clients only – to interact with you through ClariNet LS’s Bid Management process.
Customize your Valuation Template and Premium Calculator
Getting the right combination of settings in your Valuation Templates and Premium Calculators will give you confidence in generating Premium Schedules and valuing your Cases. These are managed under the Pricing & Risk page.
- From the Settings menu, select Pricing & Risk.
- You can apply settings for each tab. See Pricing a Case, Valuation Templates, LE Selection and Blending Rules, Custom IRRs, Deterministic Pricing.
ClariNet LS supports multi-factor authentication to help protect your account.
To set this up see Multi-Factor Authentication .