Multi-Factor Authentication
Adding a Multi-Factor Authentication Device (also known as two-step or two-factor) is a simple and effective way to help protect your account. Every time you log into ClariNet LS, you will be asked to enter a code generated by your device.
ClariNet LS uses what’s called time-based MFA. Your computer and virtual MFA device must therefore be set to the correct time.
Setup MFA for a single user
Any user can turn on MFA for their own ClariNet LS account, even if the Client Administrator hasn’t made it mandatory.
You need MFA software. They can be installed on many different platforms such as mobile phones, tablets, Windows OS, Mac OS or web browser add-on. The installation process is as follows:
- Download MFA software
- Google Authenticator (mobile devices only)
- Authy (multi-platform, maintain a single database made available on your mobile, Windows software and browser add-on)
- WinAuth (Windows only)
- Search for "mfa" or "2 factor authentication" in your application store.
- Login to ClariNet LS with your user Login and Password.
- From the My account menu at the top right of the navigation bar select Account settings.
- Confirm your password to access Change Security Details page.
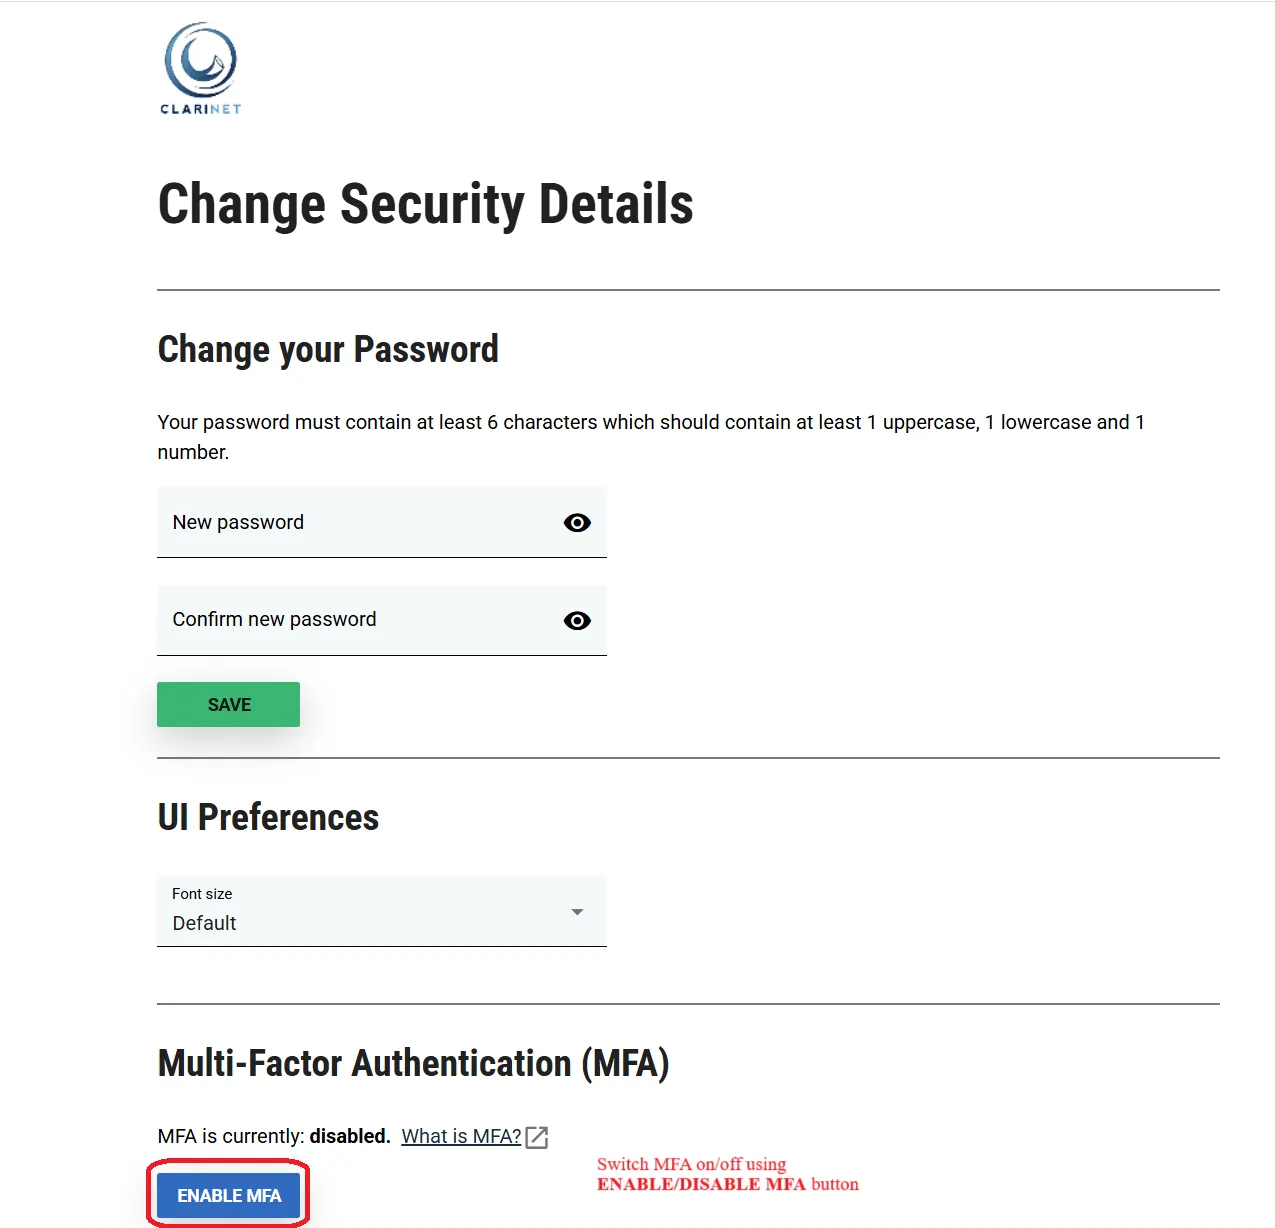
- In the Multi-Factor Authentication section click ENABLE MFA.
- You will prompted to download a MFA app if you do not have one Installed. Download one of the apps listed in the dialog box.
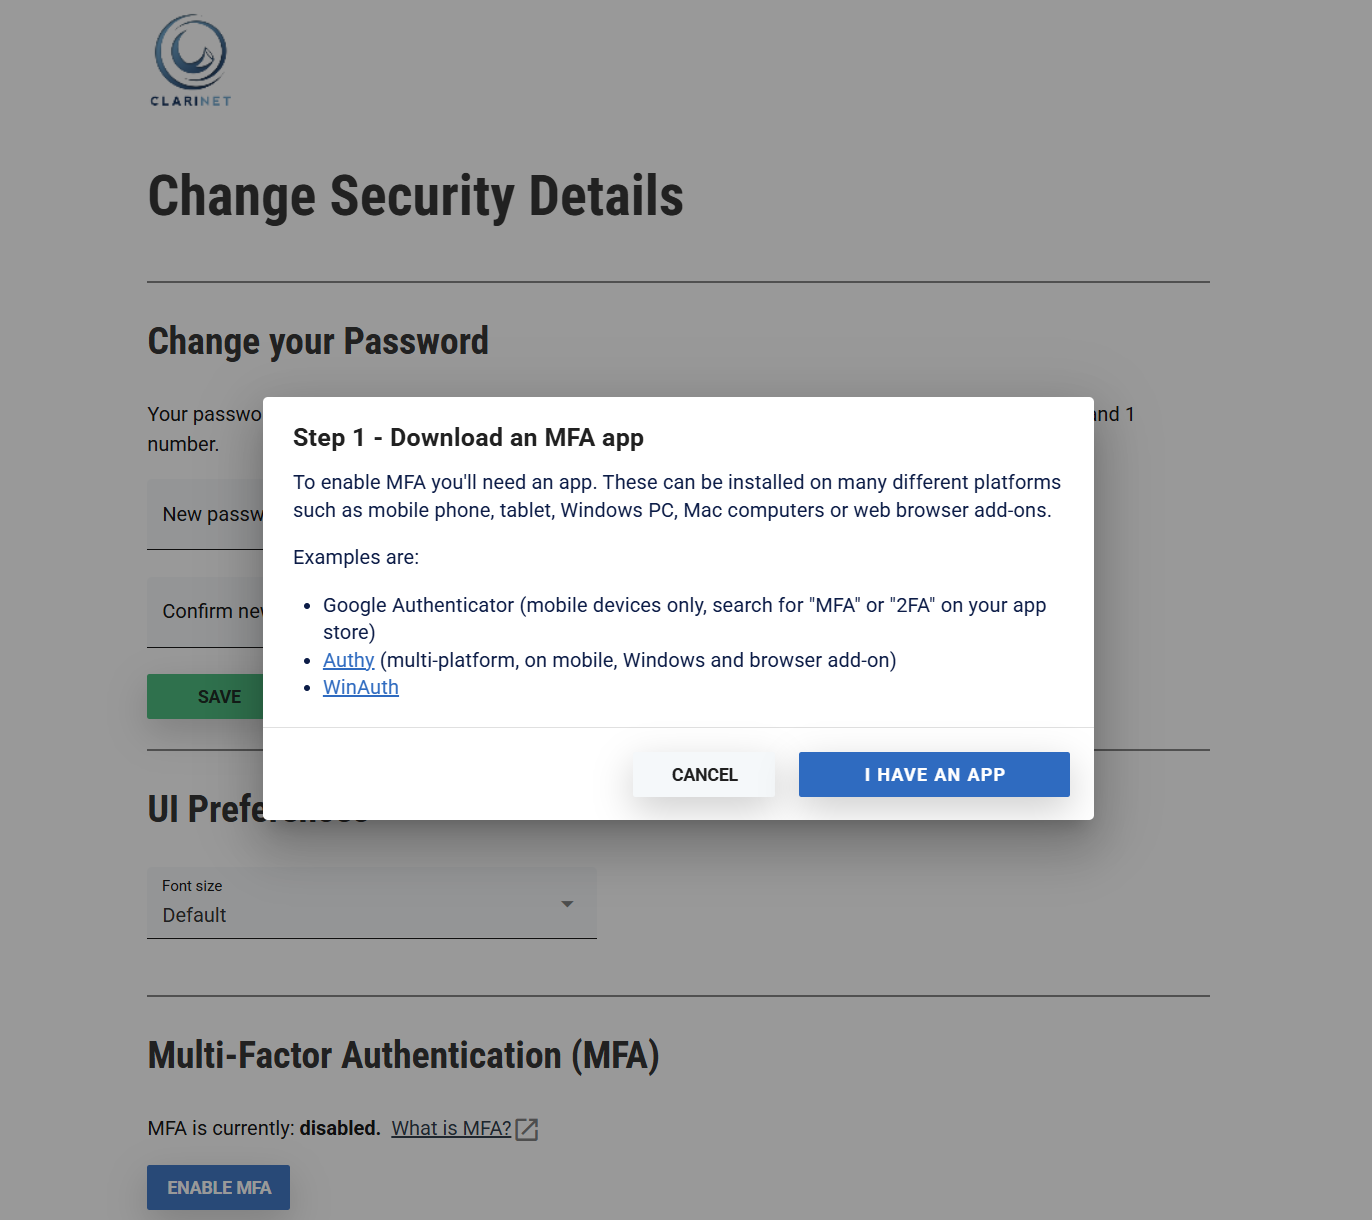
- Click on I HAVE AN APP button if you have already installed one.
- To set up ClearLife profile on your device or to register your device, scan the QR code that is displayed using your preferred app. Your MFA app now shows a new entry “ClariNet LS(Subscriber Name)”.
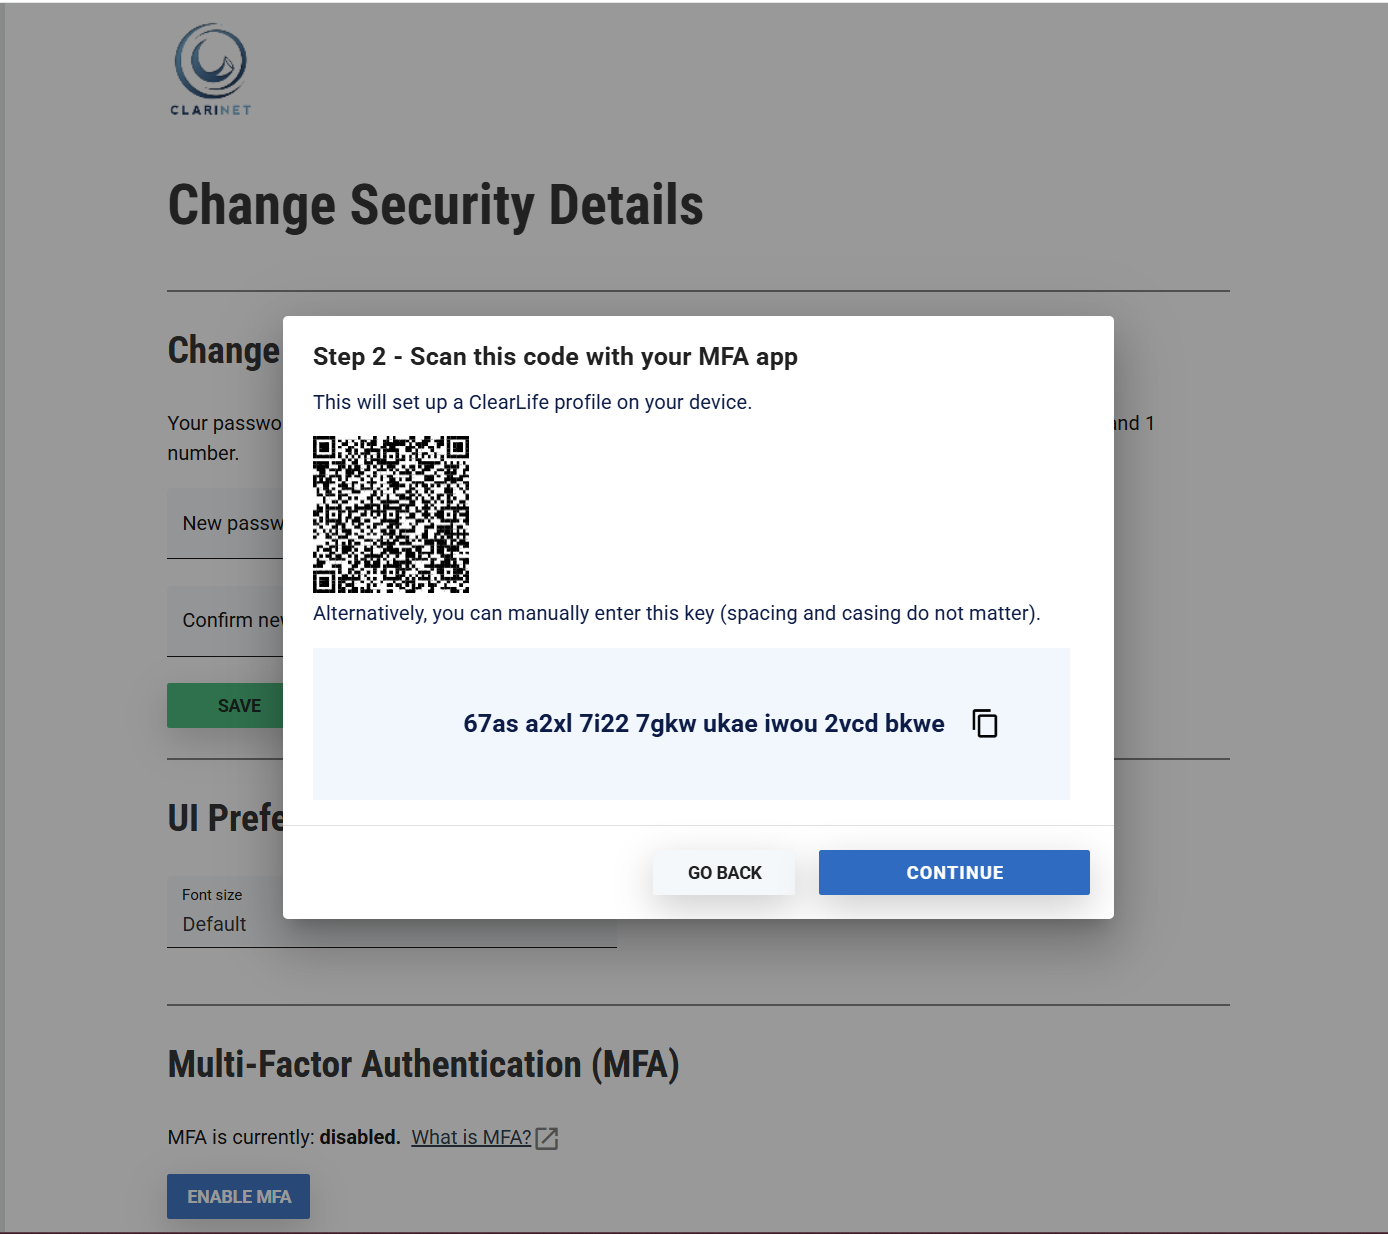
- Click CONTINUE.
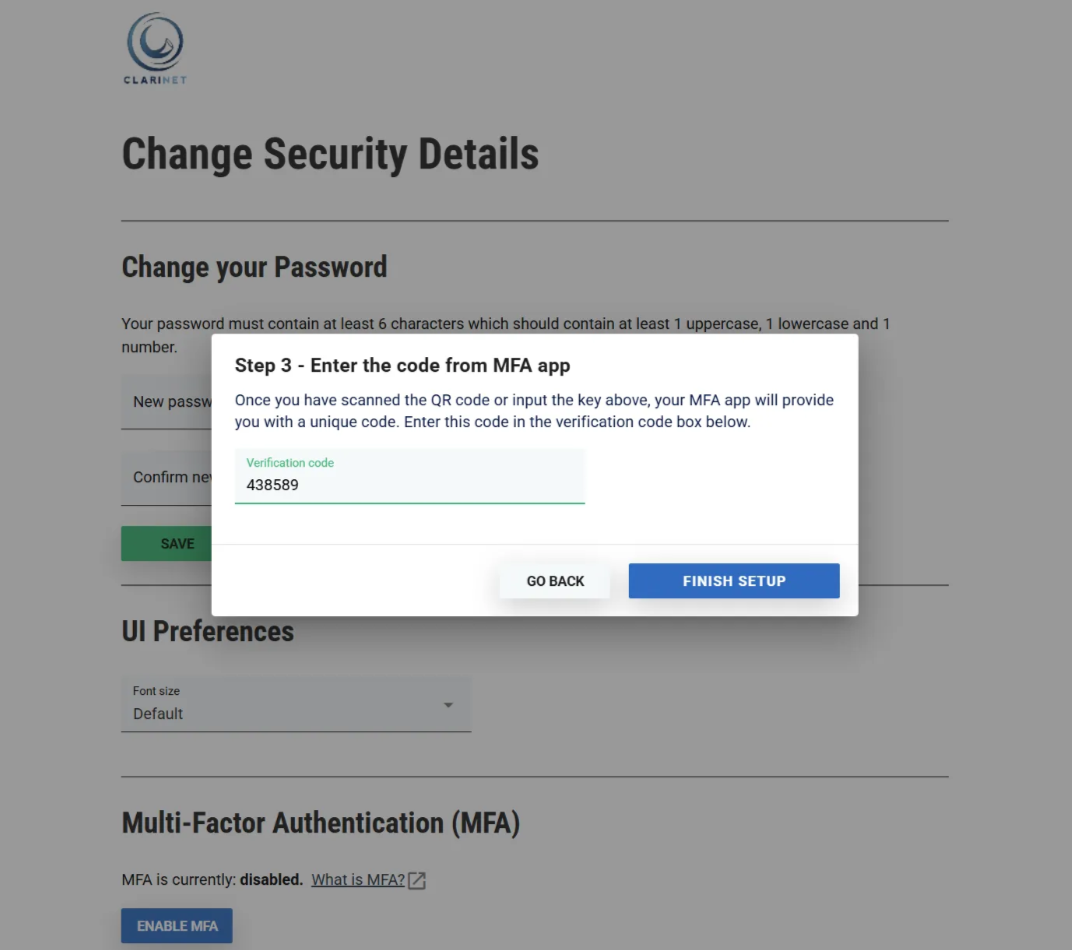
Once you have scanned the QR code or input the key above, your MFA app will provide you with a unique code. Enter this 6-digit code in the verification code box and click FINISH SETUP button.
- Multi-Factor Authentication is now on for your user account.
To use MFA, read the Login with MFA section below.
Setup MFA for a single user when MFA is forced on all users within a Subscriber
If a Client Administrator has made use of MFA mandatory within a Subscriber, all users must setup MFA for their individual accounts.
A user can follow the steps in Setup MFA for a single user before the Client Administrator makes it mandatory.
If a user hasn't set MFA up and the Client Administrator makes it mandatory, the user will be forced to setup MFA next time they log in.
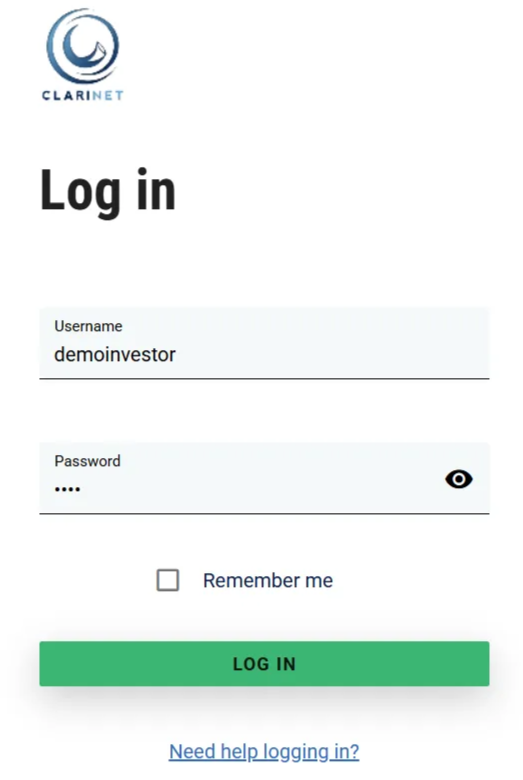
Enter your normal user Username and Password and click Log in button.
Instead of the ClariNet LS Homepage, the user is redirected to the page which will prompt user to ENABLE MFA. Follow the procedure for Setup MFA for a single user.
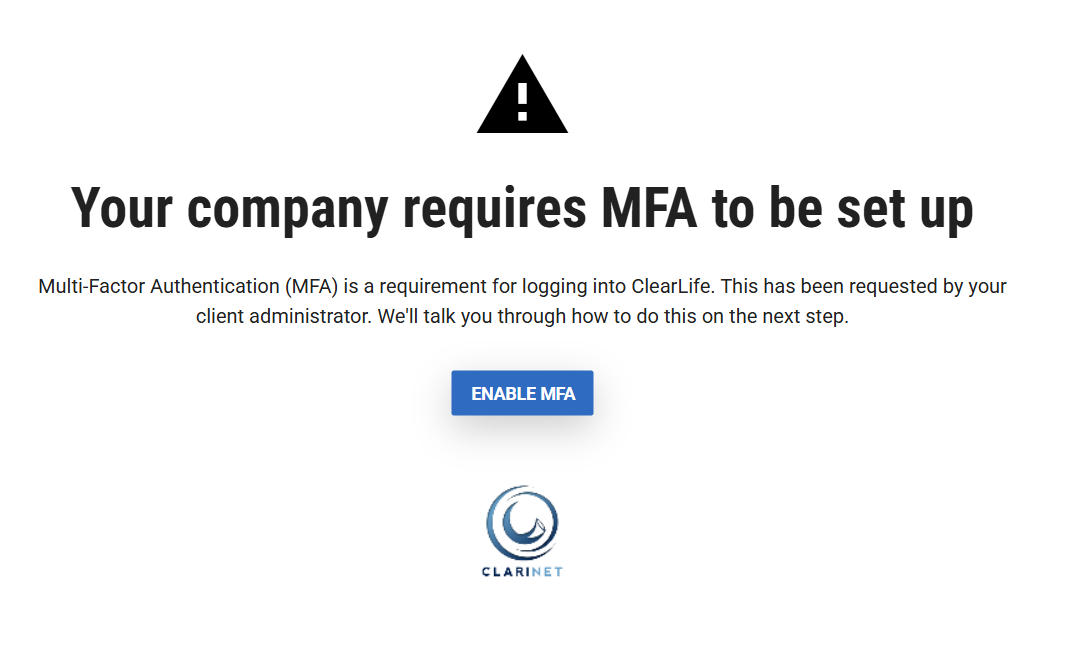
Note: If MFA has been made mandatory by the Client Administrator, you will NOT be able to login to ClariNet LS without registering a device.
Login with MFA
This assumes you have turned on MFA by following the steps in Setup MFA for a single user.
- Enter your normal user Username and Password and click Log in.
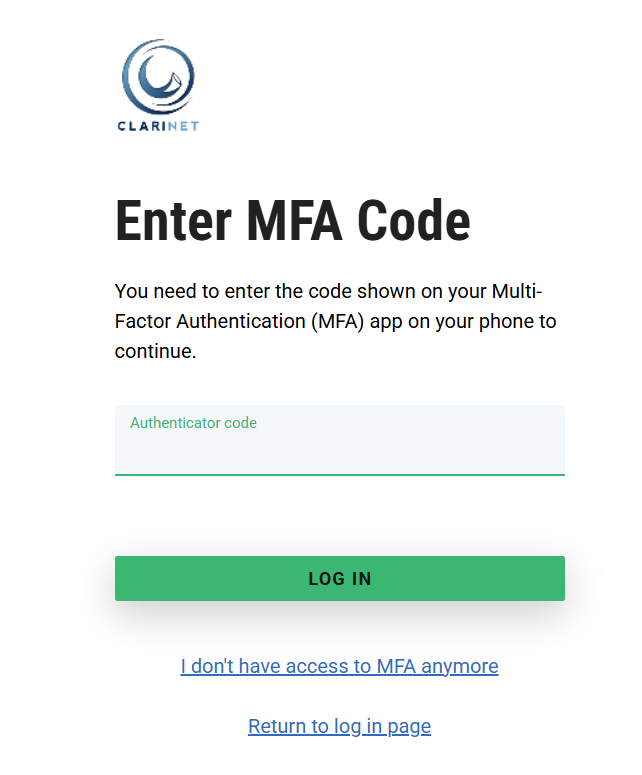
- The next step is the new additional verification that MFA requires. Check the MFA app. Enter the 6-digit code shown on your MFA app on your device in the authenticator code box and click Log In.
Force MFA for all users within a subscriber
To make MFA mandatory for all users within a Subscriber, the Client Administrator must enable MFA on their own account first. Simply follow the instructions in Setup MFA for a single user.
- On the Admin menu/Users page, click TURN ON in the Multi-Factor Authentication section.
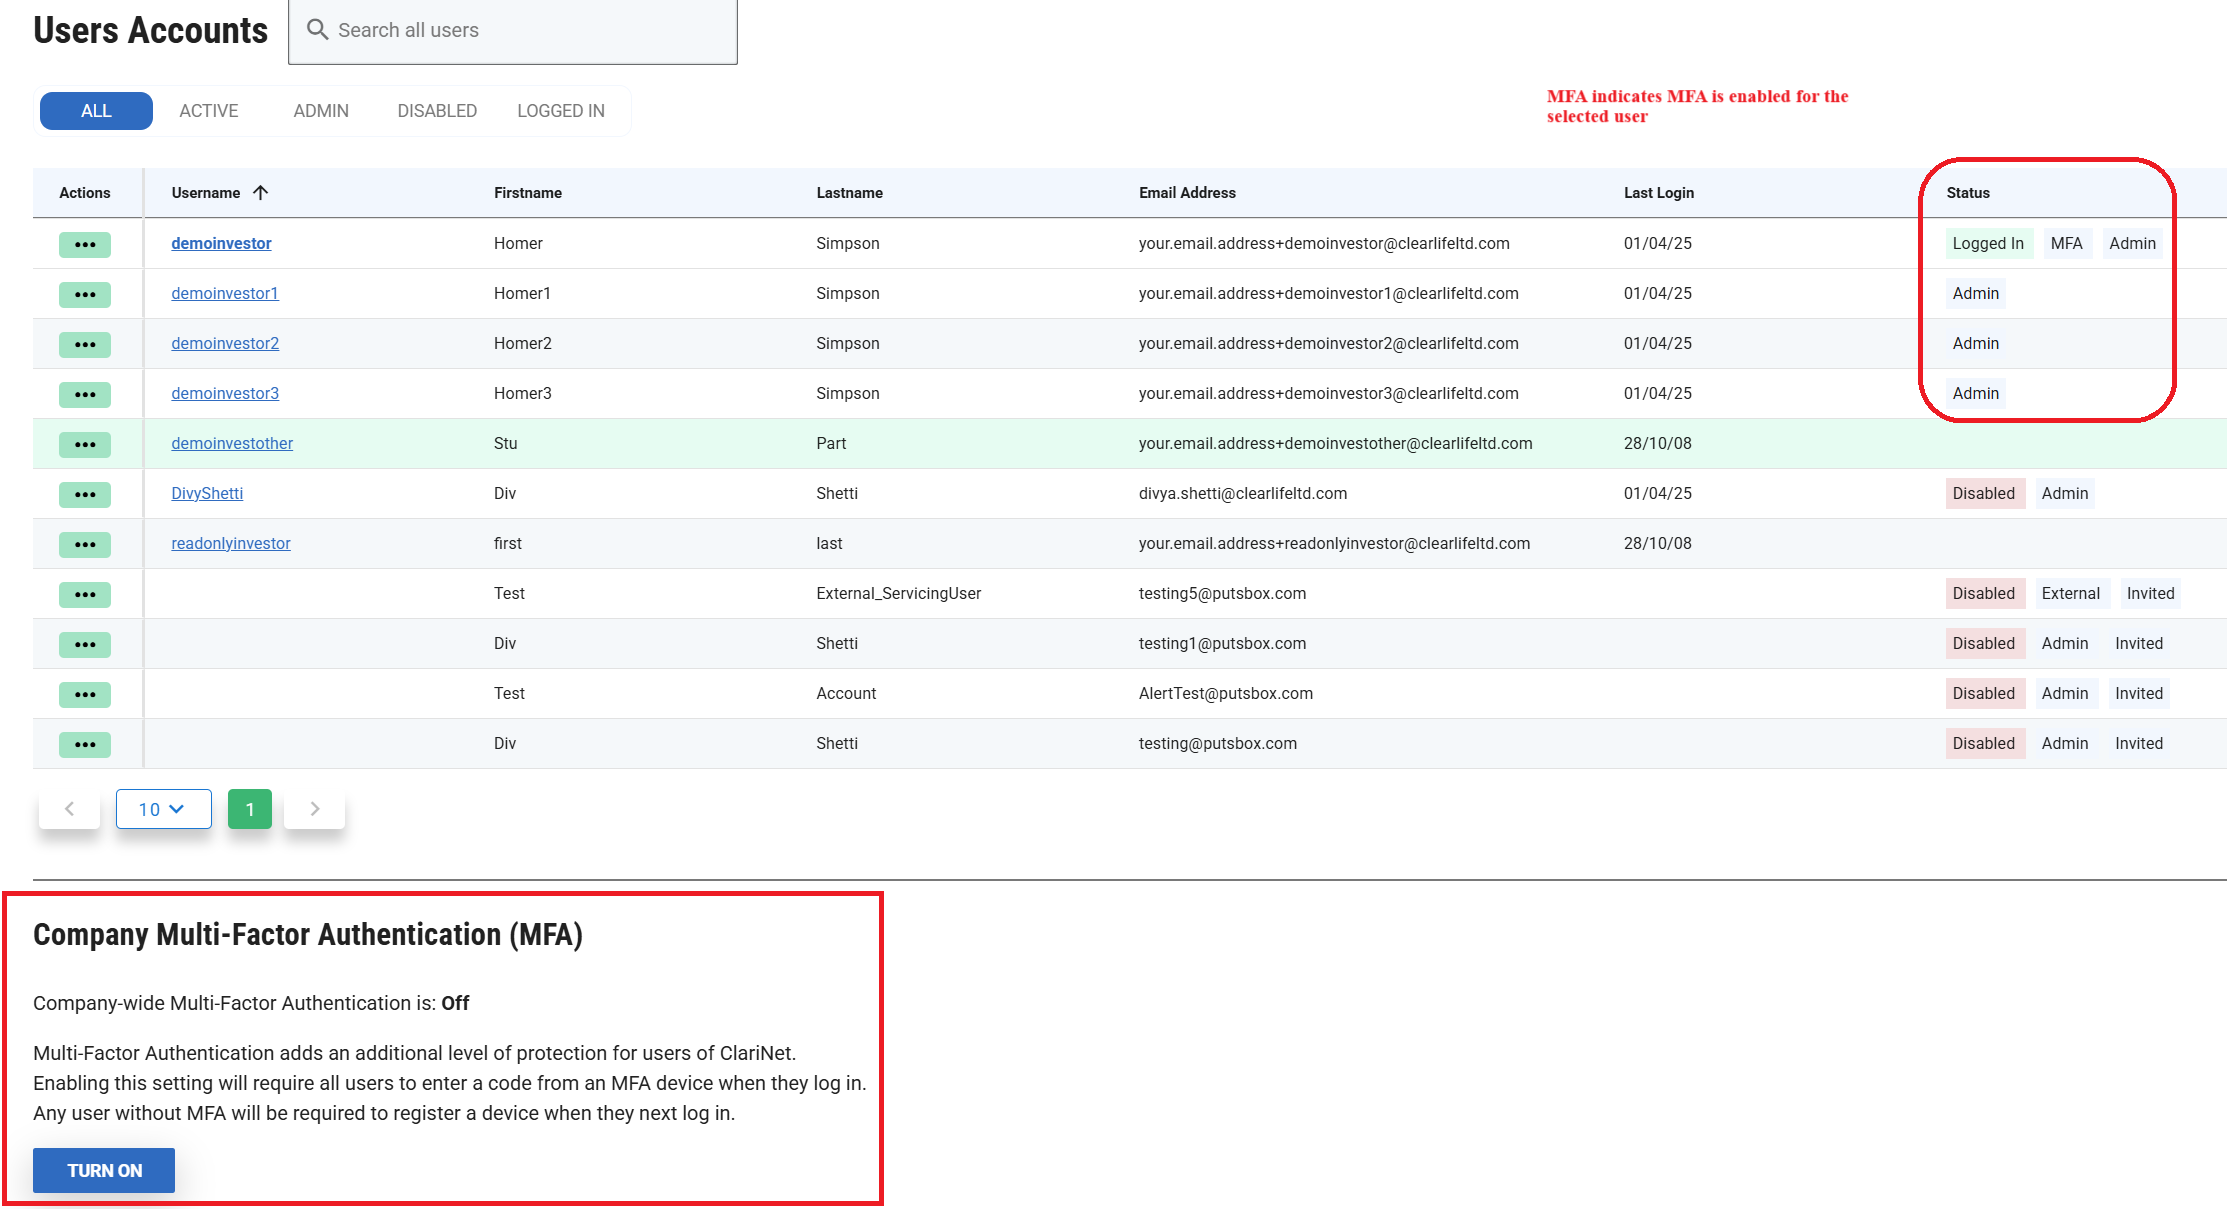
- The list of User Accounts has a Status column indicating whether MFA is enabled for each account.
- Before making MFA mandatory for all users, we recommend a transition period. Notify all your users that the change will be effective after a certain period (one or two weeks), and ask them to follow the simple steps in Setup MFA for a single user. This way, users can set it up at a convenient time for them. You can monitor the progress by monitoring the MFA column on the Users admin page. Once MFA is made mandatory, remaining users will follow the steps in Setup MFA for a single user when MFA is forced on all users within a Subscriber.
I’ve lost my MFA device
- Tell your Client Administrator.
- The Client Administrator should use the RESET USER MFA DETAILS functionality by selecting the user from the Settings, Users and clicking Edit.
- The Client Administrator clicks RESET USER MFA DETAILS button to reset the MFA details and delete the MFA device for that user. This will remove the user’s previous MFA details for their account and prompt user to set up new MFA details.
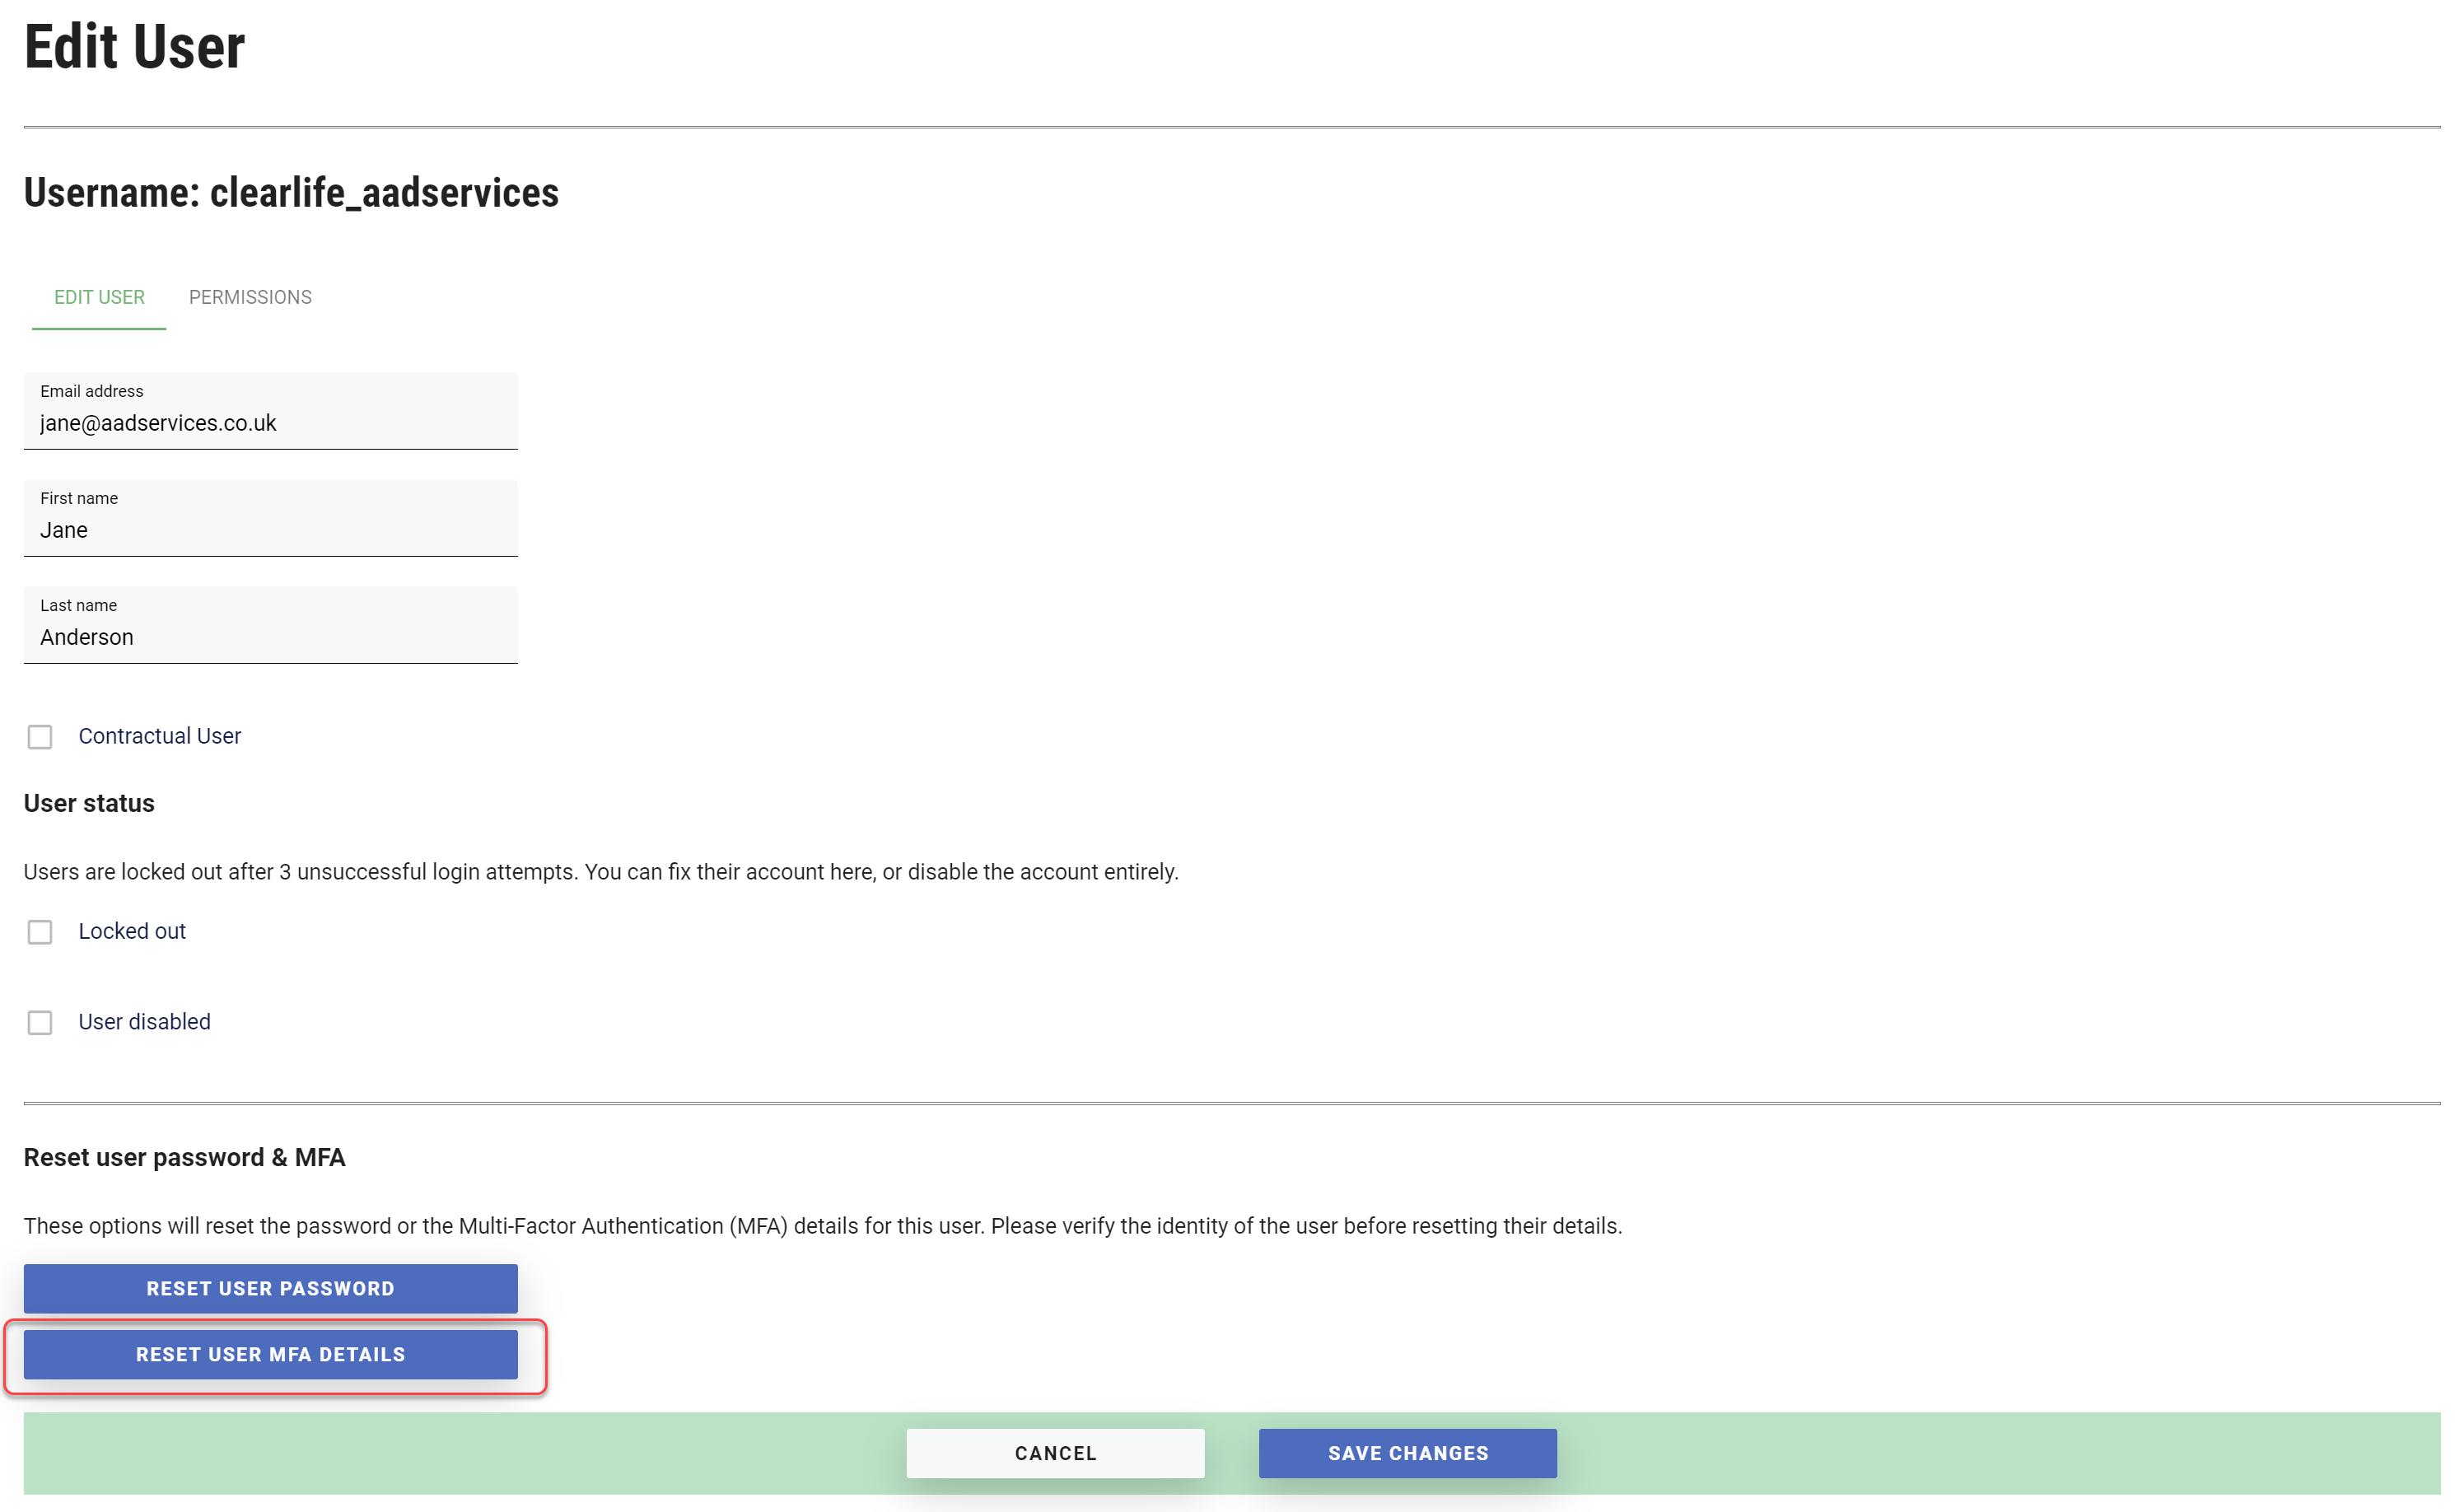
- This will trigger an email to user stating that their client administrator has removed user’s MFA details from user’s account in order to enable user to log back into ClearLife account. This email will have a link to log in. Follow the same procedure as Setup MFA for a single user.
I’ve Forgotten my password
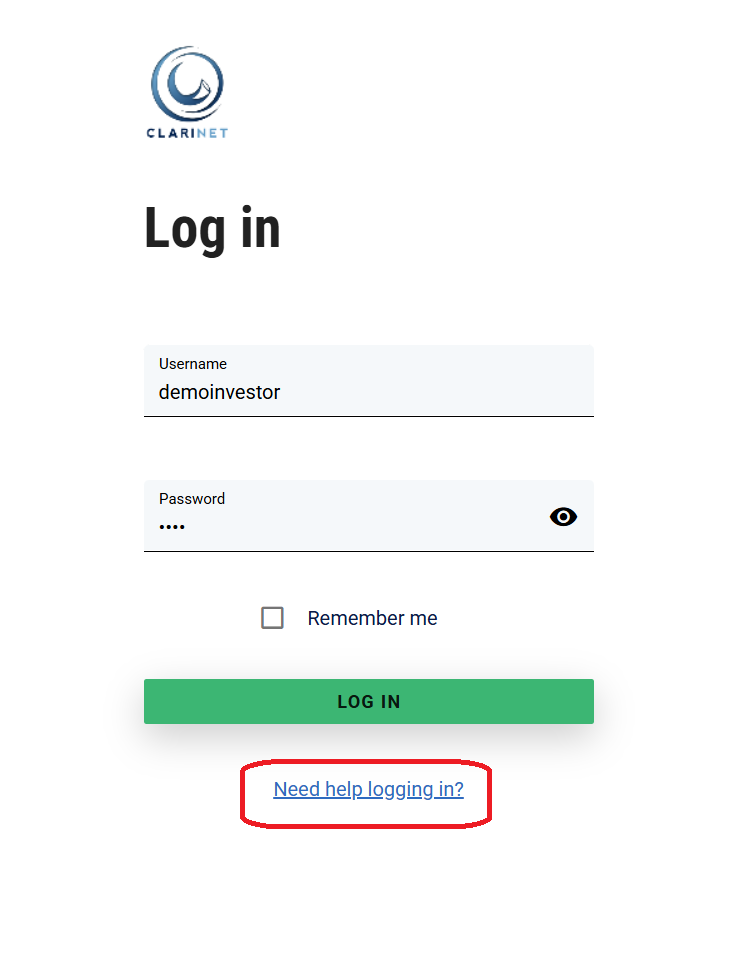
The user can reset the password by clicking the Need help logging in? button on the Login page.
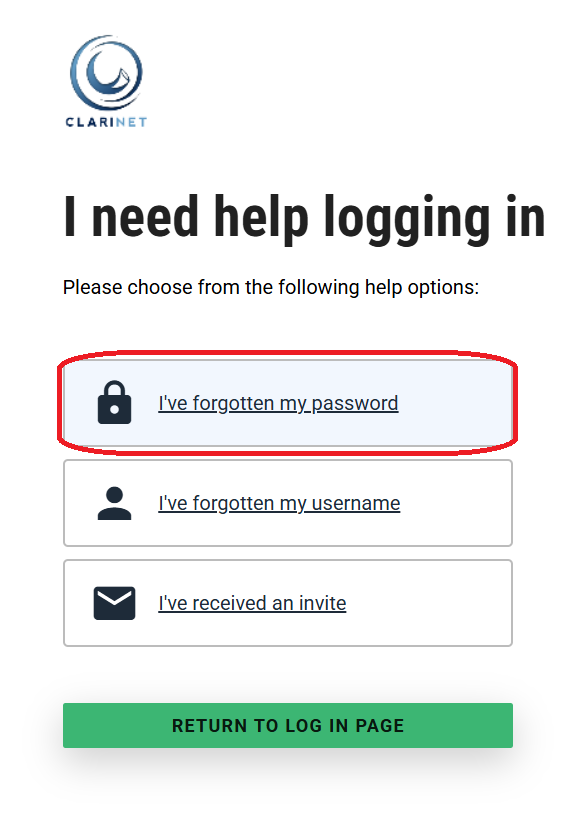
- Click on Need help logging in? followed by I’ve forgotten my password.
- Enter your valid username and click on SEND PASSWORD RESET EMAIL.
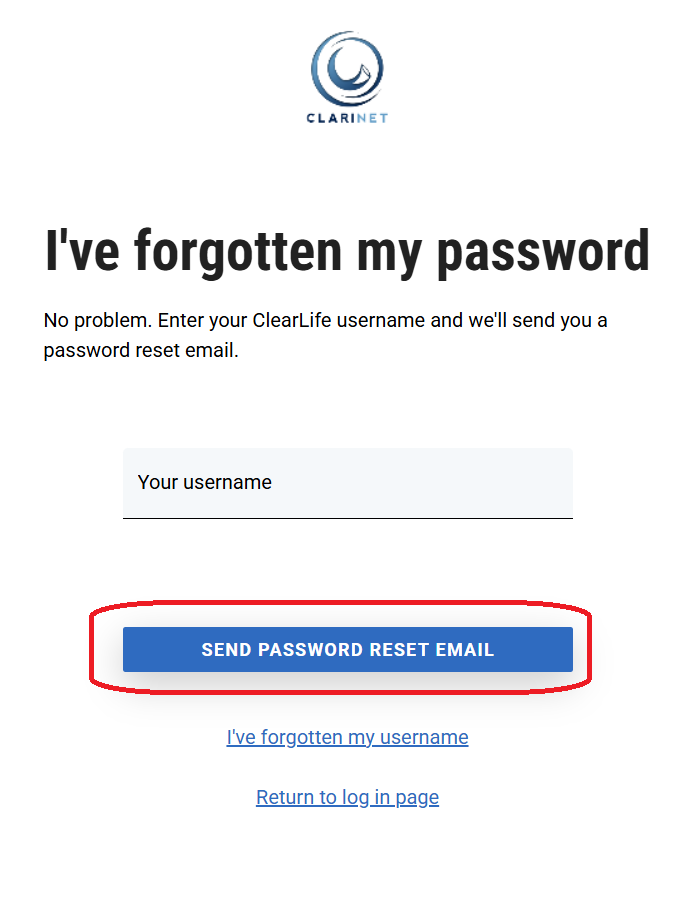
An email will be sent to the email address registered with the username entered. This email contains the reset password link.
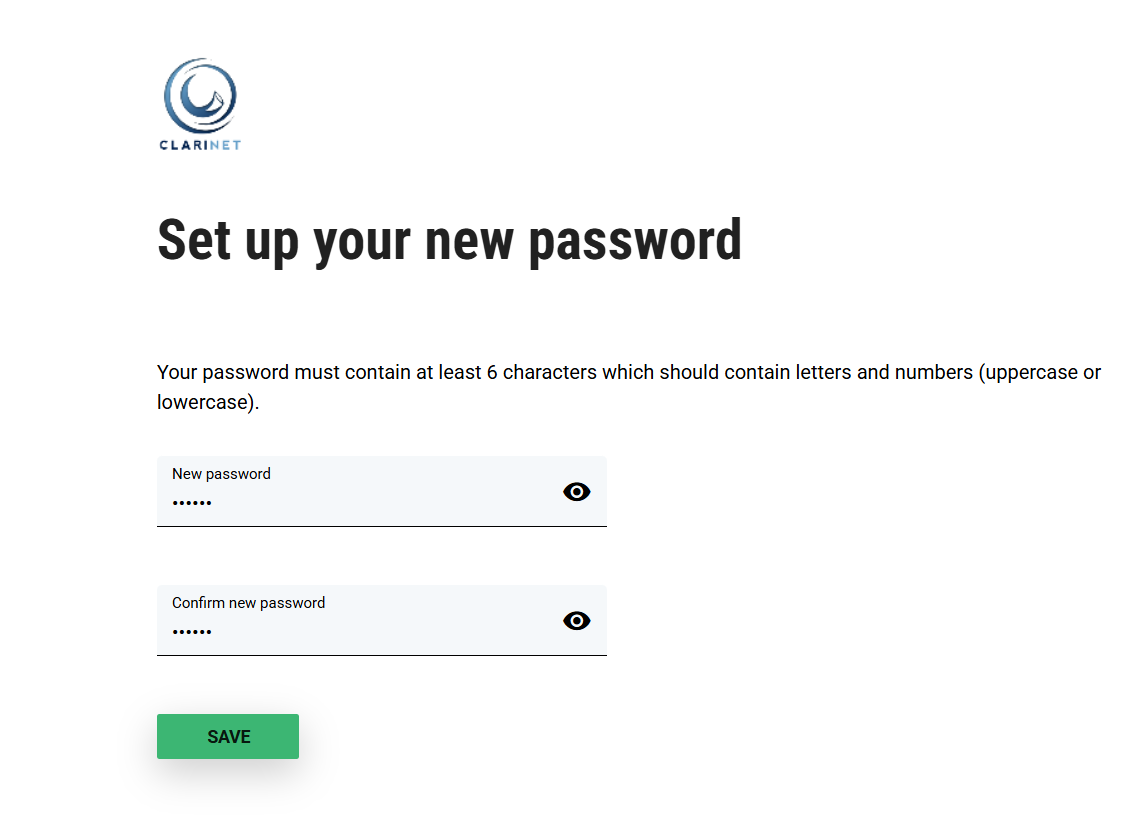
Once the password is reset, user will be redirected to the login page.
This password reset request will work only for 1 hour. If it has expired, create another password reset request.
General user management best practices
- Only have the smallest number of users with the Client Administrator role.
- Do not use shared users ("intaketeam" or "tempstaff" for example), each user login should belong to a single individual.