Insured Obituary Search
The Insured Obituary Search function allows you to generate URLs which can be deployed to search for Insured information (such as obituaries and death notices) in publicly accessible online resources. It populates the URLs with information stored in ClariNet LS and outputs the populated URLs in a web page, with clickable links from which you can launch those searches.
It does not automate the search process; this still has to be done manually.
You will need to identify the format of the URL which the relevant website requires. This can usually be determined by conducting a search on the site and copying the full URL generated in the address bar. This will often be different depending on how much information you want to include in the search, For example, using www.findagrave.com, if I want to search for John Robert Smith, you would use the following URL:
javascript
https://www.findagrave.com/memorial/search firstname=John&middlename=Robert&lastname=SmithBy contrast, if you want to search for John Robert Smith born in 1932 only, you would use the following URL:
javascript
https://www.findagrave.com/memorial/search firstname=John&middlename=Robert&lastname=Smith&birthyear=1932Clearly, the more precise your search URL, the more likely you are to return an exact match to your Insured, but if you make the search too precise you may also return "false negatives", as some online resources may contain conflicting data.
Website Notes
www.whitepages.com: URLs for this site must not include anything in the "Text Used to Identify No Results Found" field.
Searches and Exclusions
Start by clicking the "Insured Obituary Search" admin menu item. Once here you will be able to view and edit your Obituary Searches and Exclusions.
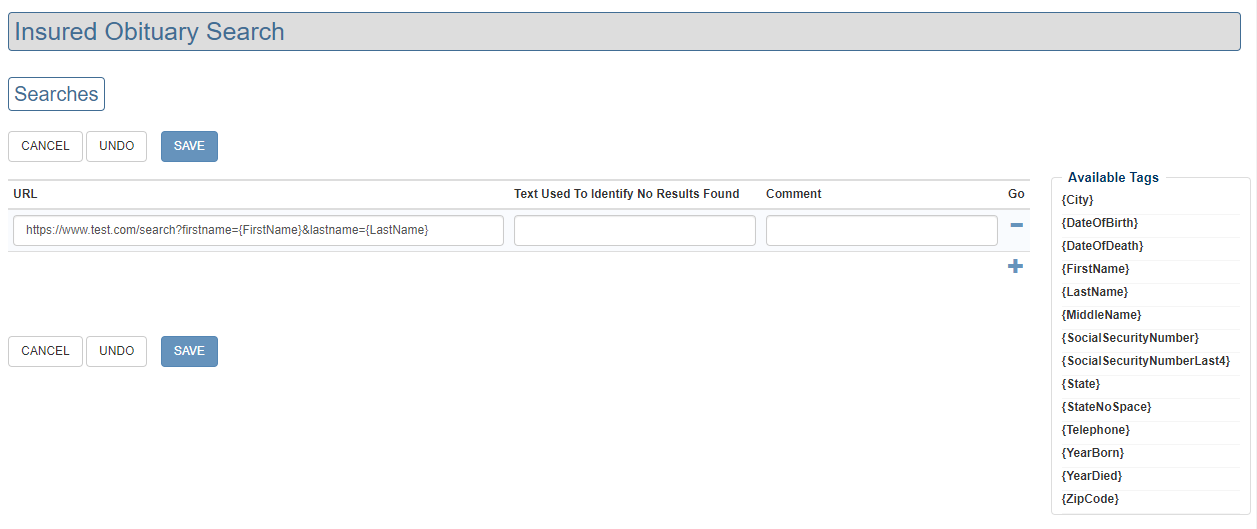
Searches
To add a new Search, click the "Edit" button followed by the "+". In the new blank row add your desired URL. You can use the Available Tags section on the right to help fill in the values that will be replaced with real Insured data when the Report is generated. Place the cursor in the URL textbox and click on any one of the Available Tags for that tag to be copied across for you.
Next, you can optionally enter the "Text Used to Identify No Results Found". If specified, the Report will exclude URLs that produced no results by matching that text with the text on the website. When the text is left blank, the website will not be checked for empty results and all URLs will be generated for the report; this is the recommended setting for Search Engines such as Google, as they will always return a result.
Exclusions
This table displays the list of URLs that will be removed from the Report - You can only add an entry here by clicking "Exclude" from the Report itself. You are also able to delete the data entirely by clicking "DELETE ALL" or remove just those Insureds that are now confirmed dead using the "DELETE ALL CONFIRMED DEAD" button. This will delete an Insured that has a date in the "Death Confirmed Date" field.

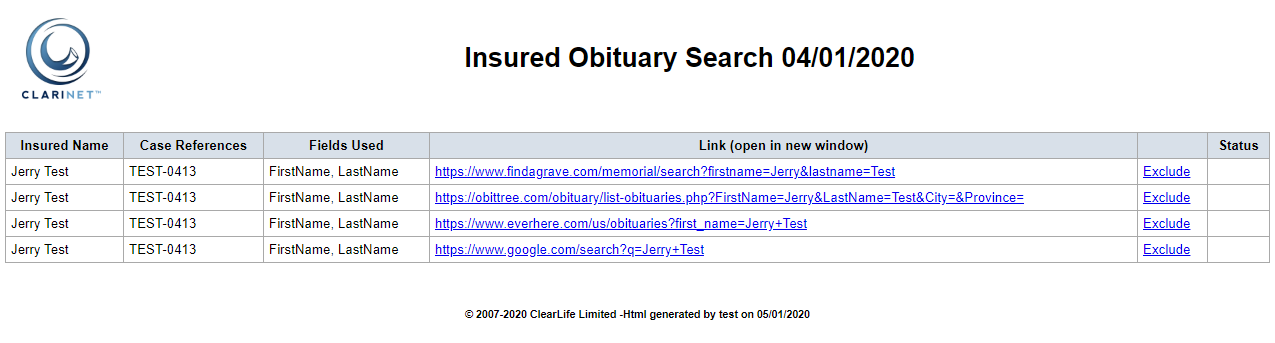
Running and Viewing Reports
You can use any collection of Cases (such as a Cases List, a Portfolio or Advanced Search results) to generate a Report. Once you have your list of Cases, click the Reporting icon and select the report titled "Insured Obituary Search (HTML)". As stated in the on screen message, the Report will be generated in the background. Note that you are only able to run one Report at a time across your Client.
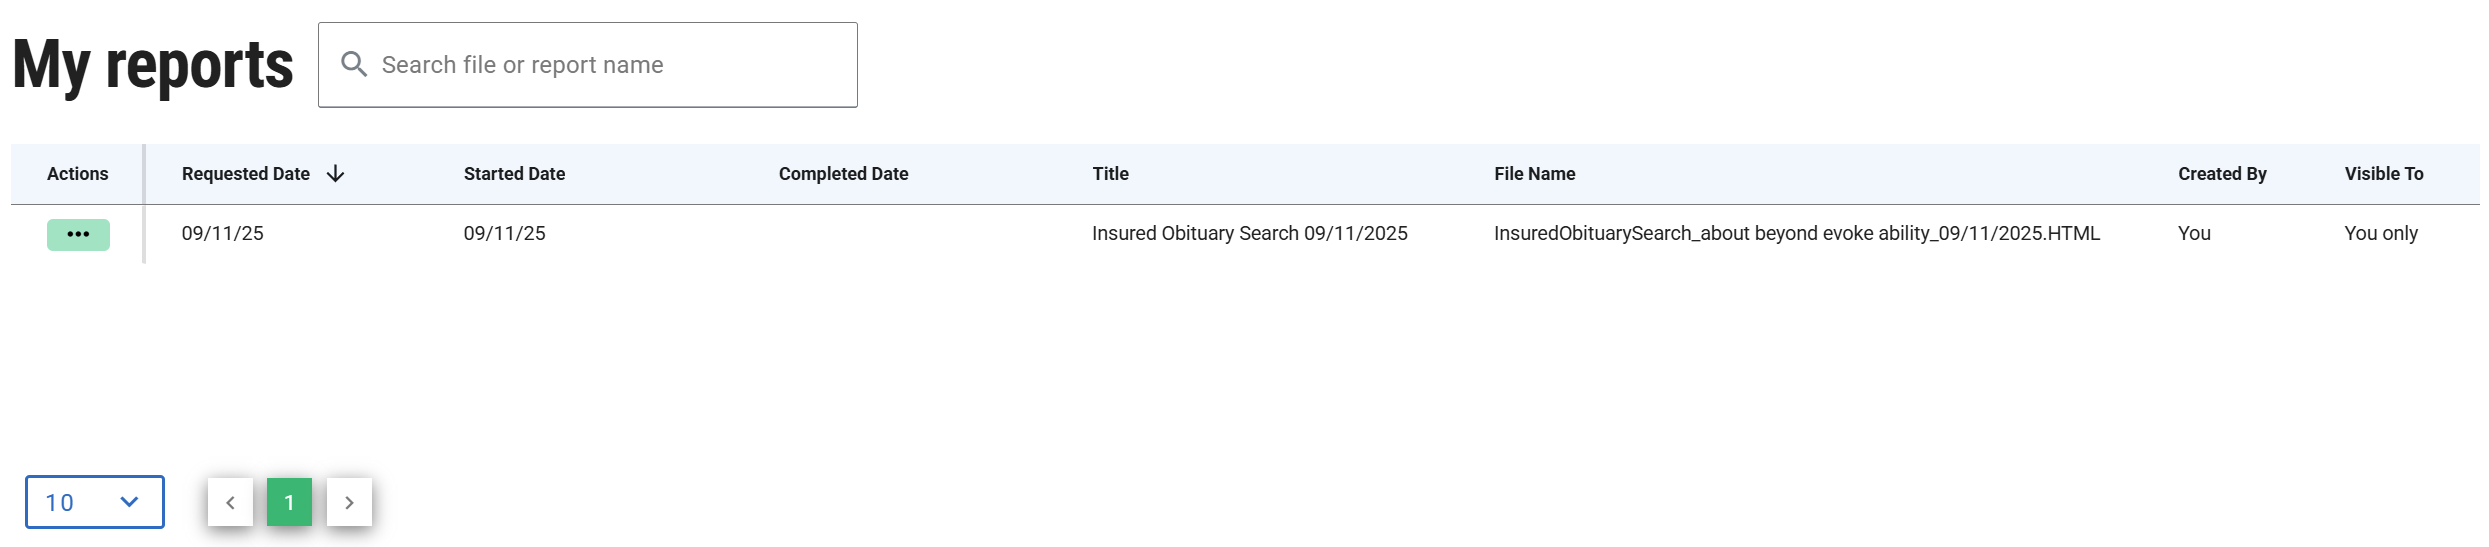
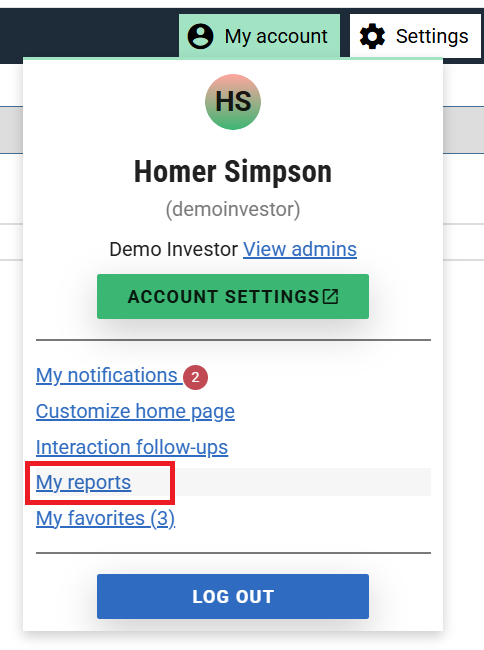
To view the Report, start by clicking the Username menu and selecting "My Reports". Here you see a table of all Reports that have been generated or are in the process of being generated.
Once on the "My Reports" page you will be able to download via the magnifier or delete with the Minus. Note, the magnifier will be disabled until the Report is ready to be download. There are three date fields that have the following meanings:
- Requested Date: This is the date and time when the "Ok" button was pressed on the Reporting popup
- Started Date: This is the date and time when the Report has started to be generated
- Completed Date: This is the date and time when the Report has finished and you will now be able to download it.