Users
ClariNet LS provides functionality for creating new users and assigning roles to them using a secure registration process. During this process, new users are sent an email, registration codes are exchanged, and roles are assigned. Once a user has been set up, their roles can be edited as required.
To add or edit users and assign roles you must have Client Administrator permission in ClariNet LS.
To add a new User and assign roles:
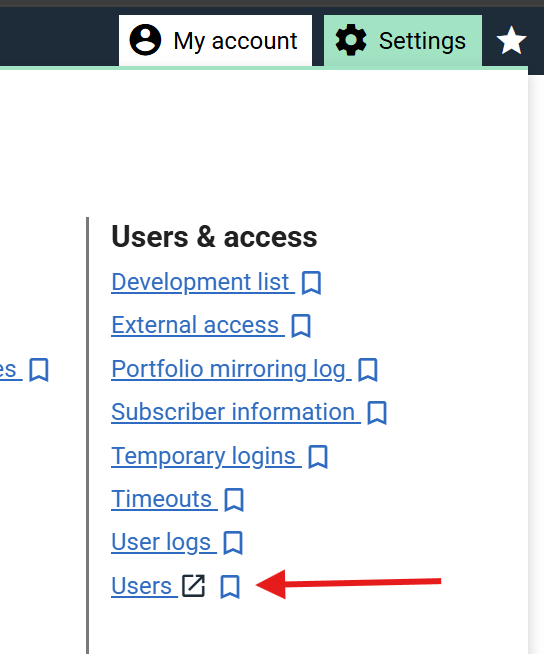
- Click on the Settings menu and select the Users page.
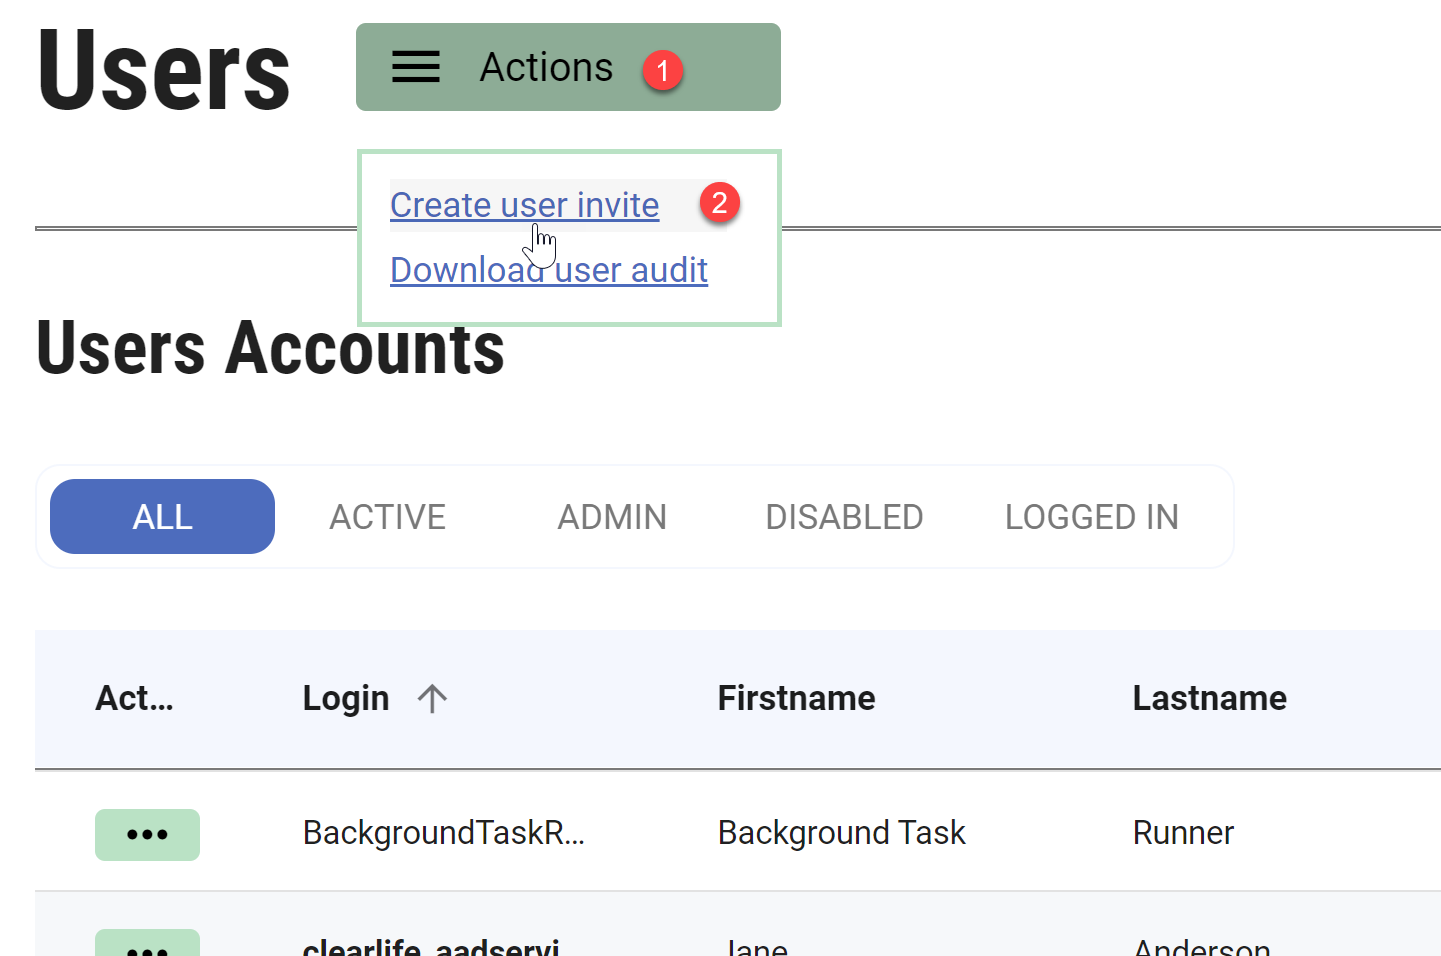
- Click on the Actions Button next to the Users section followed by Create User Invite.
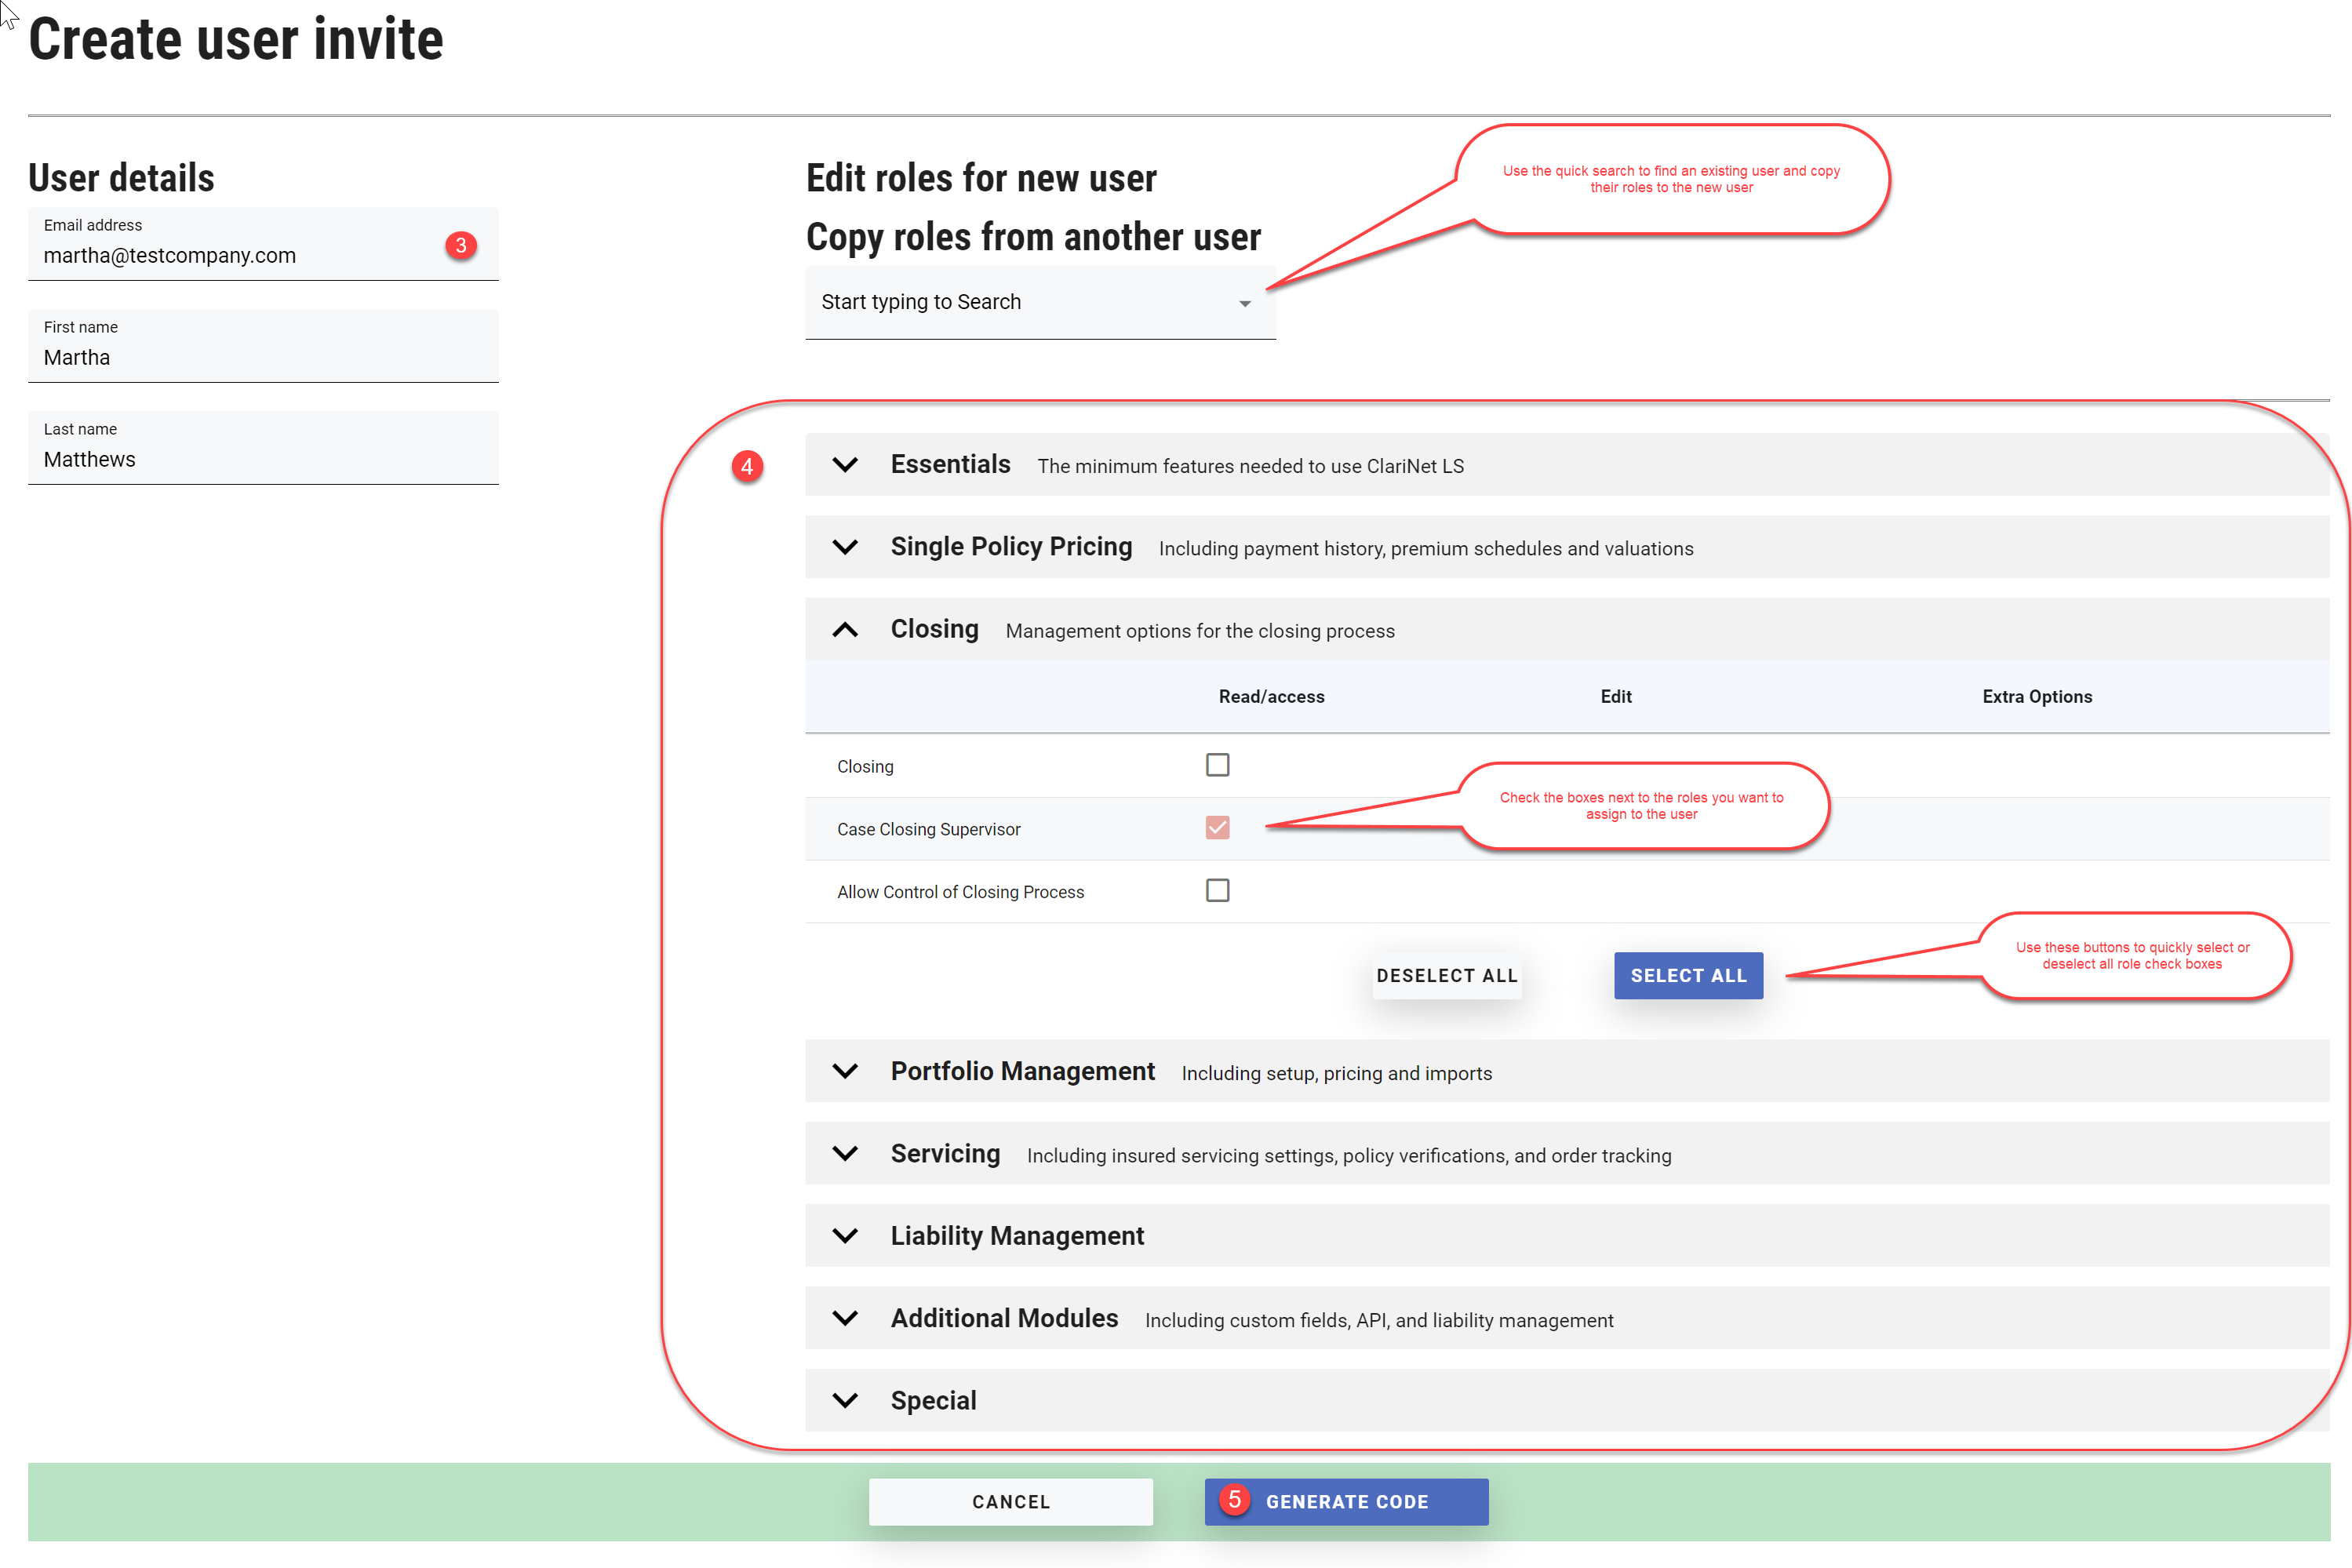
- Enter the email address, first and last name of your new User.
- Edit roles for new user either by copying roles from another user or by manually selecting the roles. Quick search on to the right side of user details allows you to enter the user to be cloned. Confirm on a dialog box that appears and all the roles of the user will be copied to new user automatically. Under the search bar field there are sections listing the modules available and associated roles. Check the boxes next to the roles you want to assign to the user. Use the SELECT ALL and DESELECT ALL buttons to assist you.
You can only view, not edit, your own roles; they are shown as disabled.
See Topics → Administration → Permission and Roles for a complete list of roles required to access specific menu items, tabs or functions within ClariNet LS.
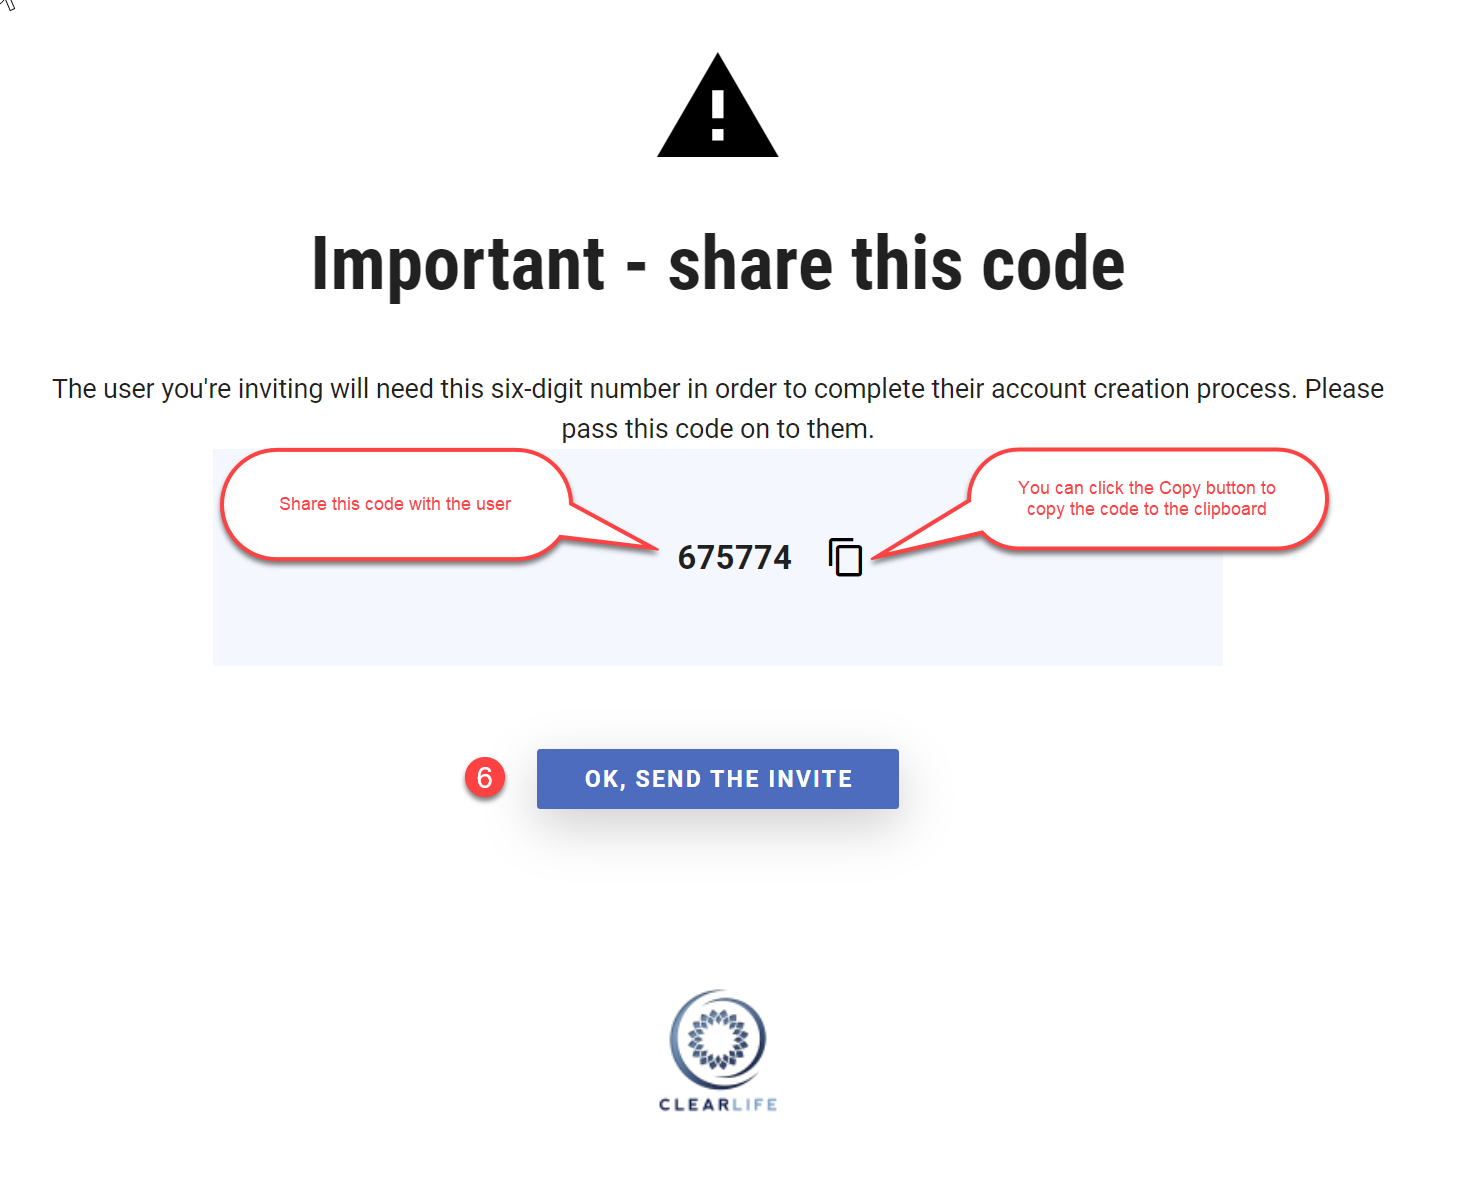
- Once you have selected the required roles, click the GENERATE CODE button at the bottom of the page. A six digit code will be generated which you need to note down. The user you are inviting will need this six-digit number in order to complete their account creation process.
Remember that you need to communicate the code to the new user.
- Click on OK, Send THE INVITE button. This triggers an email invitation to the new user from the ClariNet LS administrator, which includes a link to complete the registration process online.
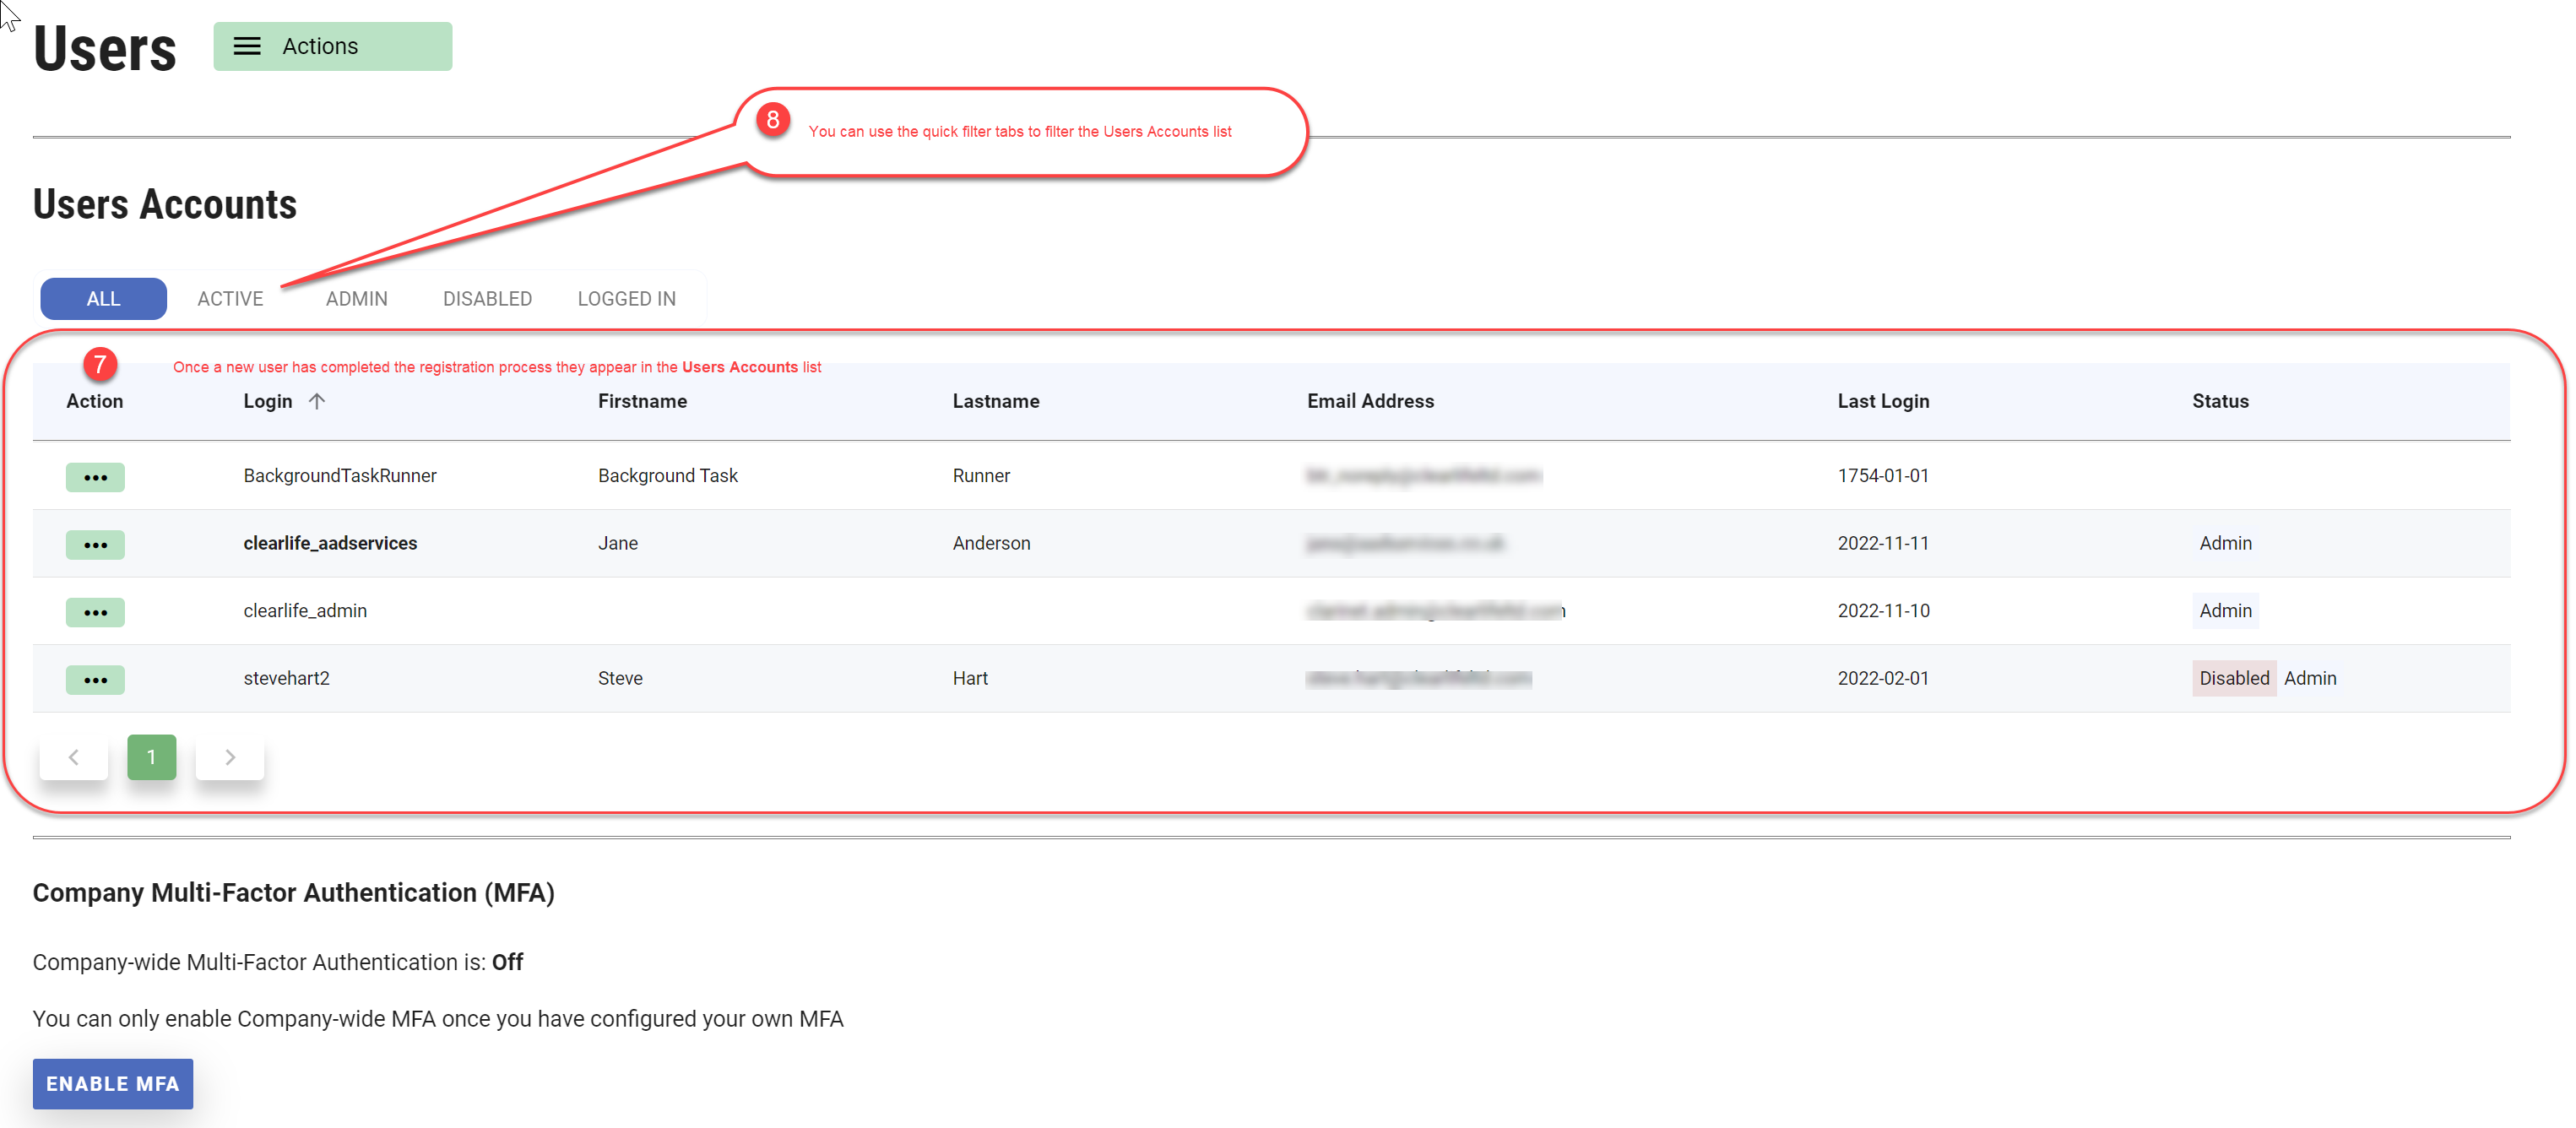
- Once a new user has received the email invitation and completed the registration process they are set up as a user in ClariNet LS and their name appears on the Users page in the Users Accounts section.
- You can use quick filter tabs under Users Accounts section to filter your list view.
This invite will work only for 3 days. If the new user has not set up the account within 3 days, the link will expire and new user will need to contact administrator for new link.
Registration steps for a new user:
- From the email invitation received, click on the link which will direct you to the page to create your account.
- Enter the invitation code provided by your administrator and click on the Create Your Account button.
- On the new page, enter your preferred username and password. Username can have numbers, alphabets and characters like hyphen ( - ), underscore ( _ ), full stop ( . ), At sign ( @ ) and Plus ( + )sign.
Username should be one unique word and should not contain any spaces in between the letters.
- Click on the Create button.
- Your account is now set up and should be able to log in using the username and password you have just created.
To edit roles for an existing user:
- Click on the Settings menu and select the Users page.
- Locate the user you wish to edit in the User Accounts section.
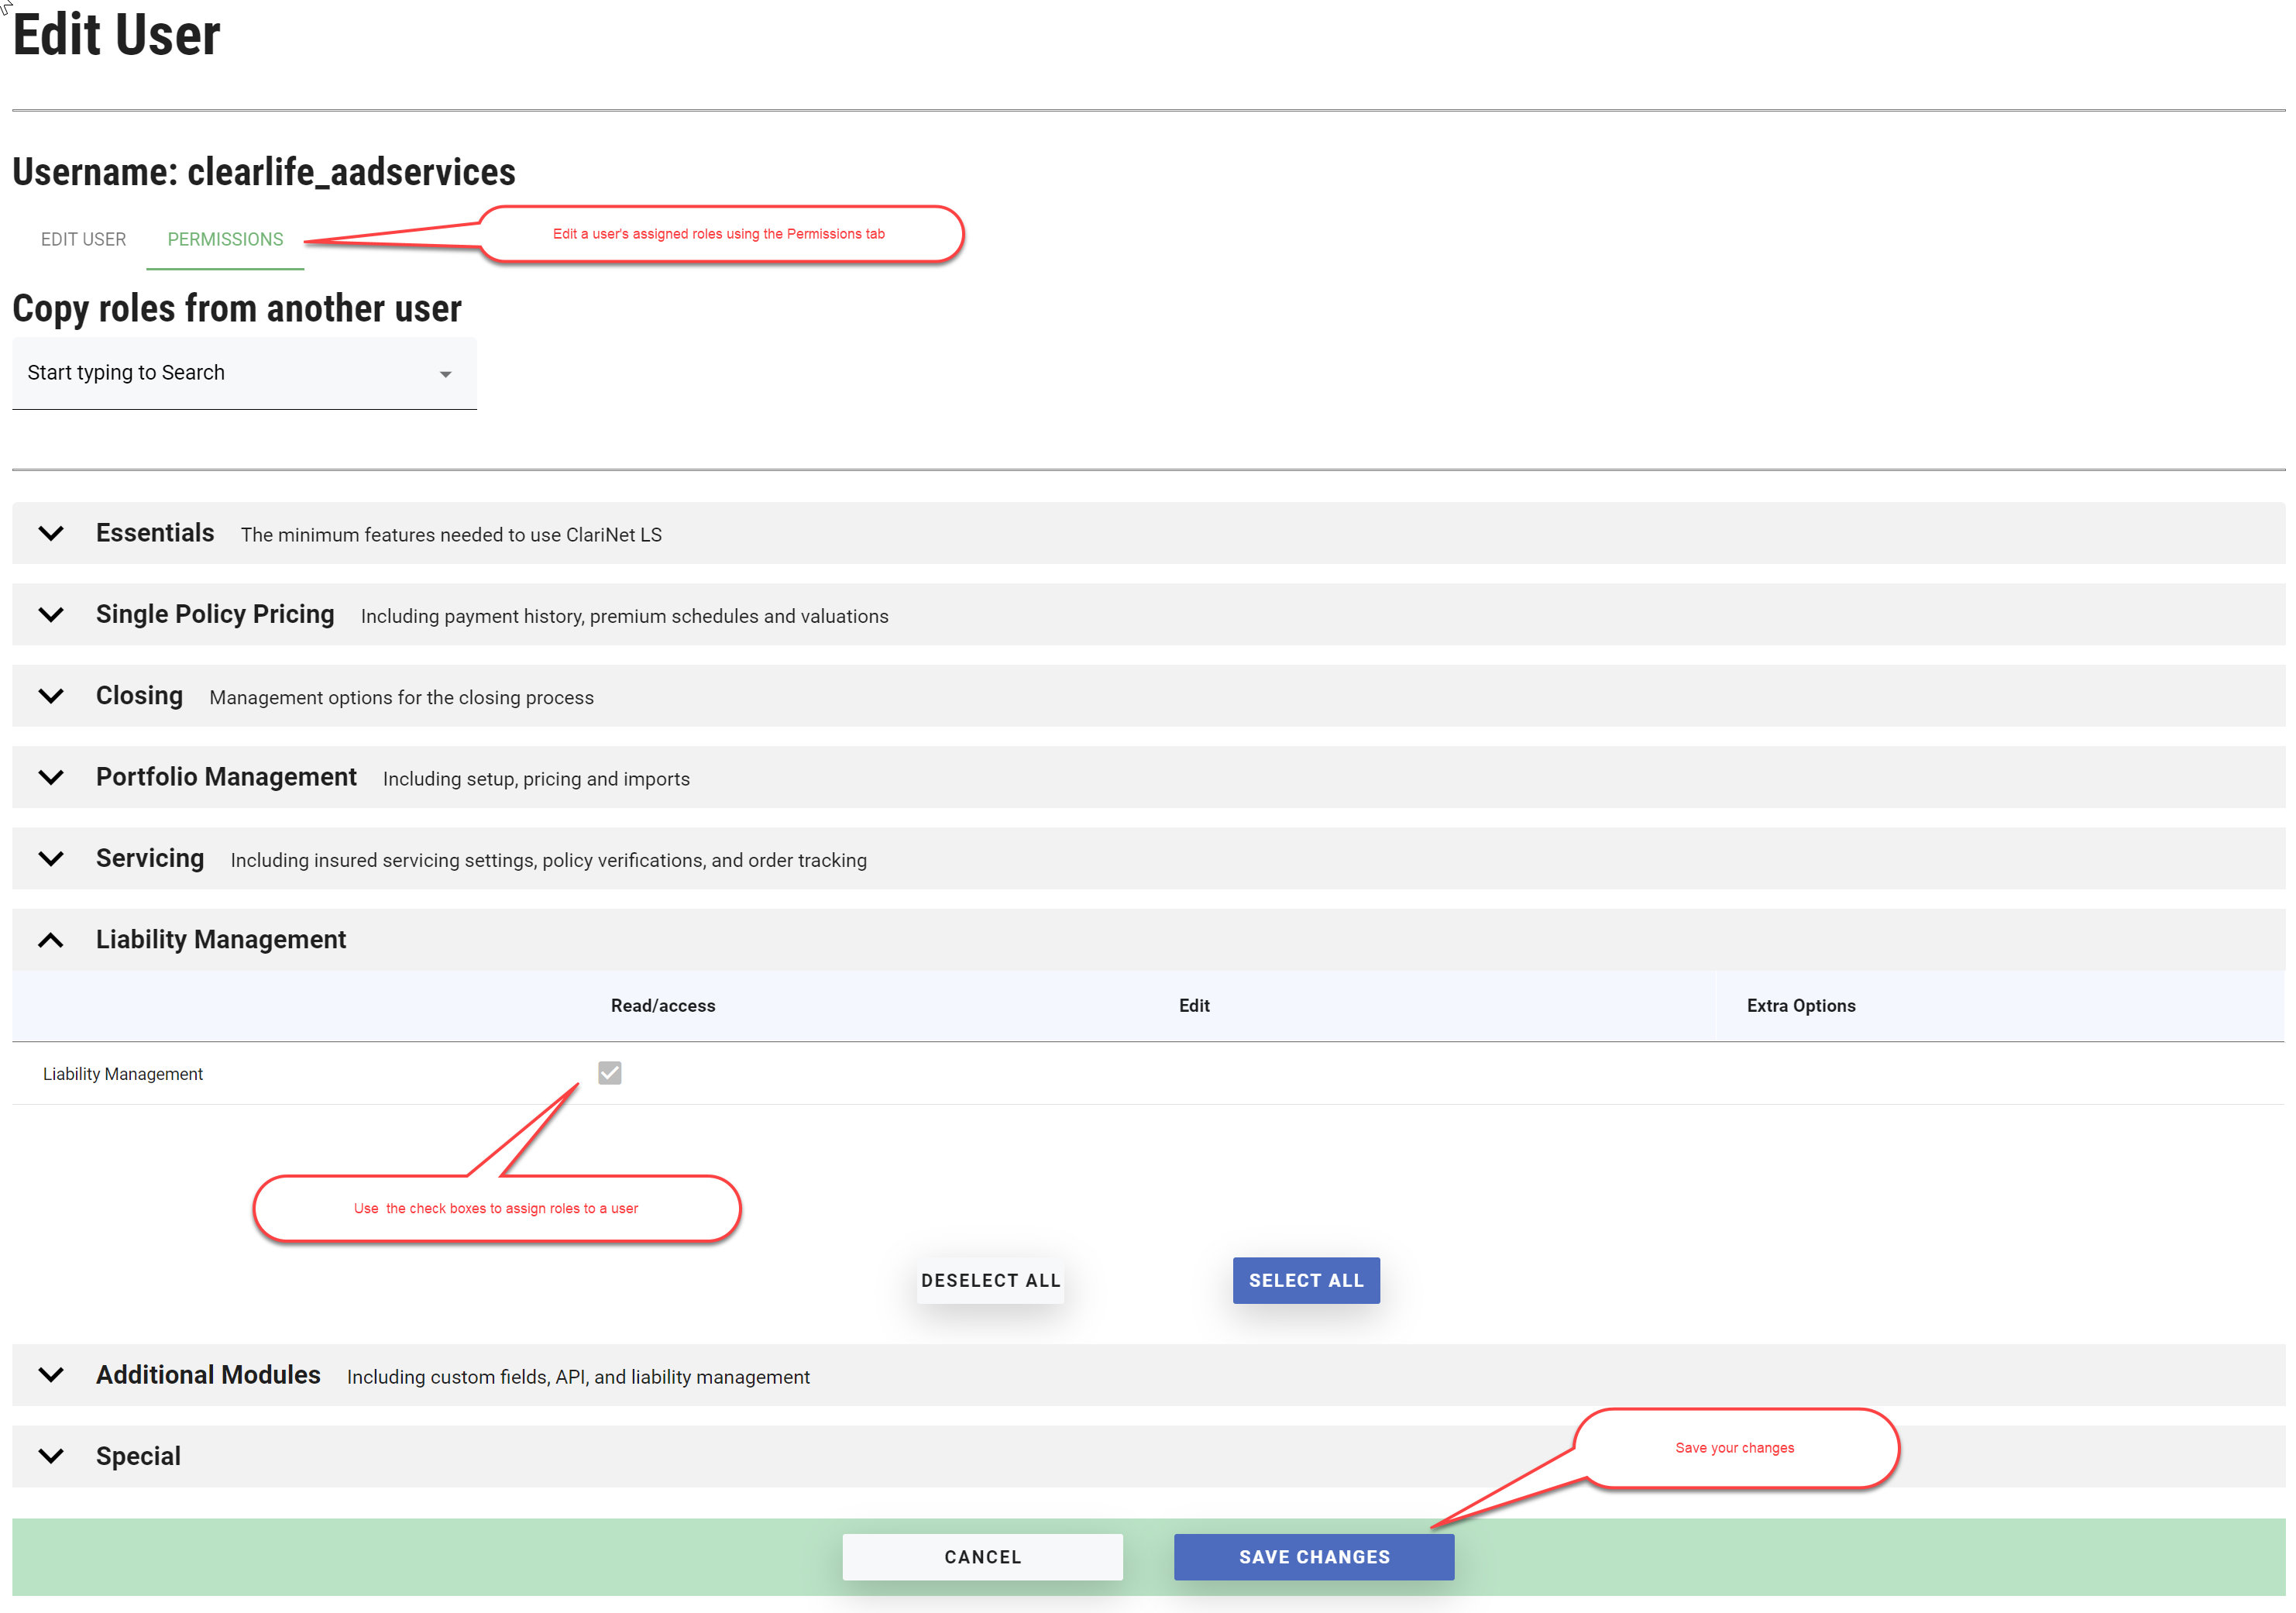
- For that user, click on the three dots image Action button next to it and select the Edit user & roles.
- The Edit User page for the selected user is displayed. Click on the PERMISSIONS tab, you will see the modules listed and associated roles. Check the boxes next to the roles you want to assign to the user.
You can only view, not edit, your own roles; they are shown as disabled.
- Once you have selected the required roles, click the SAVE CHANGES button at the bottom of the page to save the roles for the selected user.
If a user does not have sufficient permission to access a menu or perform a required action in the UI, check they have the correct roles assigned, see Permissions and Roles for a full list.
See also Security Details for changing passwords and switching on/off MFA Authentication.
Rescuing a locked-out user
There can be scenarios where users are locked out of ClariNet due to multiple incorrect password attempts. To ensure secure accounts for ClariNetLS, the system will lock a user account. Users will be prompted to contact their administrator to unlock their accounts. Administrators can choose to either unlock the account or reset the password. Below are the steps to achieve this;
- Login to ClarinetLS with an admin account.
- On the new tab, search for the user you need to unlock.
- Use the action button (the 3 dots) and select 'Edit user & roles'.
- Uncheck the check box named 'Locked out', and click on save.

The “Reset user password” button will send an email to the user’s listed email address allowing them to click a link and reset their password.