Case Lists
Case Lists are created based on filters. Certain default Case lists (e.g., All Cases) are included with the Essentials module. Building the filters for other Case Lists is done using the Advanced Search tool, see Searching.
Column Headings and Sorting a Case List
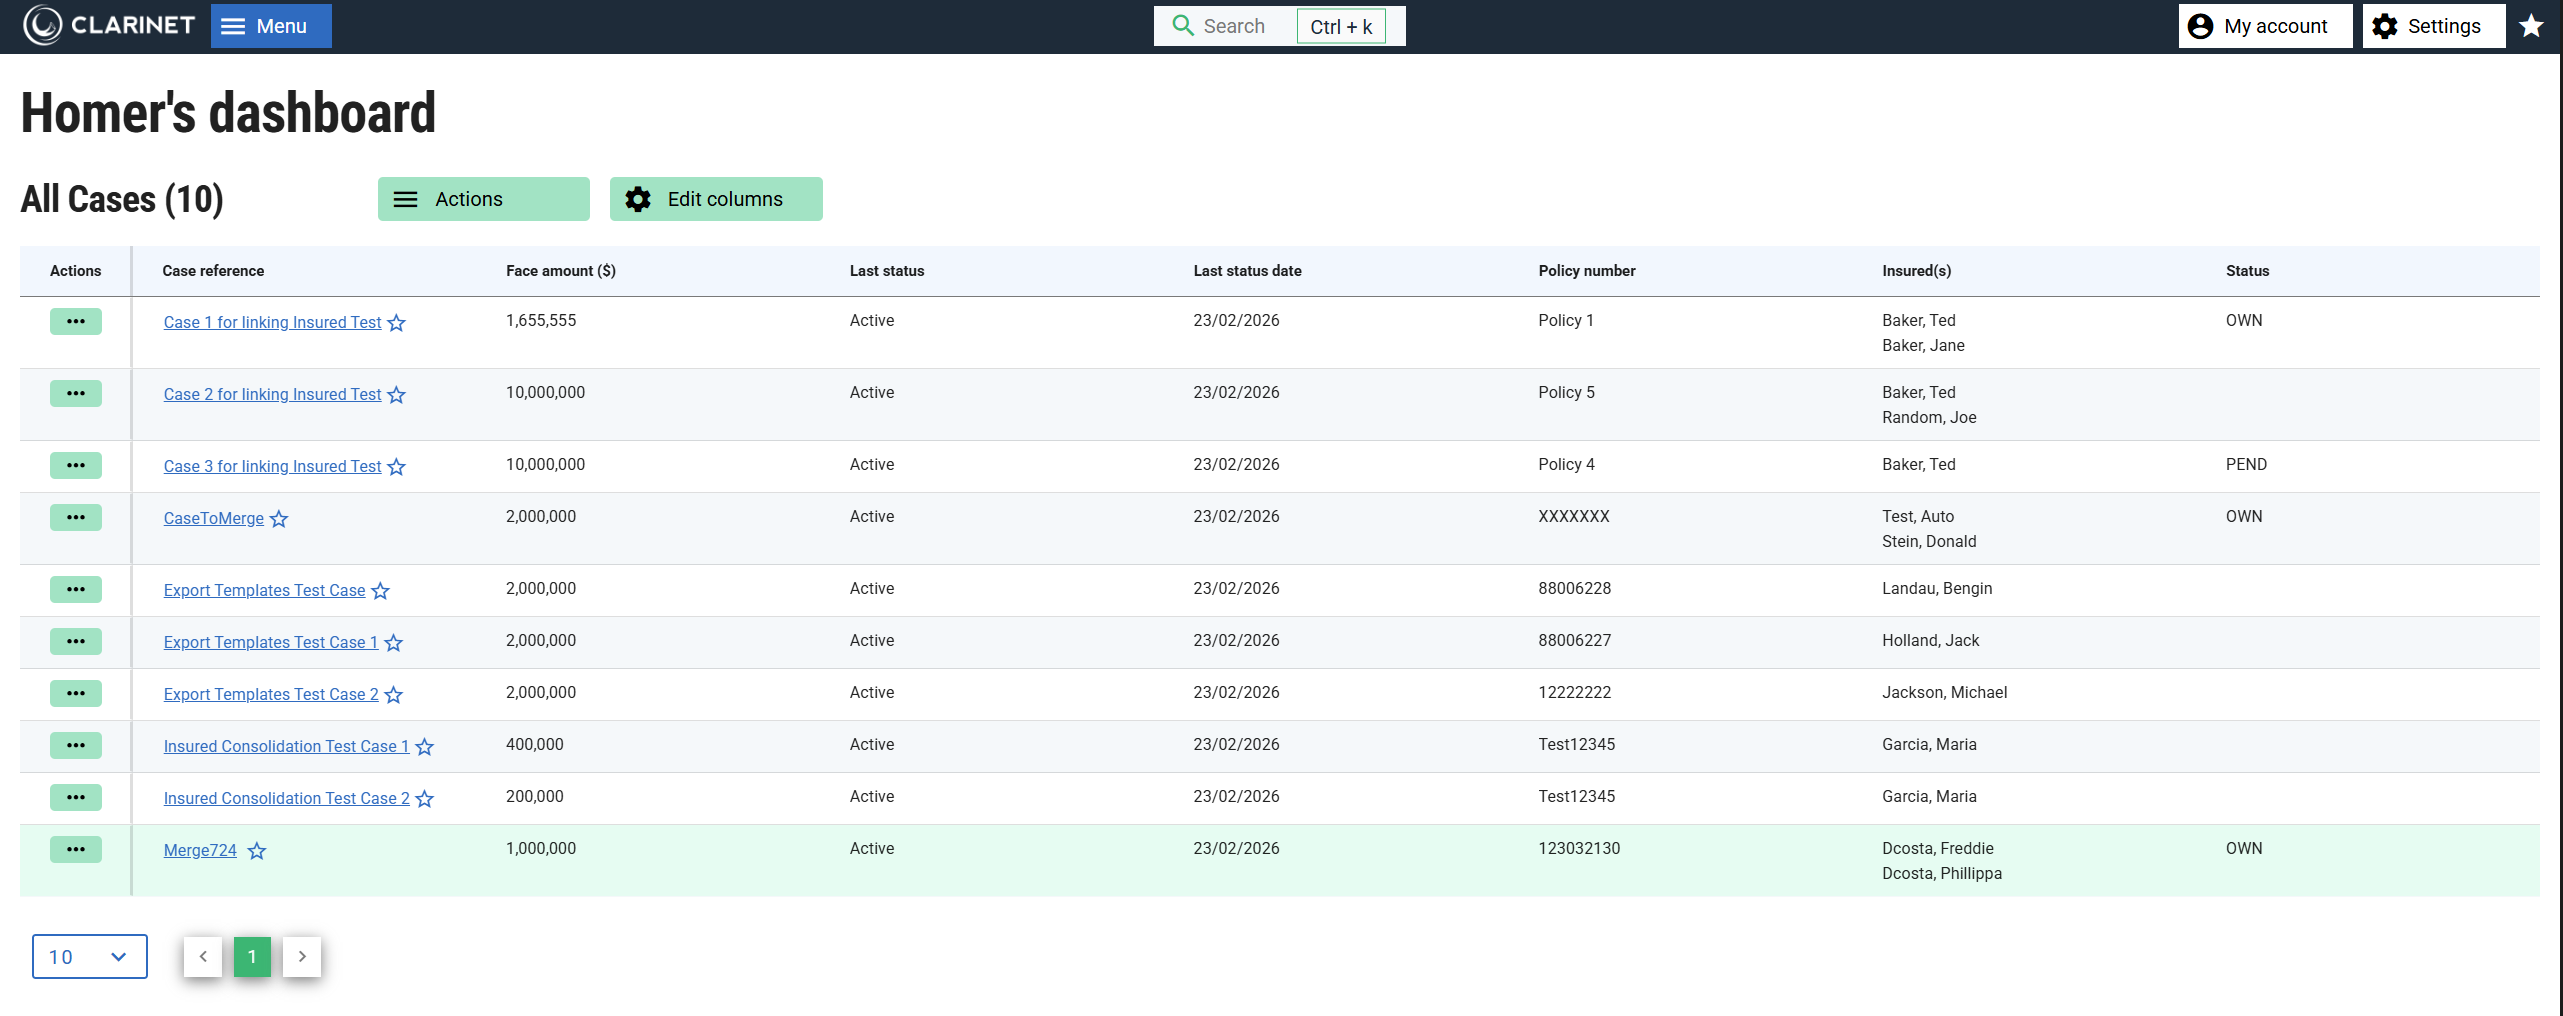
The fields displayed in each Case List can be customized for each list. To start with, as a new user, only the Case Reference will be shown.
- Case Reference (from the Case page)
- Insured(s) (from the Insured Lives page)
- Carrier (from the Policy page)
- Policy Number (from the Policy page)
- Face Amount (from the Case page)
- Status (determined based on data in the Cost/Maturity/Disposal page)
- Last Status
- Status Date
- Pricing Analyst (from the Case page)
- Send Custom Bid Status (from the focused Transaction on the Transactions page)
- Received Custom Bid Status (from the focused Transaction on the Transactions page)
You can sort the Case List by clicking on any of these column headings. The currently active sort key and its direction are shown in the column headings:

Last Status/Status Date
The Last Status shows the result of the most recent Transaction Event or change in Case Status. The Status Date shows the date when this occurred. For further information on Last Status, see Process Flow.
Actions Column
Each Case List also contains an actions column at the left hand side of the table. You can interact with the Cases in a Case List using the menu items that appear on clicking the actions menu:
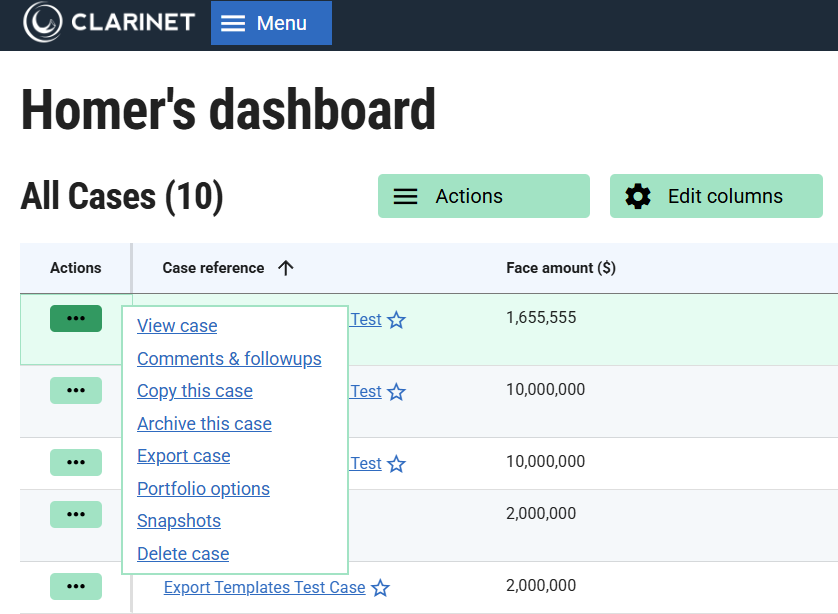
Reading from left to right, these are:
View case: Open the Case View. For information on the Case View and its contents, please review the FAQ entitled “Case View”.
Comments & follow-ups: Comments on the Case can be added and viewed by clicking this icon. A comment can be marked as public or private. If marked as public, it will be sent with the Case should the Case be submitted to another ClariNet LS client through a Sent Transaction. If marked as private, it will not be sent with the Case.
Restore this archived case. This function is only displayed for Cases that you have just archived. It will allow you to return the Case back to an Active state.
Export Case: Clicking this icon opens the Export Case popup.
Portfolio options: Clicking this icon opens a pop-up that lists out the portfolios containing this particular case and allows you to add this case to existing or new portfolios.
Copy this Case: This icon allows copying a selected case. All the key details, including case, policy, and Insured details, are copied similar to a case snapshot. Clicking this icon copies a selected case, and a success message is displayed to notify that the case is copied.
Example of copied case.

Example of Insured reference for a copied case

Text (copy 1) is suffixed for the first copy of a case.
Customize Case Lists
Each user can choose which columns to display and specify their order.
To customize the columns that appear in your Case Lists:
Click on the Edit columns button to show the full list of available columns and alter the column selection based on what you would like to see by checking or unchecking the columns.
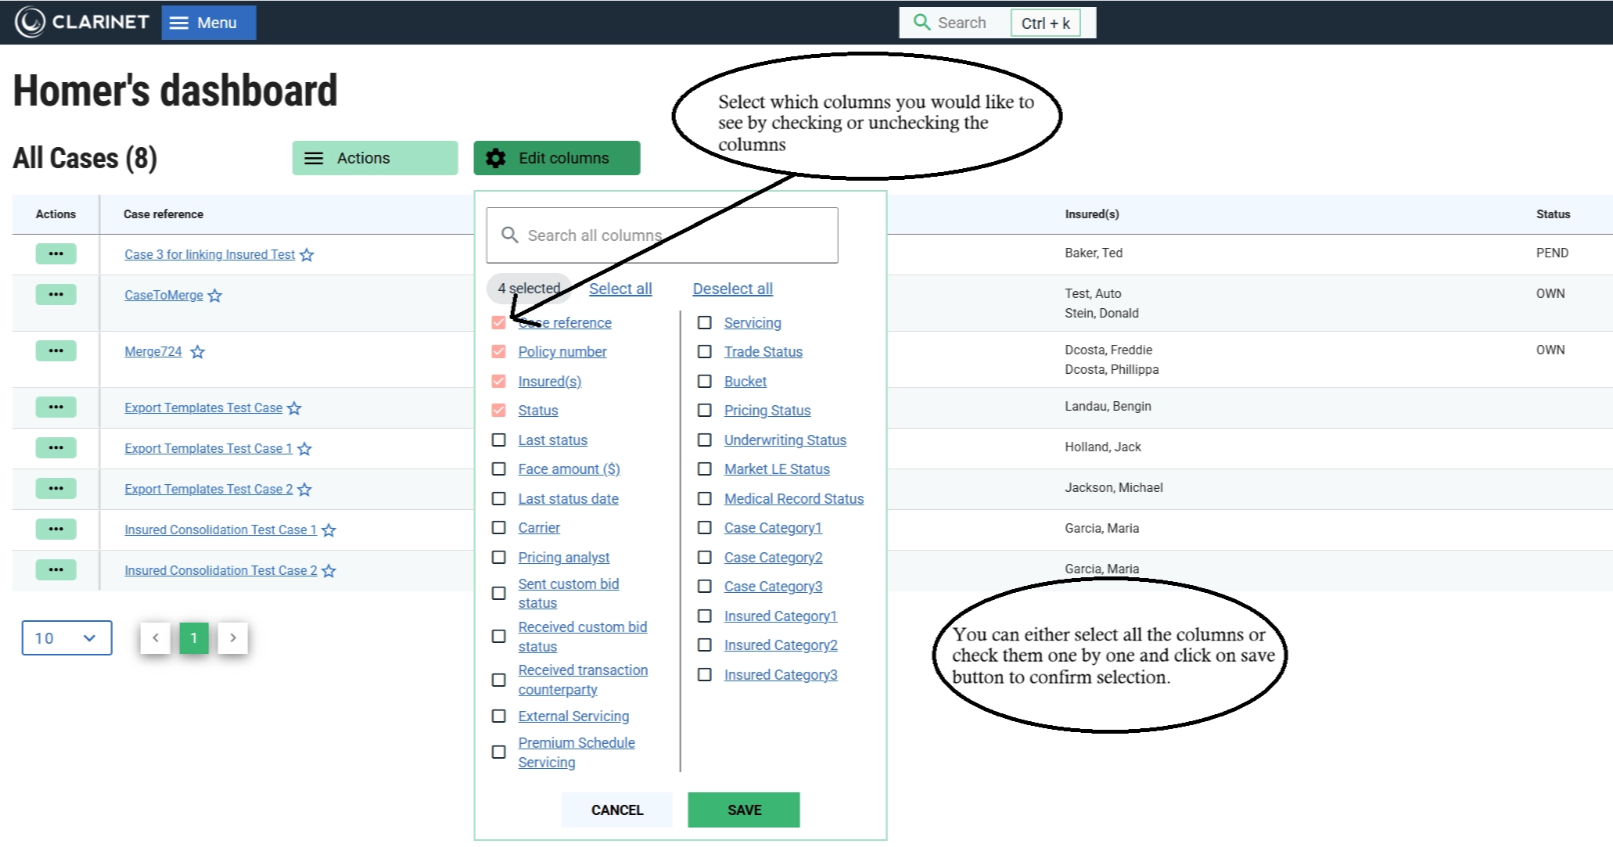
Once a column is shown on the Case List, you can further customize it by dragging it out of the grid to remove it, or resizing it by hovering at the right-hand edge of the column header until the cursor changes to a sizer icon. Then left-click and hold to adjust the size of the column.
From the context menu, you can reset the widths of all the columns to the default, or auto size the column and it will adjust it to fit the current content displayed. The settings you choose will automatically be remembered for you, for each Case List individually.

To change the order of the columns, left click and hold on a column header that you want to move, and drag it to a new position in the Case List. This will be automatically remembered for you.
Editing case lists shown on the home page
You can edit the Case Lists via My account, Customize home page.
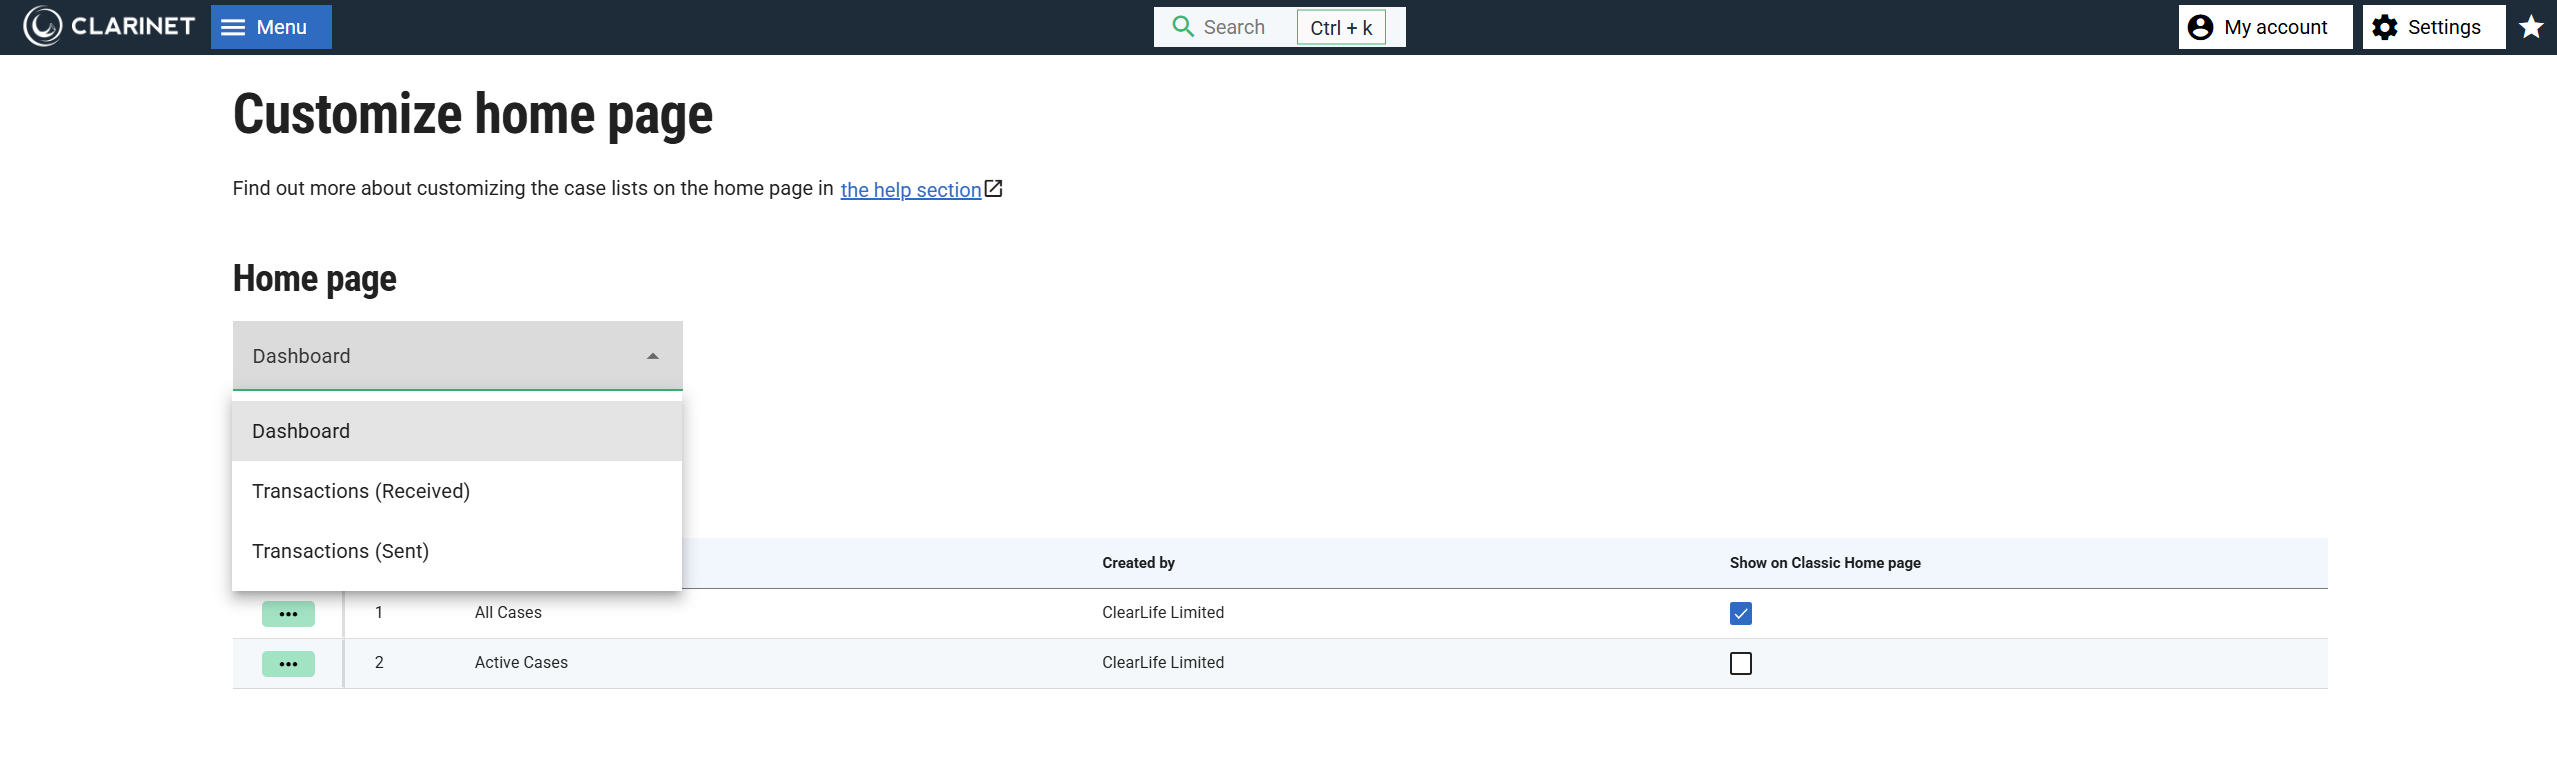
You can add the results of an Entity View as a Case list to the Homepage. When you create a new Case List, the layout of the default Case List is applied which you can then customize by selecting different columns, resizing, reordering and pinning as described above. This allows each user to display Case Lists on their Homepage using their own customizations.
To update the columns shown and the order, you can edit the entity view on Advanced search. Then once you are happy with the changes, click “Save this view” and “Update existing view”. All changes will then be reflected in the case list on the home page.

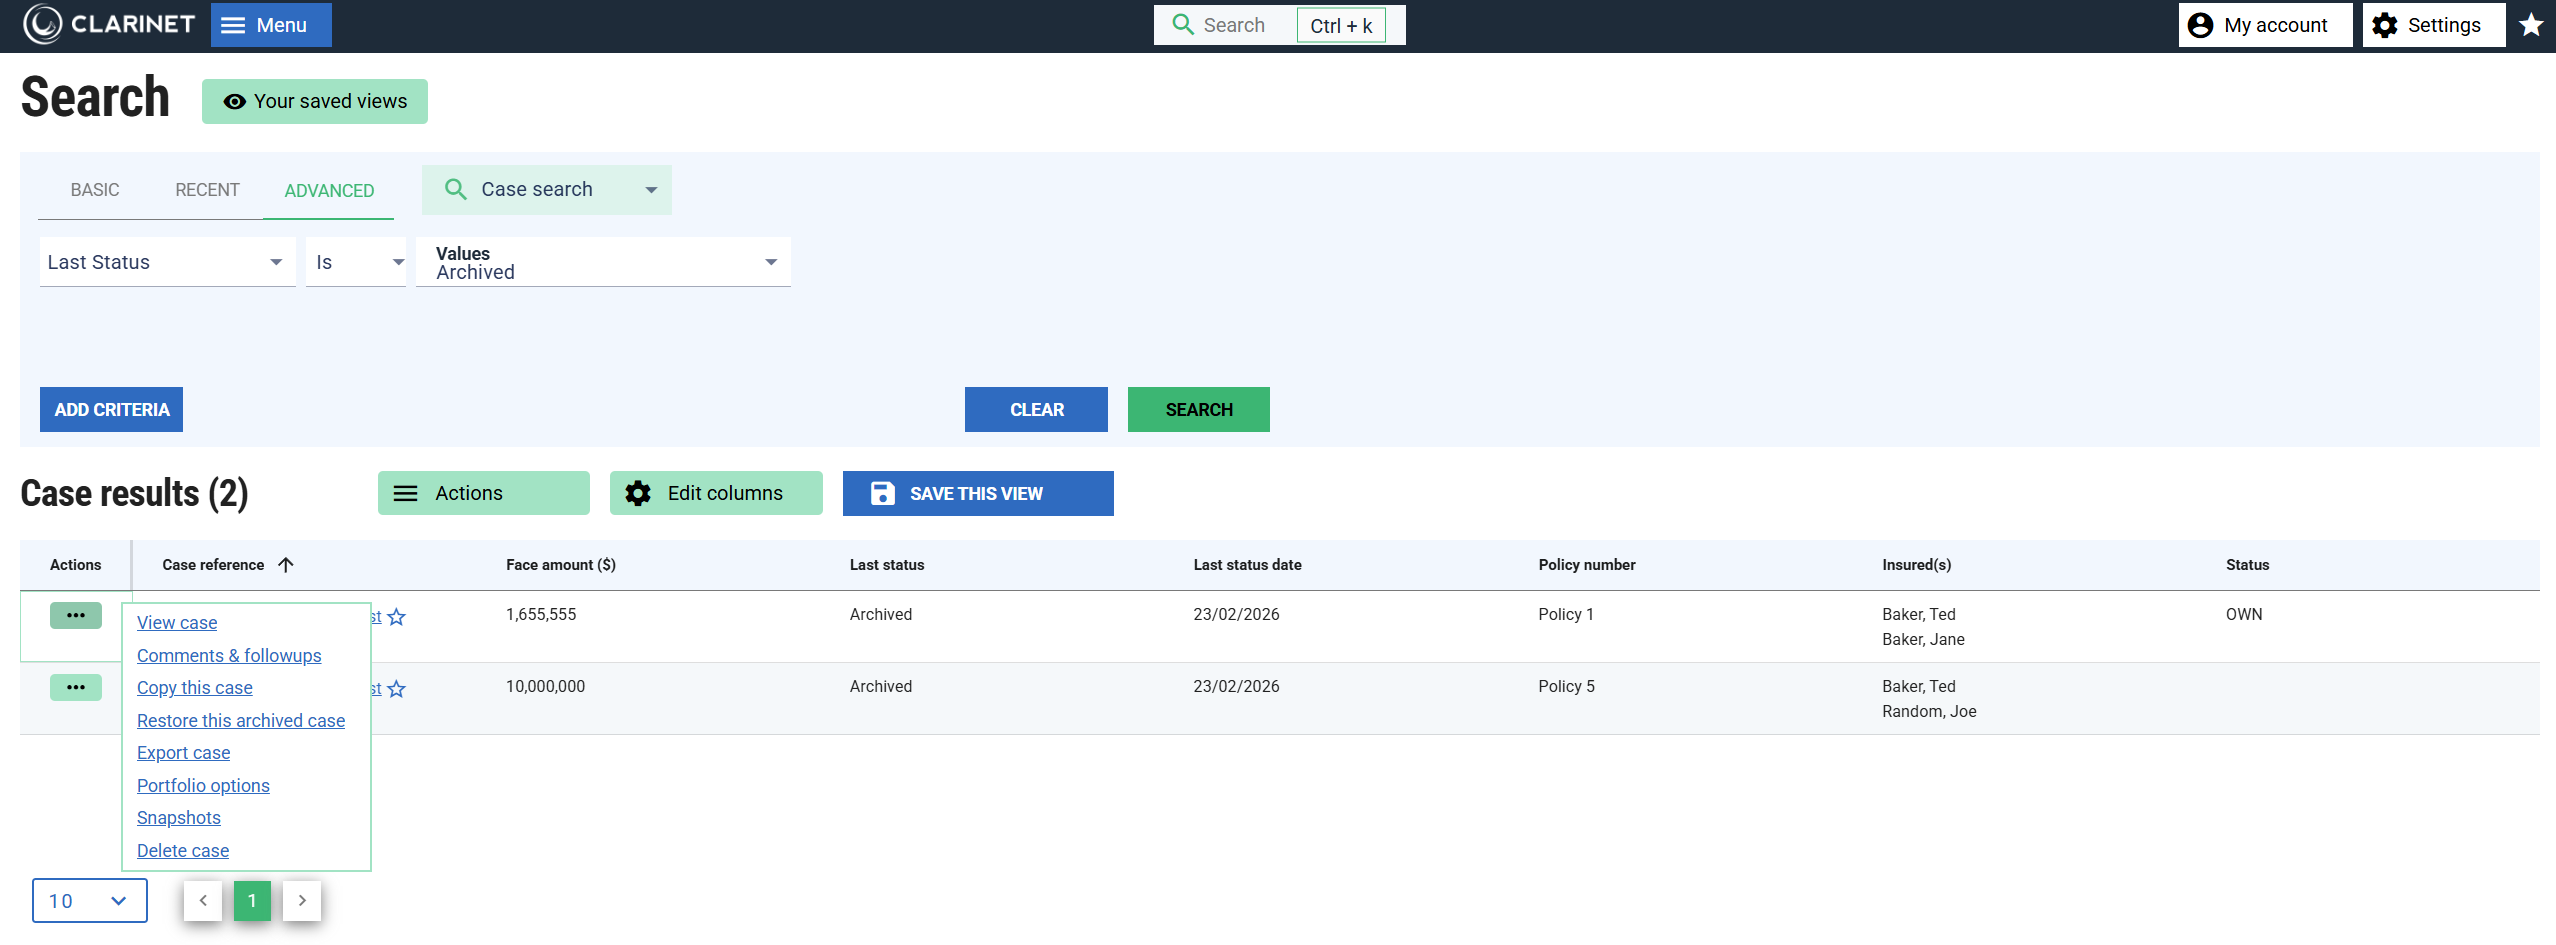
Archived Cases
To view archived cases, use the Last Status Search Criteria on the Advanced Search page as shown below.
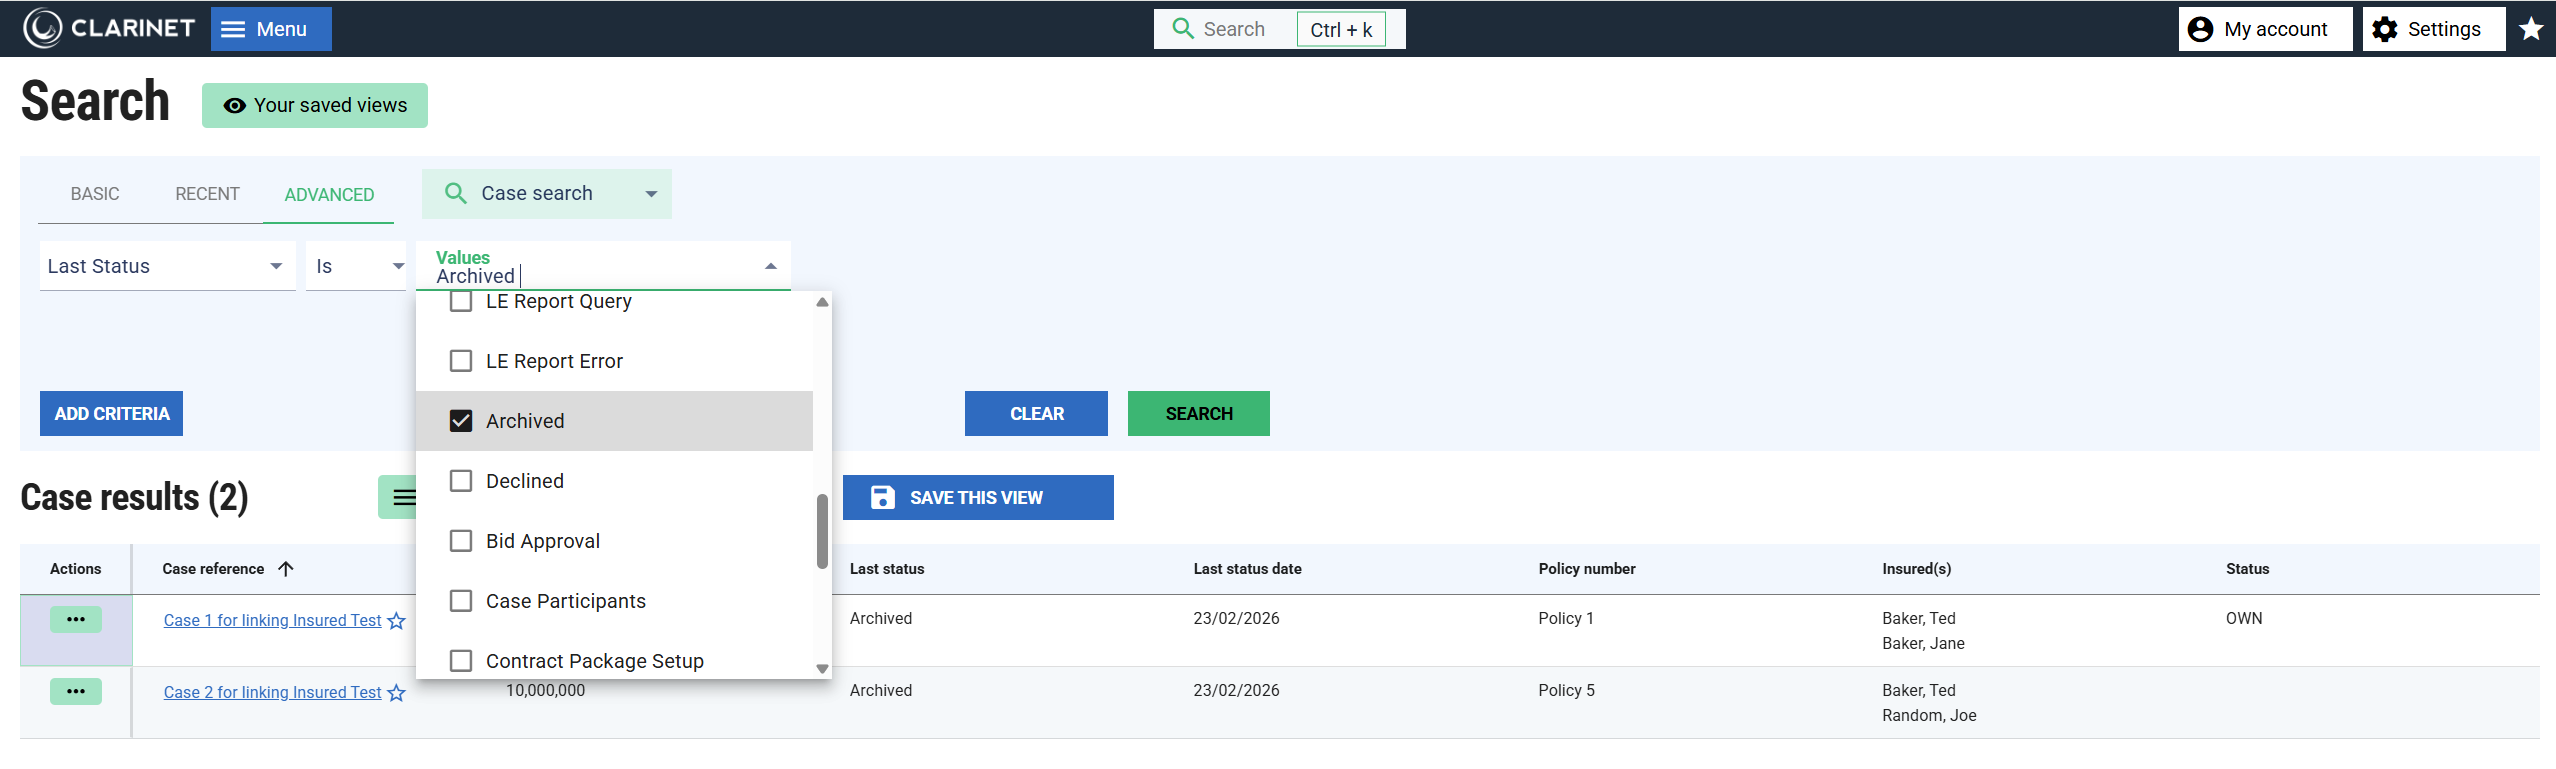
This is the only way to show archived cases. Simply click the PLAY button on the Case if you want to restore it, or by clicking on the hyperlink to restore the archived case as shown below