Excel-Style Row Editor
The Excel-style row editor (used for example on the Illustration) mimics the functionality and feel of a typical spreadsheet editor such as Microsoft Excel and so enables you to edit data in a way you may be familiar with. It even supports Control+Z to undo your last change! This functionality is tested in MS Excel, and we refer to Excel in this document, however instructions should still apply to other spreadsheet editors.
Depending on where this editor is used, not all options may be available in every scenario.
View and Edit modes
Like other fields on the screen, the rows can be in a view mode or an editable mode.
In the view mode you are not able to edit the data, it is read-only. All cells are greyed out. However you can still select cells and copy (using Control +C or the context menu shown with a right-click of the mouse), and then paste into a spreadsheet program. You can also use the context menu (right-click of the mouse) to Download the entire table in CSV format (see below).
In the edit mode, editable cells have a white background, as in Excel. The headers and row selectors (the empty grey square at the beginning of each row) cannot be edited. Further, some tables may contain cells that cannot be edited because they are calculated, such as Policy Year or Insured Age in an Illustration table. Note that even if these cells are read-only, they can still be part of a selection and copied to the clipboard. However, pasting will have no effect on them.
Dropdowns
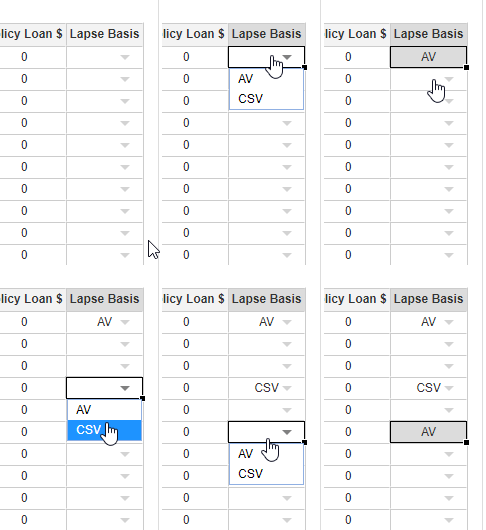
Certain fields may have a dropdown to select values. Unlike the rest of ClariNet LS, you will need to double click on a field in order to see the available options. You can then click on one of the options to select it.
Adding a row
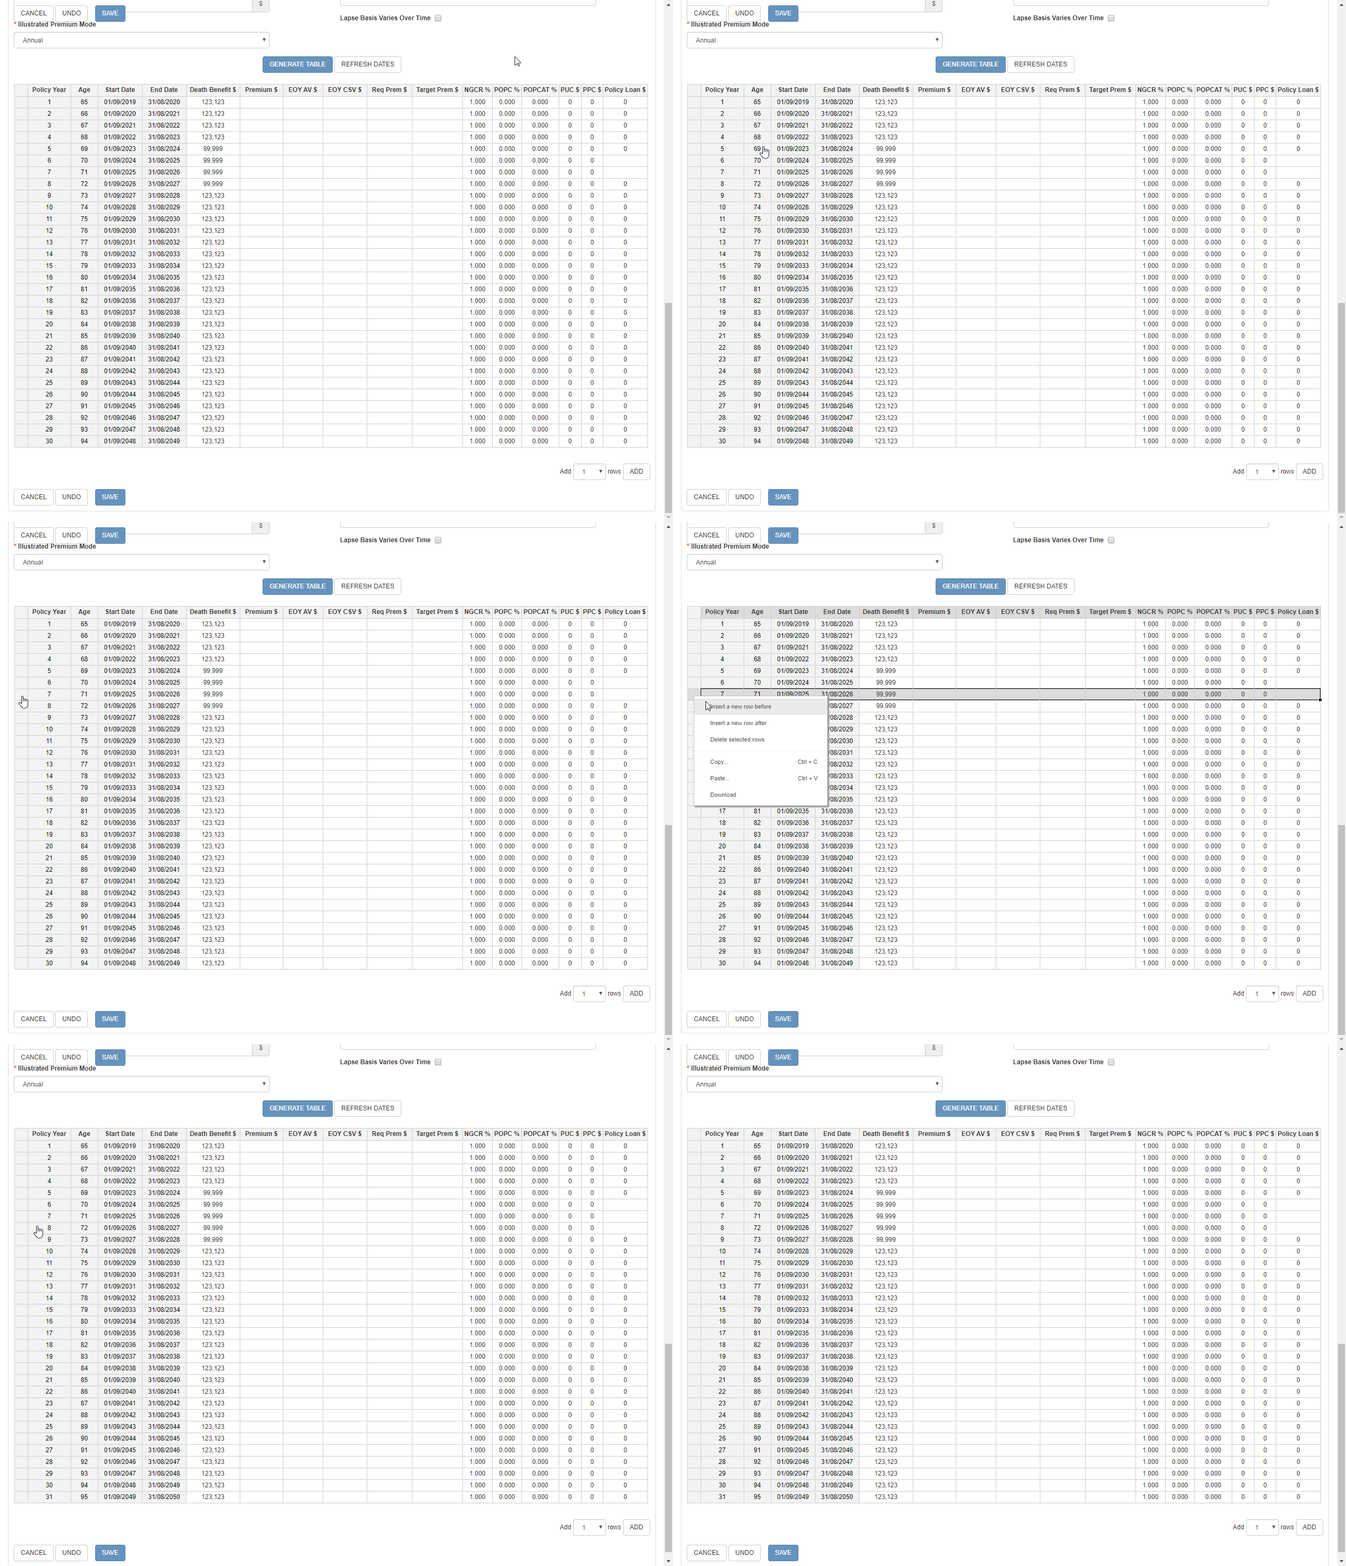
You can add a new row by right clicking on the row selector (the grey square at the beginning of each row) and then selecting "Insert a new row before" or "Insert a new row after", which will add a new row either before or after the selected row. In the case of the Illustration page, this new row will be given a Policy Year, Age, Start Date and End Date automatically.
Moving a row
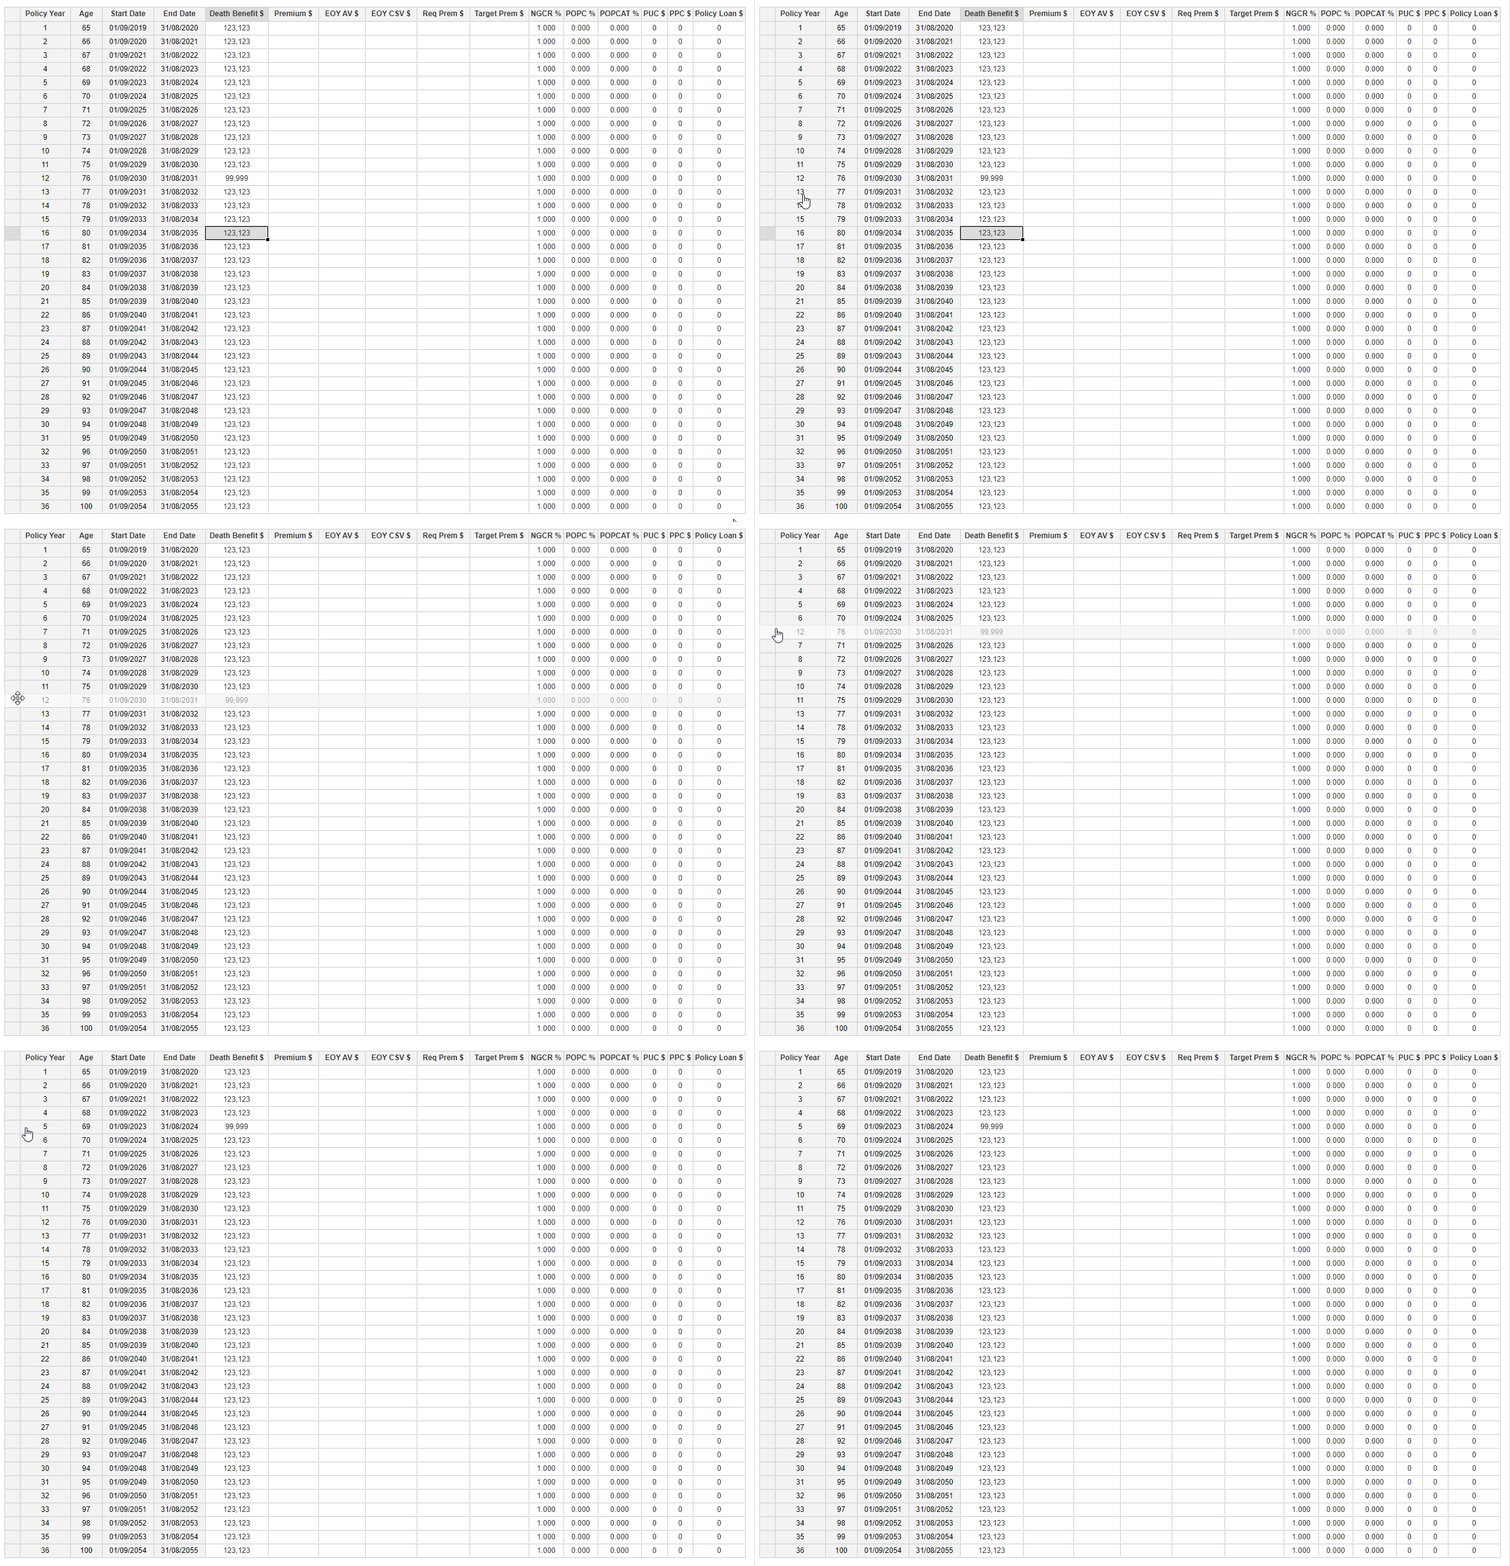
To move a row, move your mouse pointer over the first column (to the right edge of the square, just before the vertical line separating it from the next cell) until your cursor changes into a move cursor (four arrows). You can then click, hold and drag the row to move it. Release to drop the row in its new location.
In a table such as Illustration, calculated fields are recalculated after dropping the row in its new position.
Deleting a single row
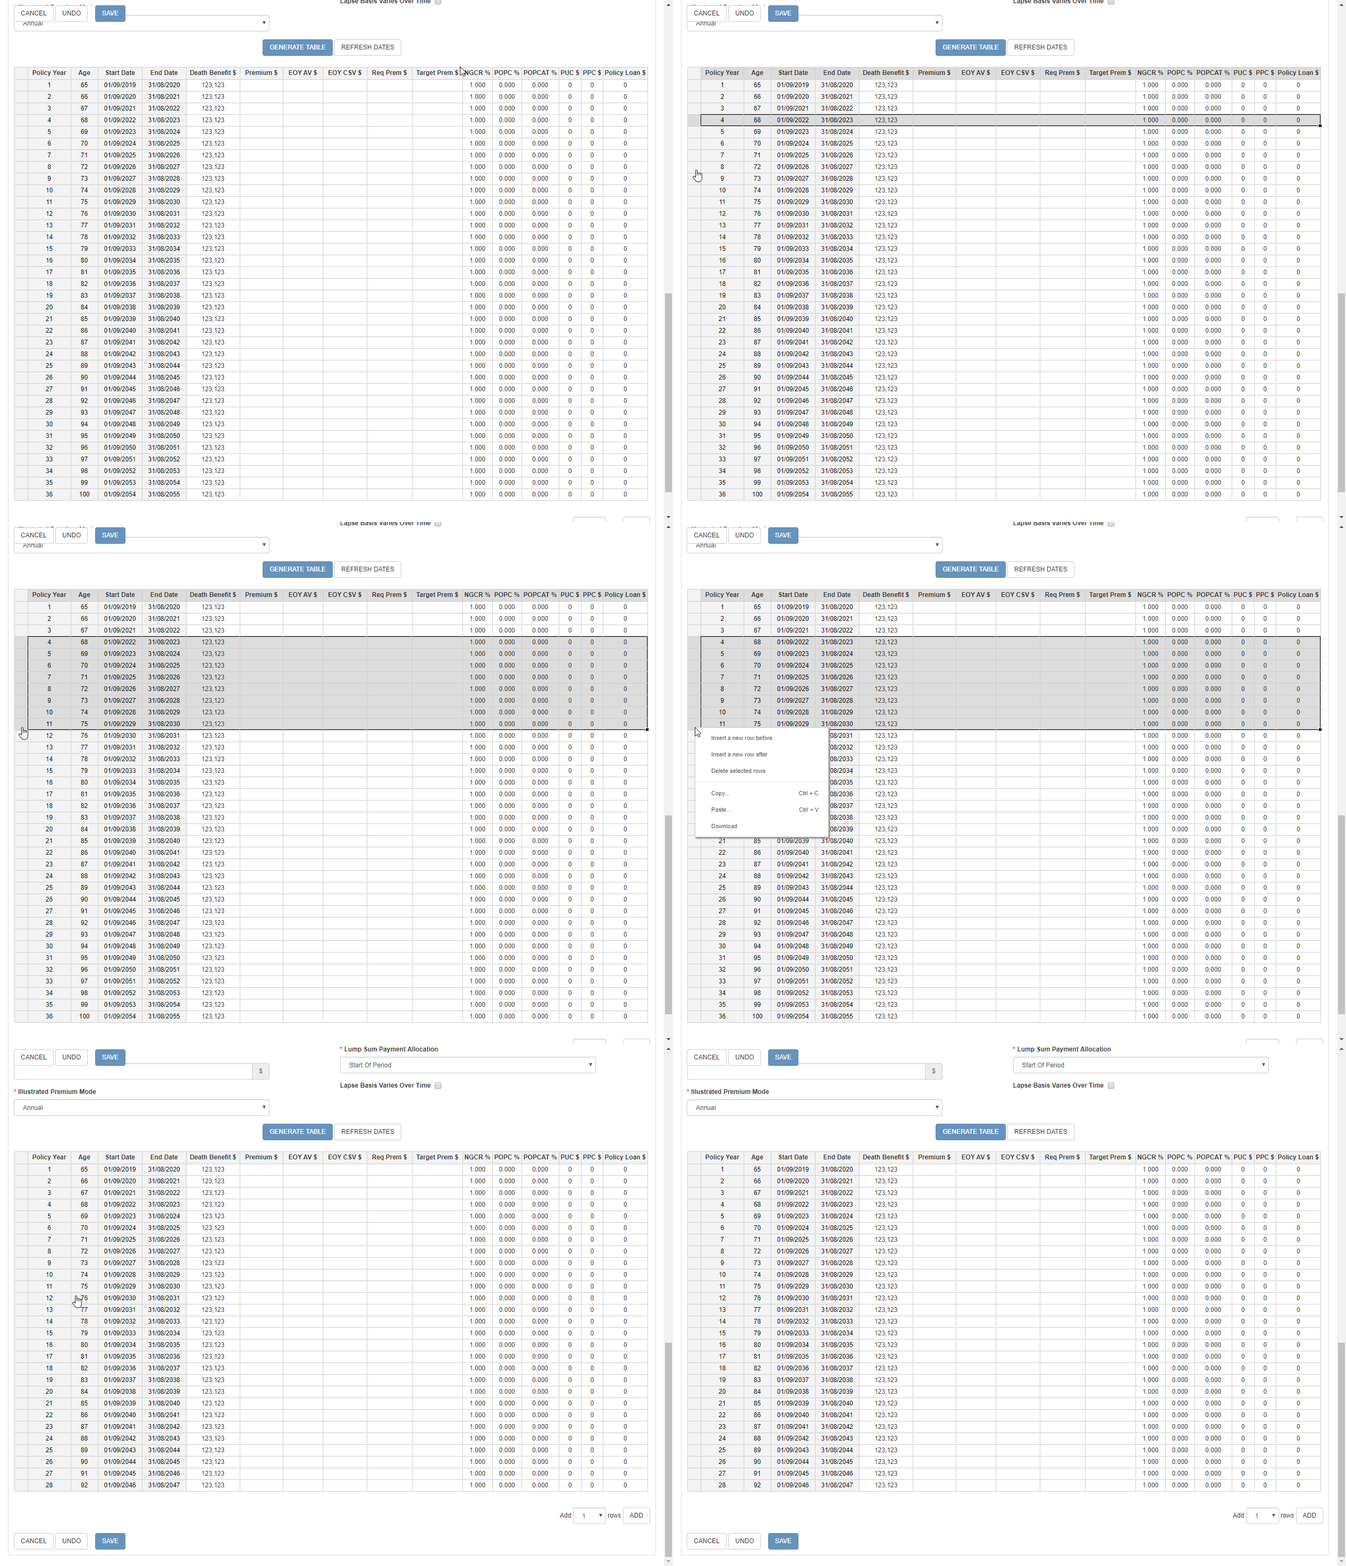
To delete a row you can click on the first column to select the entire row, and then press the Delete key on your keyboard. You can also right click on the first column and select "Delete selected rows". You can delete multiple contiguous rows at once by clicking on the first column of the first row, to select it, then holding shift while you click on the first column of another row. You will then get a selection of multiple rows, and you can either press Delete on your keyboard, or right click and select "Delete selected rows".
Deleting all rows
You can delete all rows by selecting the entire table by clicking the top left square and then right clicking the left hand column and choosing "Delete selected rows".
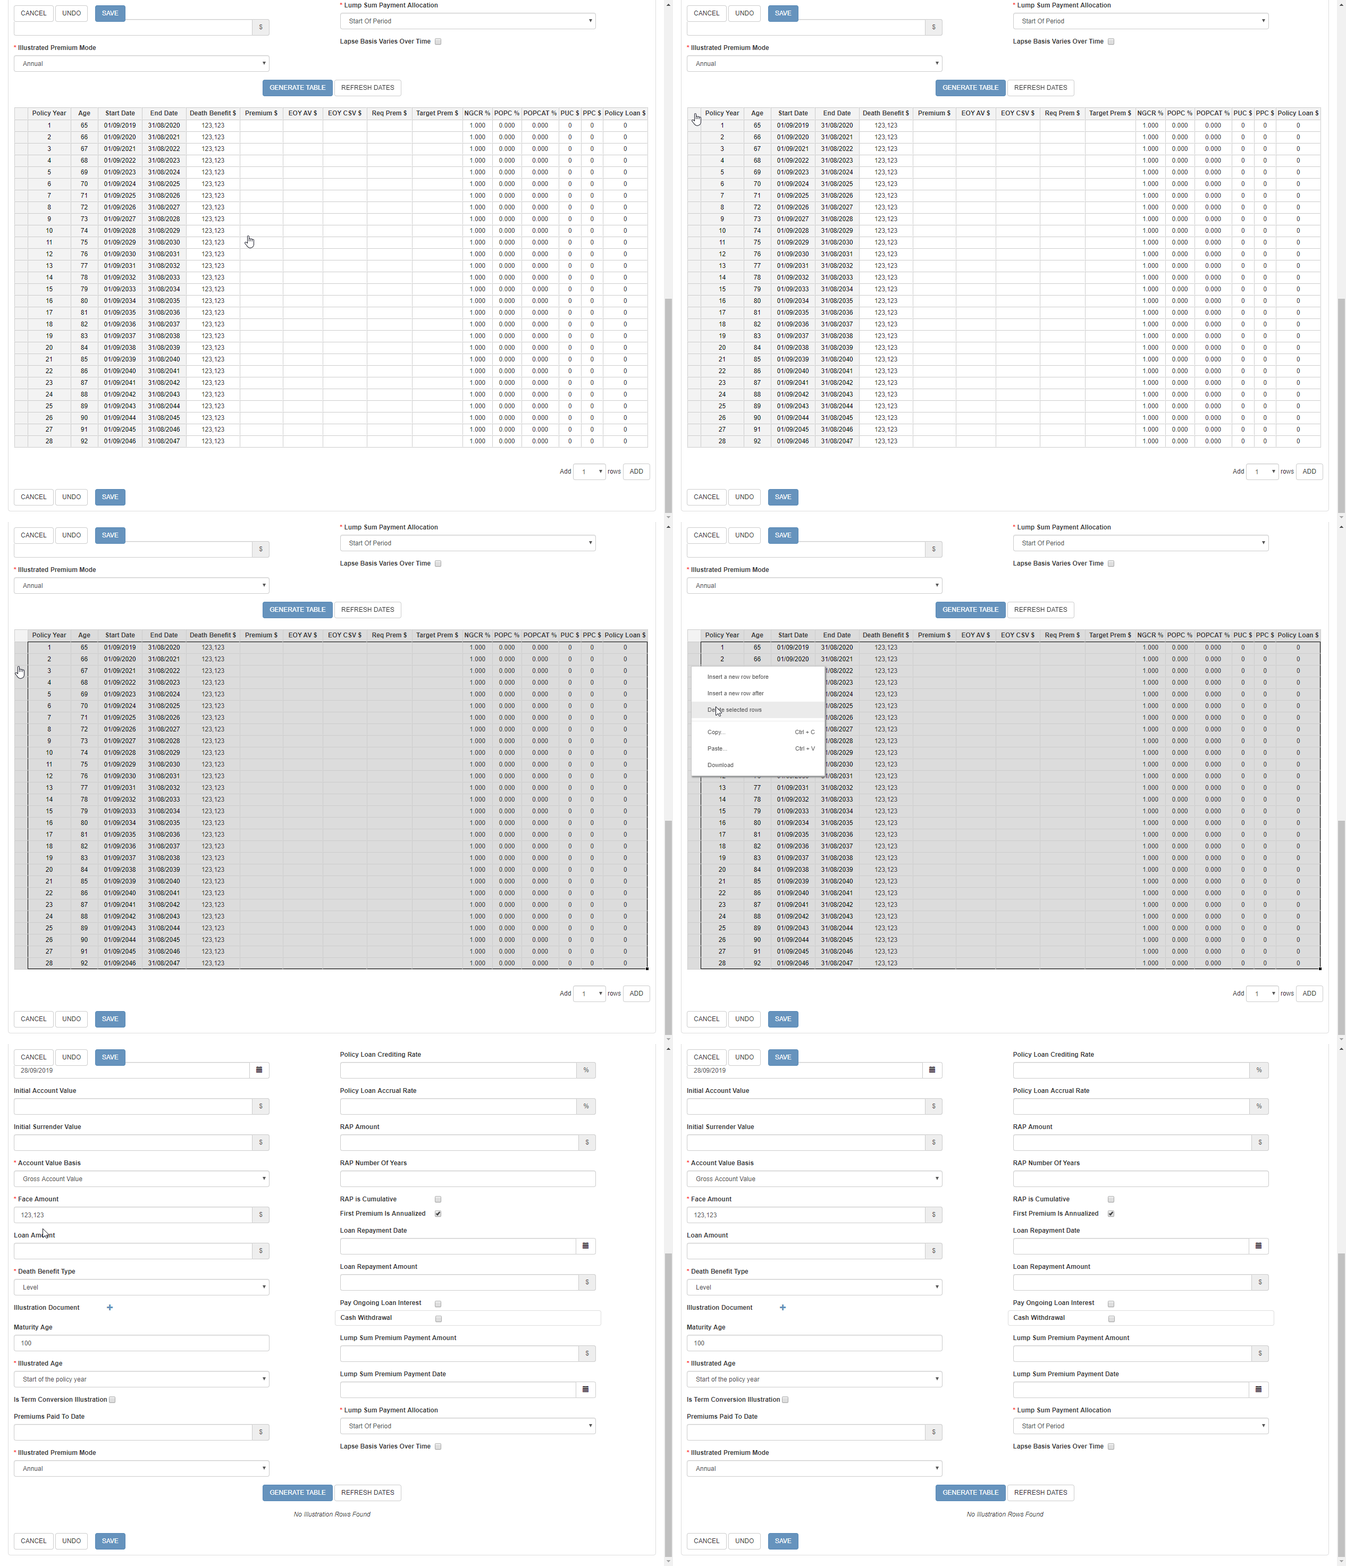
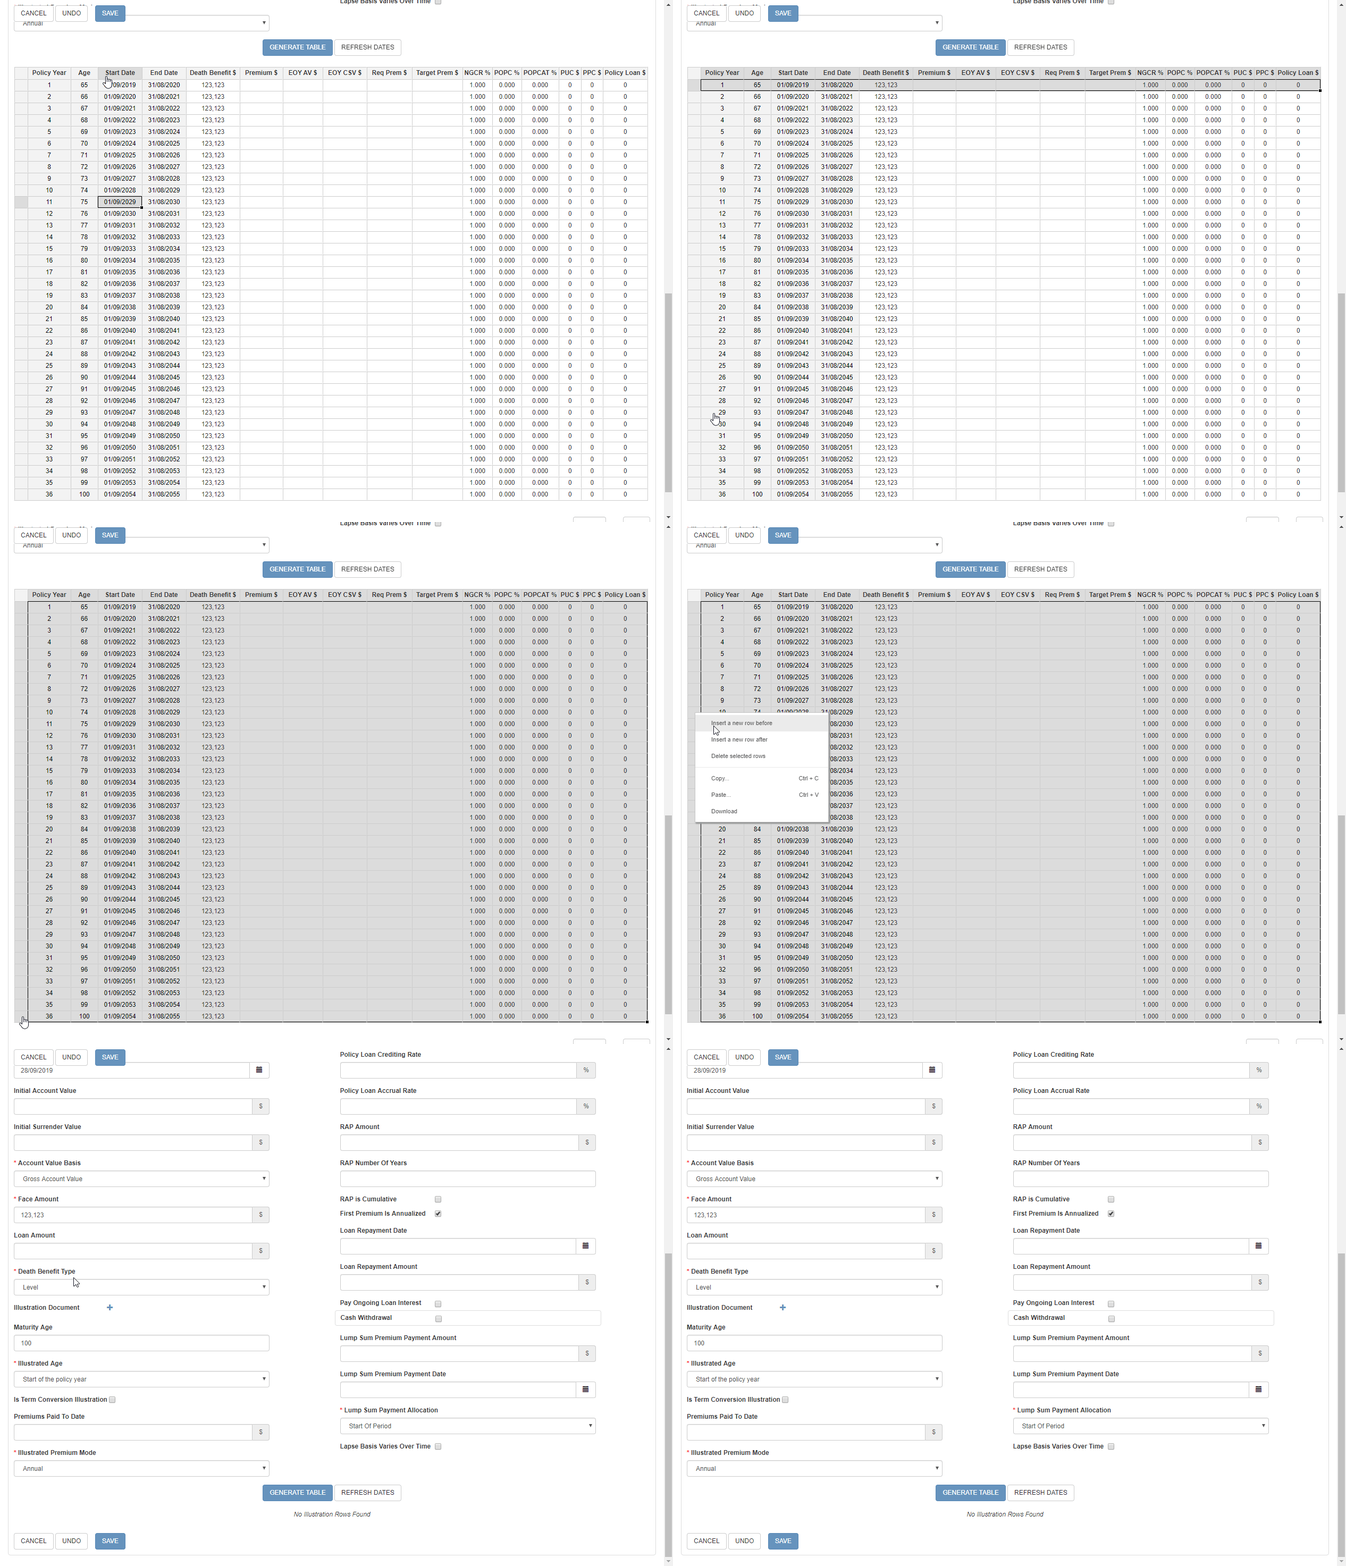
You can also select the first row (click on the row selector in the first column) and then while pressing shift, click on the row selector of the last row. Finally, you can either right clicking and selecting "Delete selected rows", or pressing the Delete key on your keyboard.
Copying a cell by dragging
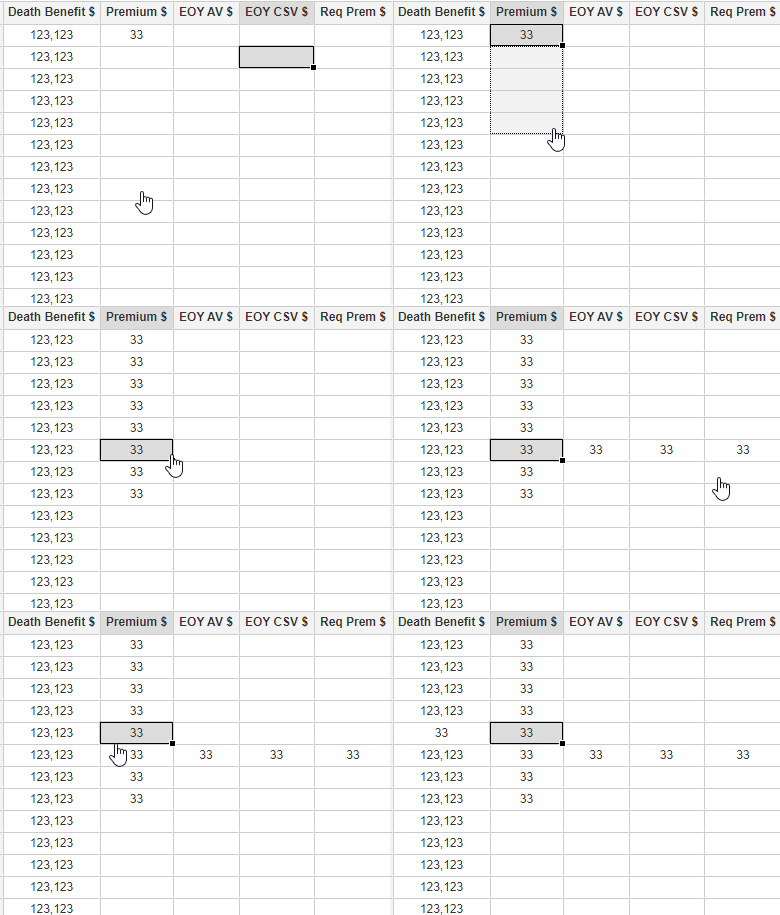
The editor allows you to copy a cell by clicking on the bottom right hand corner and dragging to neighbouring cells in top, right, left or bottom directions. Once you let go of the mouse, the value from the first field will be copied to all the cells that were selected.
Please note that unlike Excel, selecting a logical series of number (for example three cells with values 1, 2 and 3), dragging the corner will not fill in the rest of the series (for example filling in 4, 5, 6 etc.)
Copying a cell by Copy/Paste
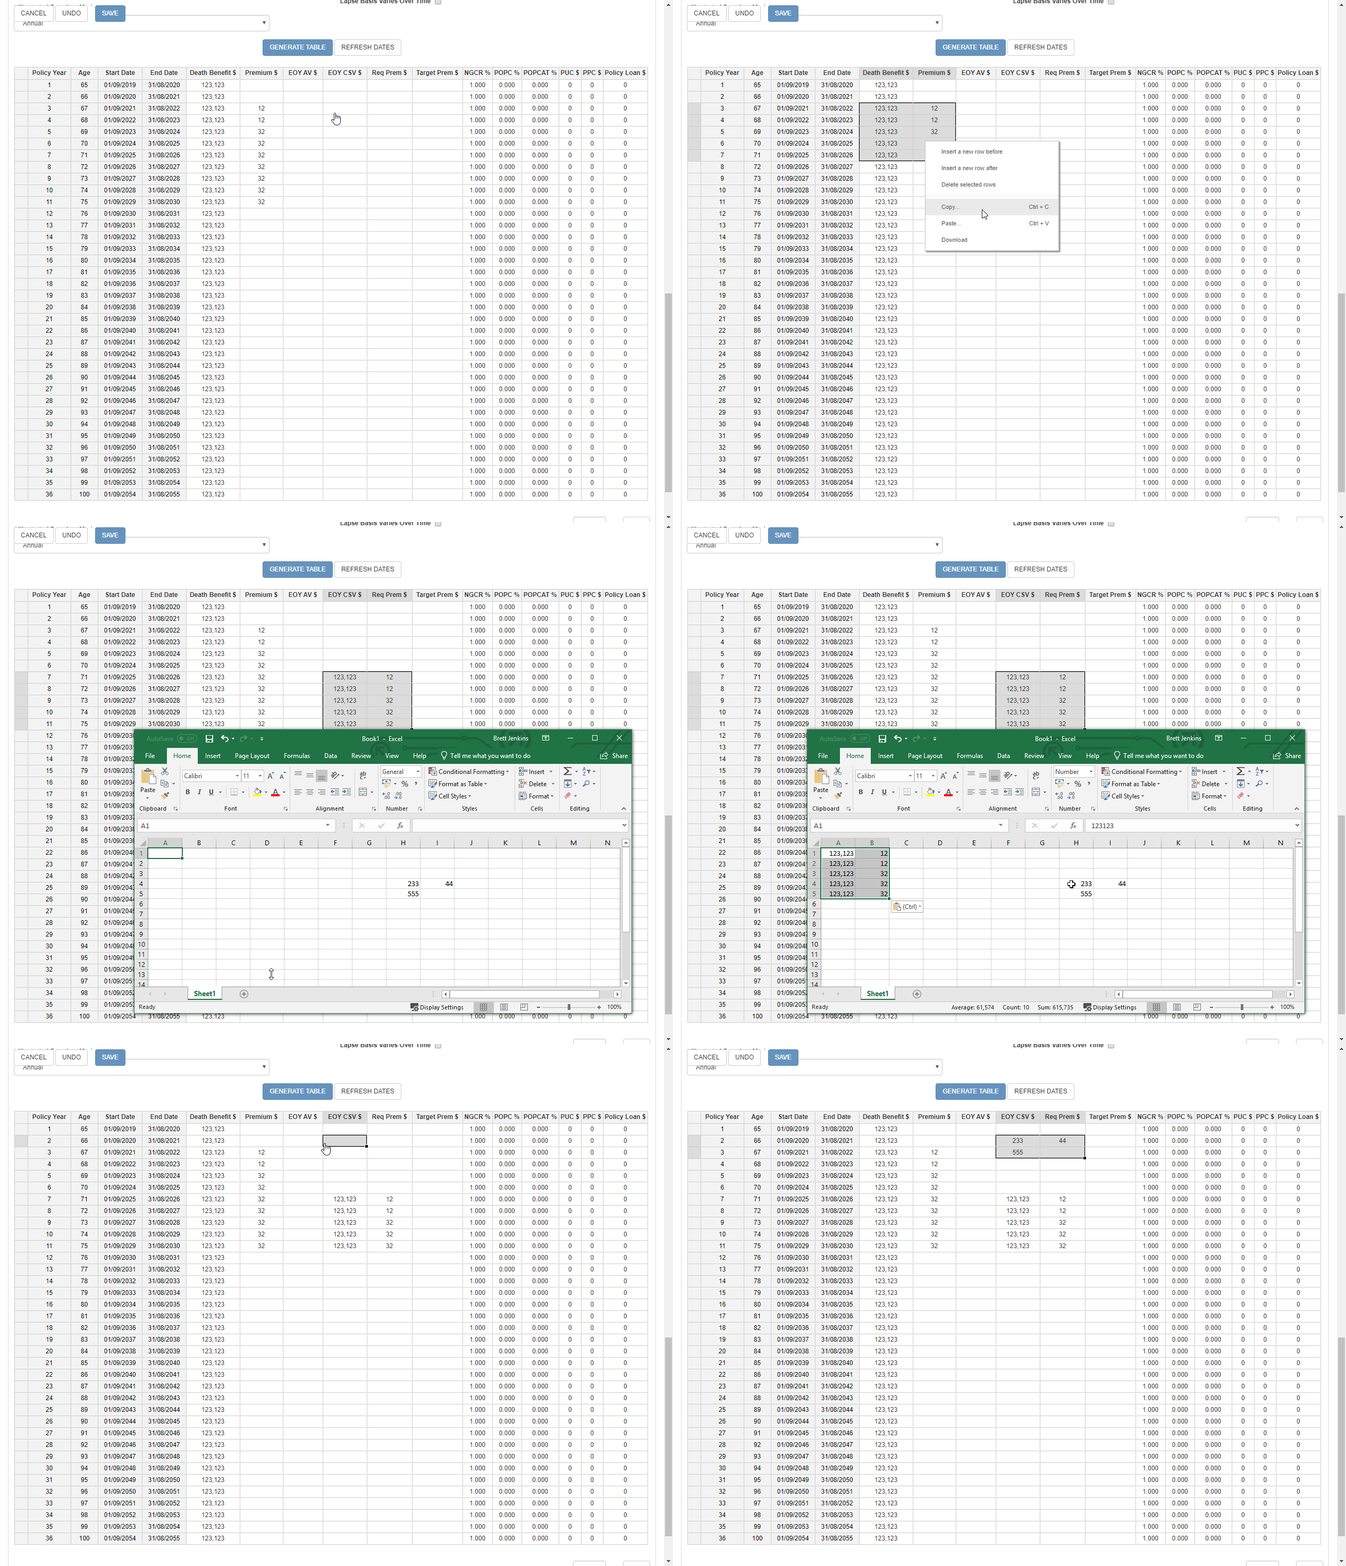
You can copy and paste cells by selecting a cell (or a selection of cells) and either right clicking and choosing "Copy", or by pressing "Ctrl+C". You can then paste to another section of the same table, or to an external spreadsheet program, by pressing "Ctrl+V" or right clicking and selecting "Paste".
Downloading
While you can copy the entire table and paste to an external spreadsheet program, the headers will not be copied.
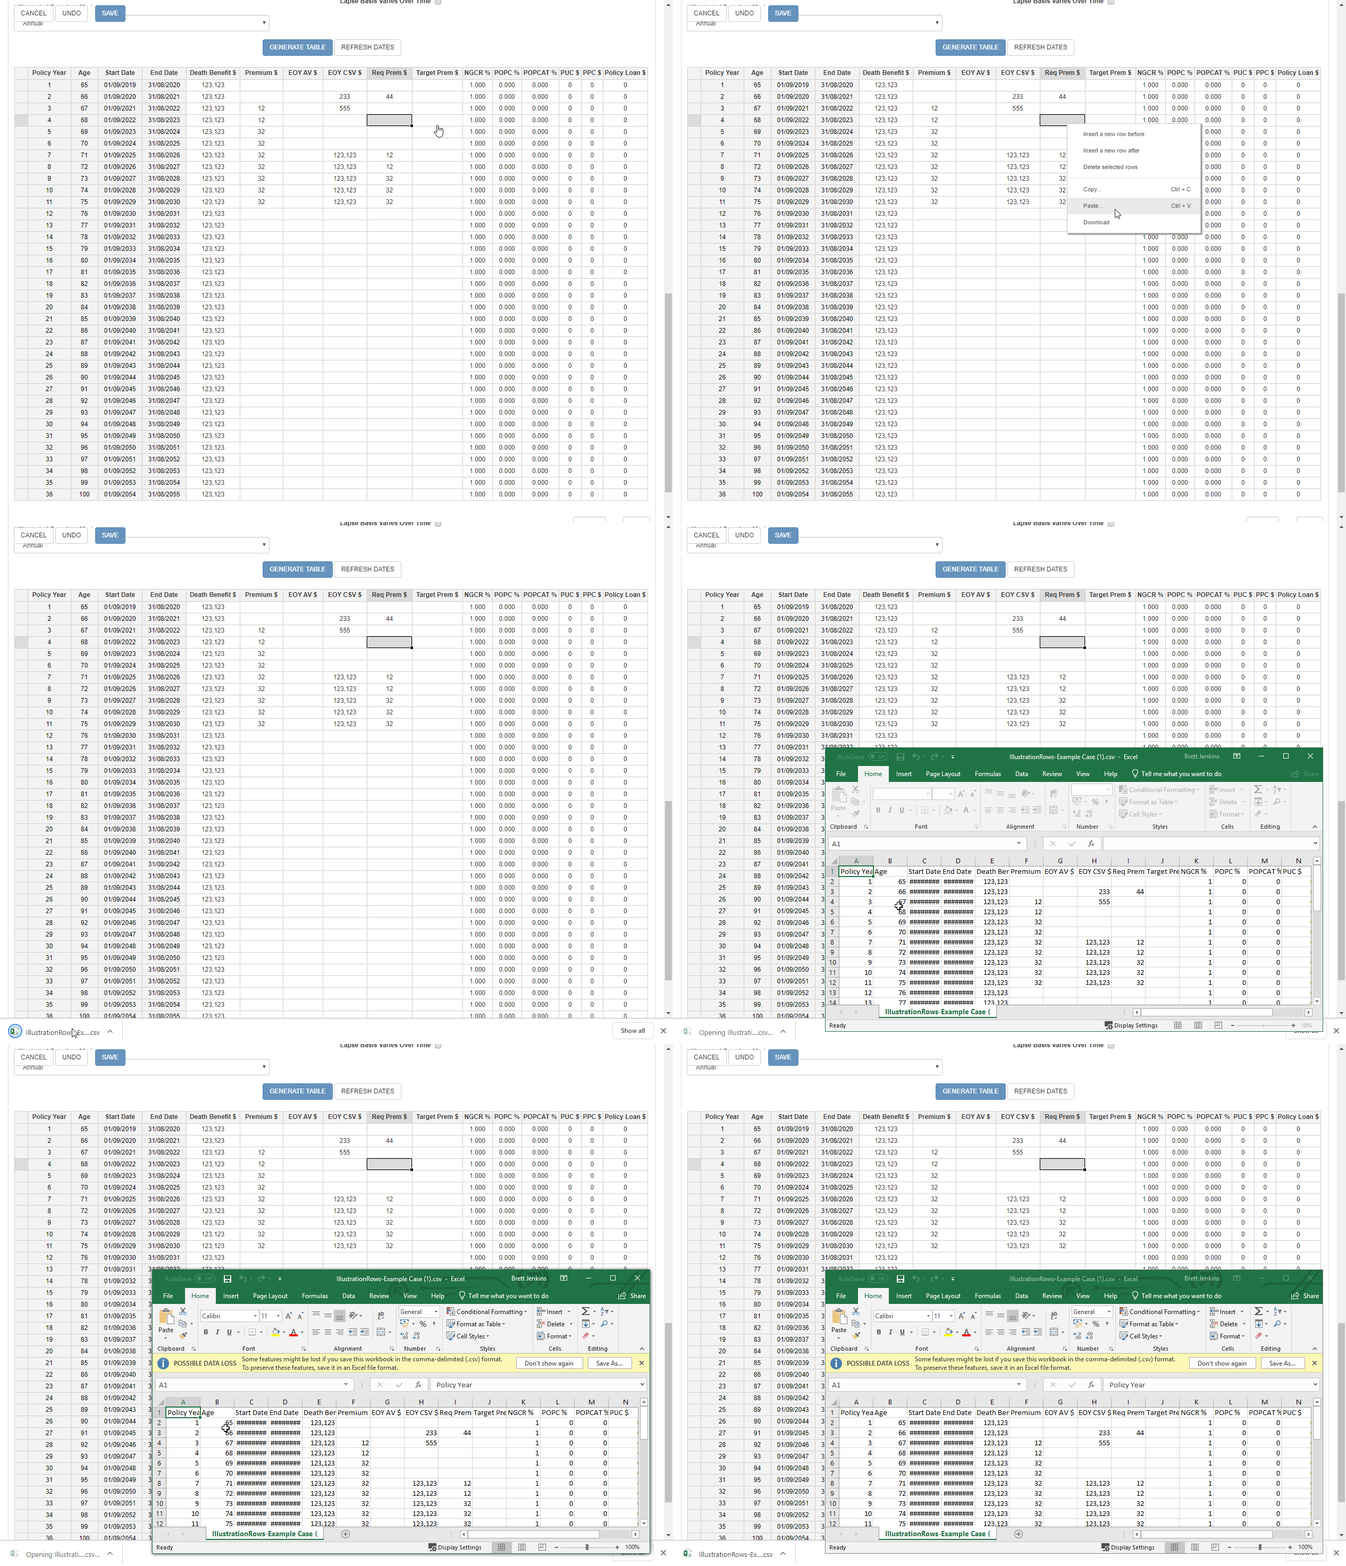
If you want to export the entire table, including headers, you can right click anywhere on the table, and select "Download". This will download a Comma Separated File (CSV), which can be imported or opened into an external spreadsheet program. This file will include the headers.
Keyboard shortcuts
- ENTER: move down (SHIFT+ENTER: move up)
- TAB: move right (SHIFT+TAB: move left)
- left/right/up/down arrows: move active cell
- SHIFT+left/right/up/down: select contiguous cells one by one
- CONTROL+SHIFT+left/right/up/down: select all cells from current position to the begining/end/top/bottom of the row or column.
- HOME: move to the first cell of the row
- END: move to the last cell of the row
- DELETE: clear the selected cell(s); if an entire row is selected, delete the row
- BACKSPACE: clear the selected single cell and edit the value of the cell
- CONTROL+A: select all
- CONTROL+Y: redo
- CONTROL+Z: undo
- CONTROL+C: copy
- CONTROL+X: cut
- CONTROL+V: paste
- F2, letters, numbers: edit the value of the cell
Mouse actions
On cells
- Double click: edit the value of the cell (also pressing F2, letters, numbers)
- Single click: select the cell
- Single click, hold and drag: select multiple cells
- Right click: shows the context menu (Insert a new row before/after; Delete selected rows; Copy; Paste; Download)
On headers
- Single click on a column/row header: select the entire column/row
- Single click on a column/row header, hold and drag: select multiple columns/rows
- Single click on the top left square selector: select the entire sheet (also pressing CONTROL+A)
On the "fill handle"
The fill handle is the black square at the bottom right of the selected cell. Note that this doesn't do calculation as in Excel, it only copies values.
- Click, hold and drag down or across: copy the selected cell(s) down or across. This works on one or more cells.
- Double click: copy the selected single cell down into all blank cells (stops at the first non-blank cell)
