Received/Sent Transactions
This page gives you an overview of all the transactions received and sent by both ClariNet and non-ClariNet subscribers.
Features available on the page are listed below:
- Quick case creation along with a transaction.
- Favourite your Transactions for easy look-up.
- Filter transactions by Insured/Received from/Policy Type/State of ownership/Bid deadline/Carrier/Secondary Insured.
- View all the sent transactions for an Insured on a single page.
- To create a new case along with a transaction.
Click on the Actions button followed by the Add transactions link to create a transaction for a new case. A form will open on the right-hand side to allow you to input case and policy information along with the sender's details.
- To favorite selected transactions.
Selected transactions can be favorited by clicking on the star icon next to the Insured name. Click on the favorites tab to list all the favorited transactions.
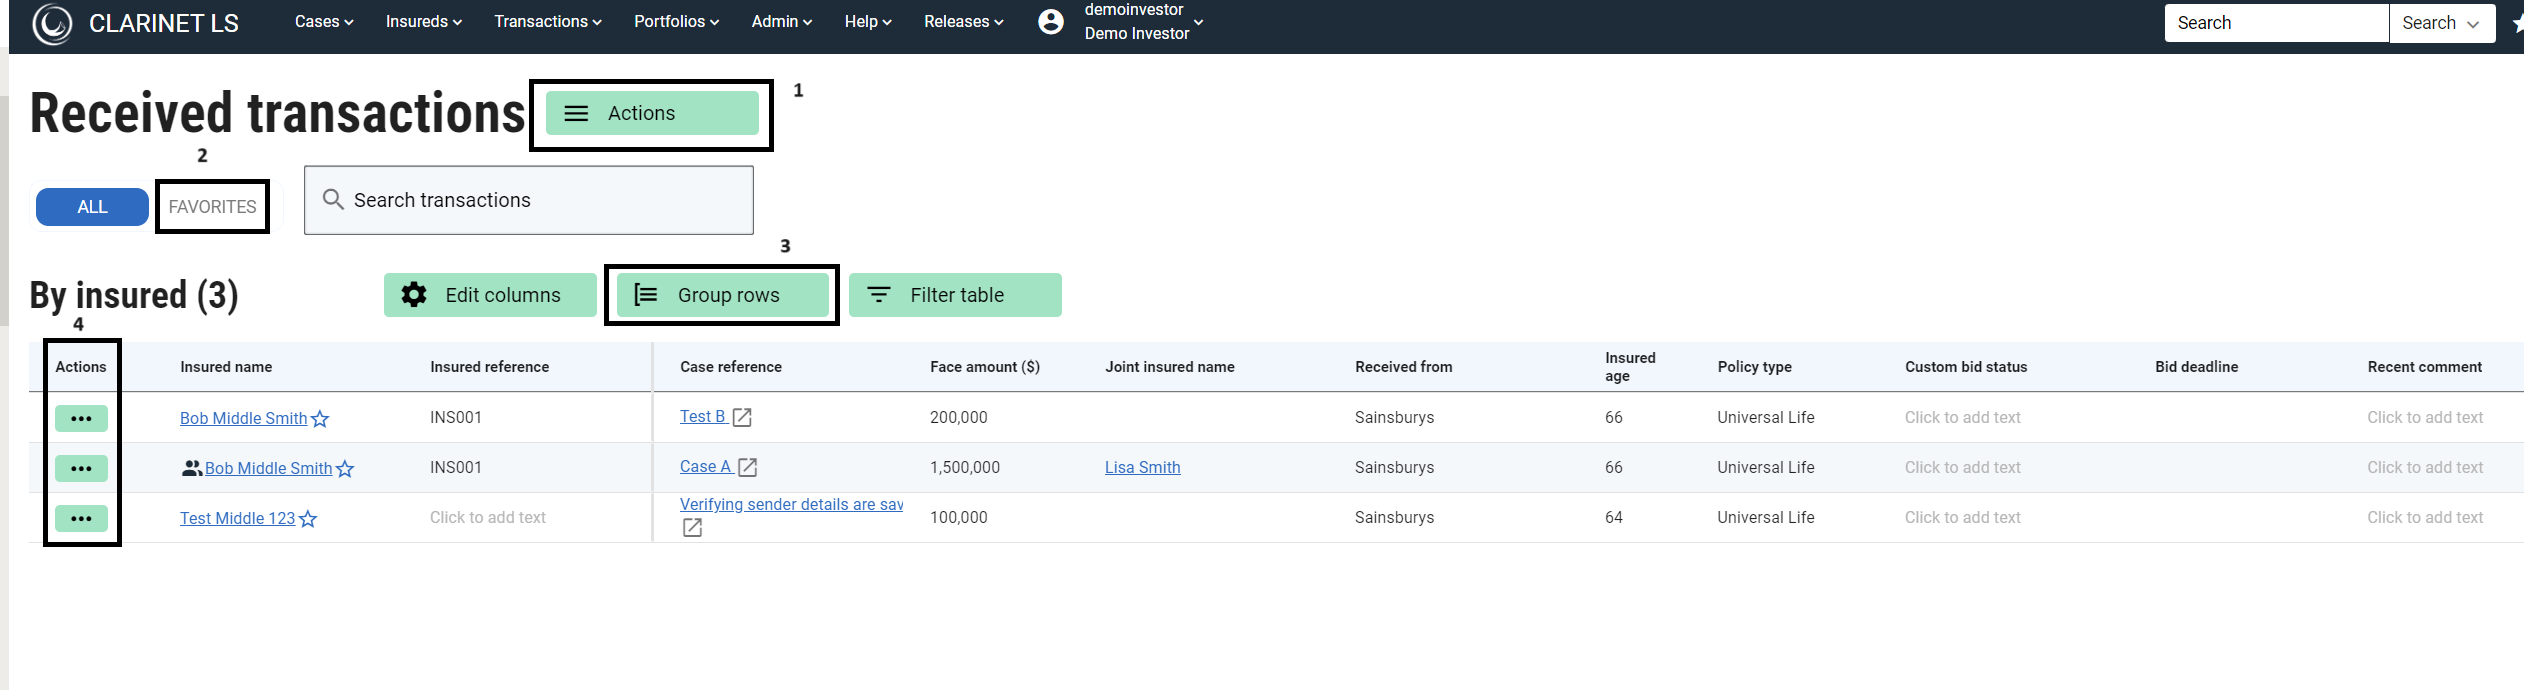
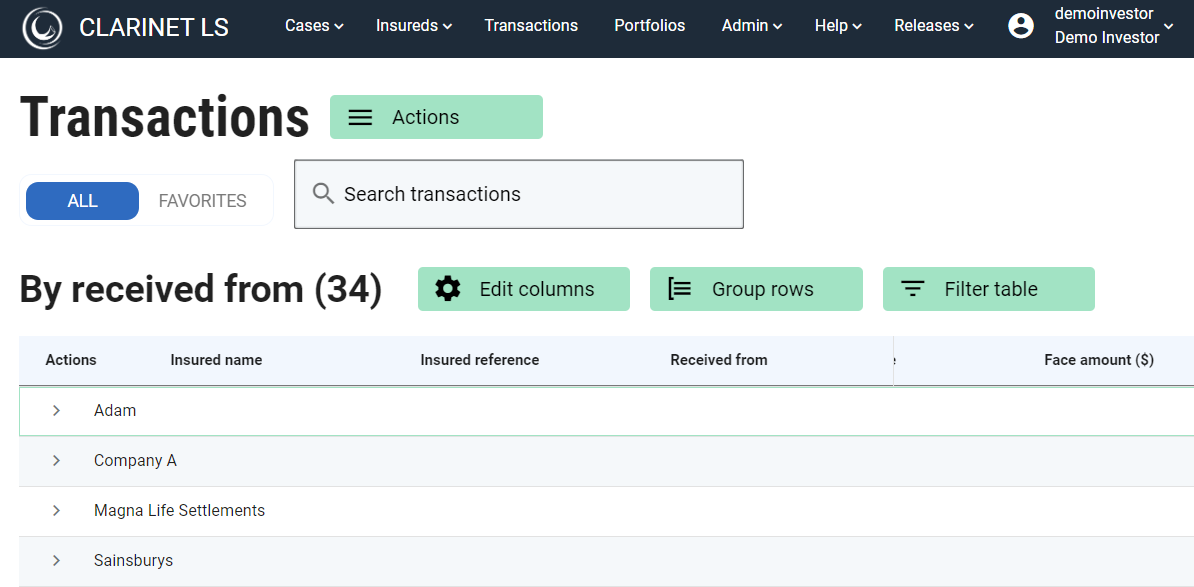
- To group transactions list
Click on the Group rows button to group the transactions by Insured/Received from/Policy Type/State of ownership/Bid deadline/Carrier/Secondary Insured.
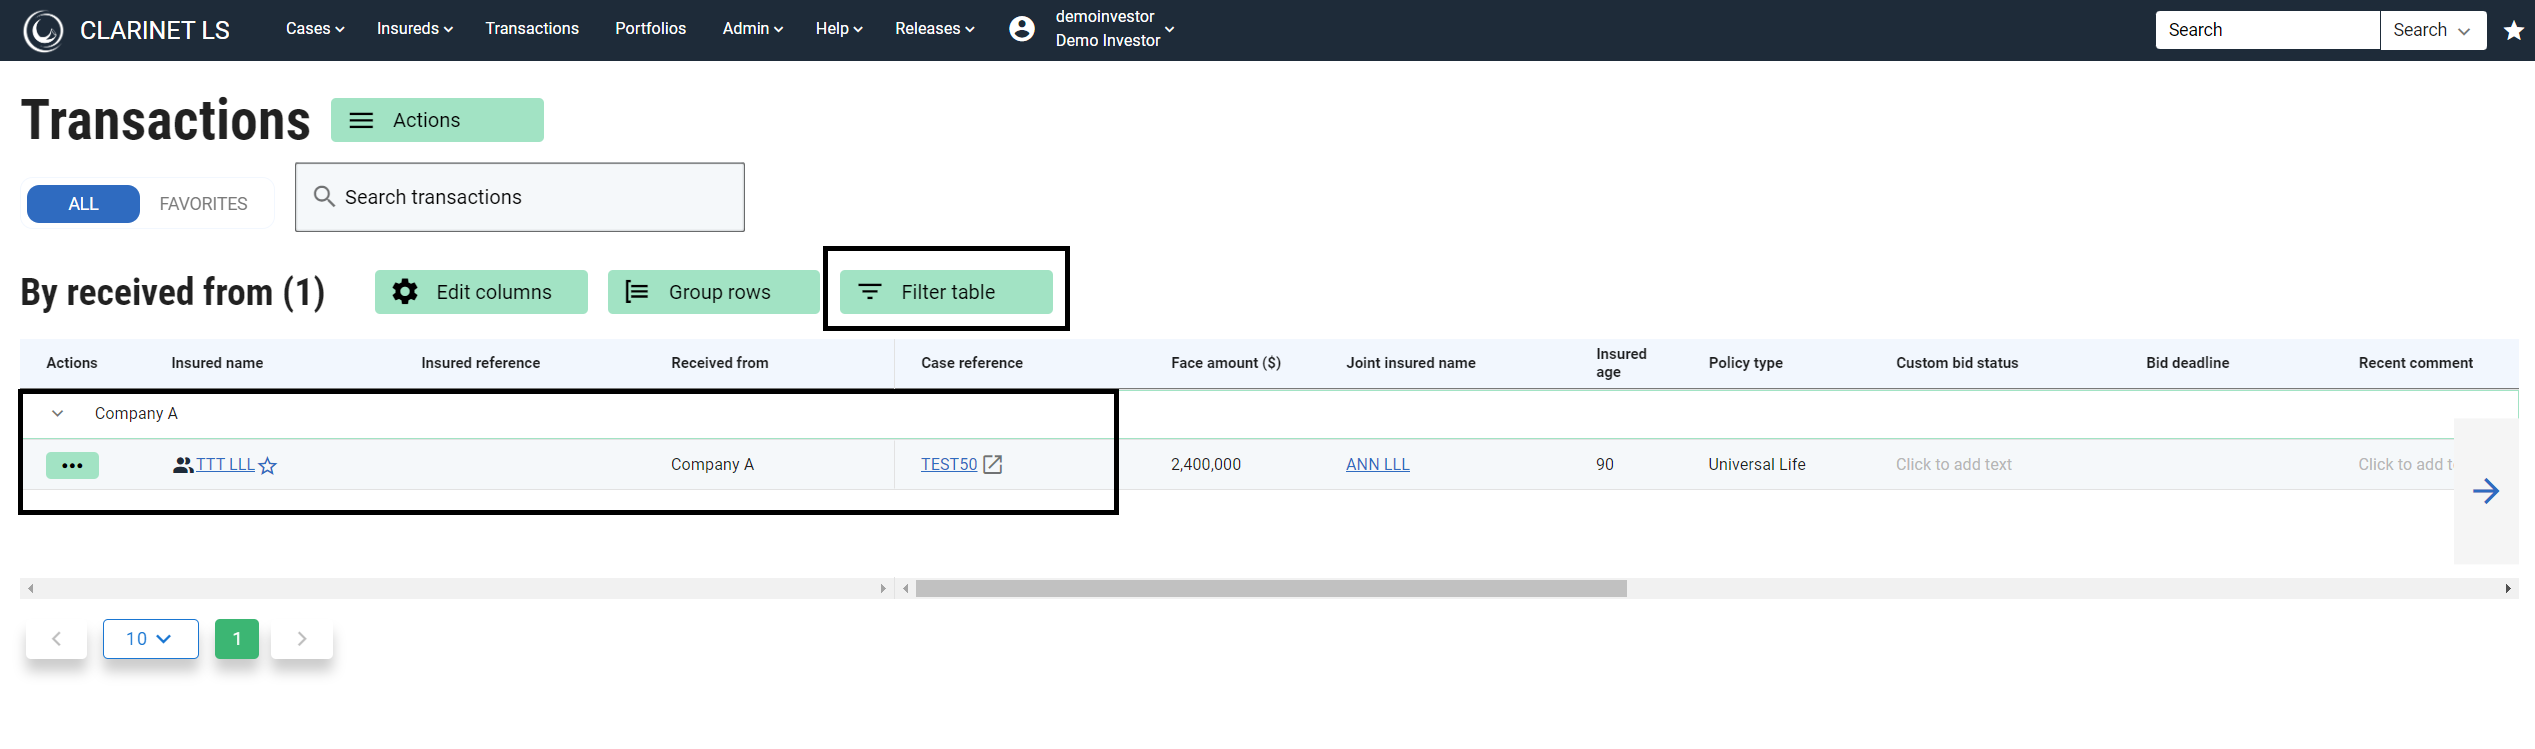
Example for transactions grouped by Received from
- Clicking on the actions menu on the left to transactions list allows two operations.
4.1 To view transaction
Clicking on the view menu opens up transaction summary view on the right hand side of the page.
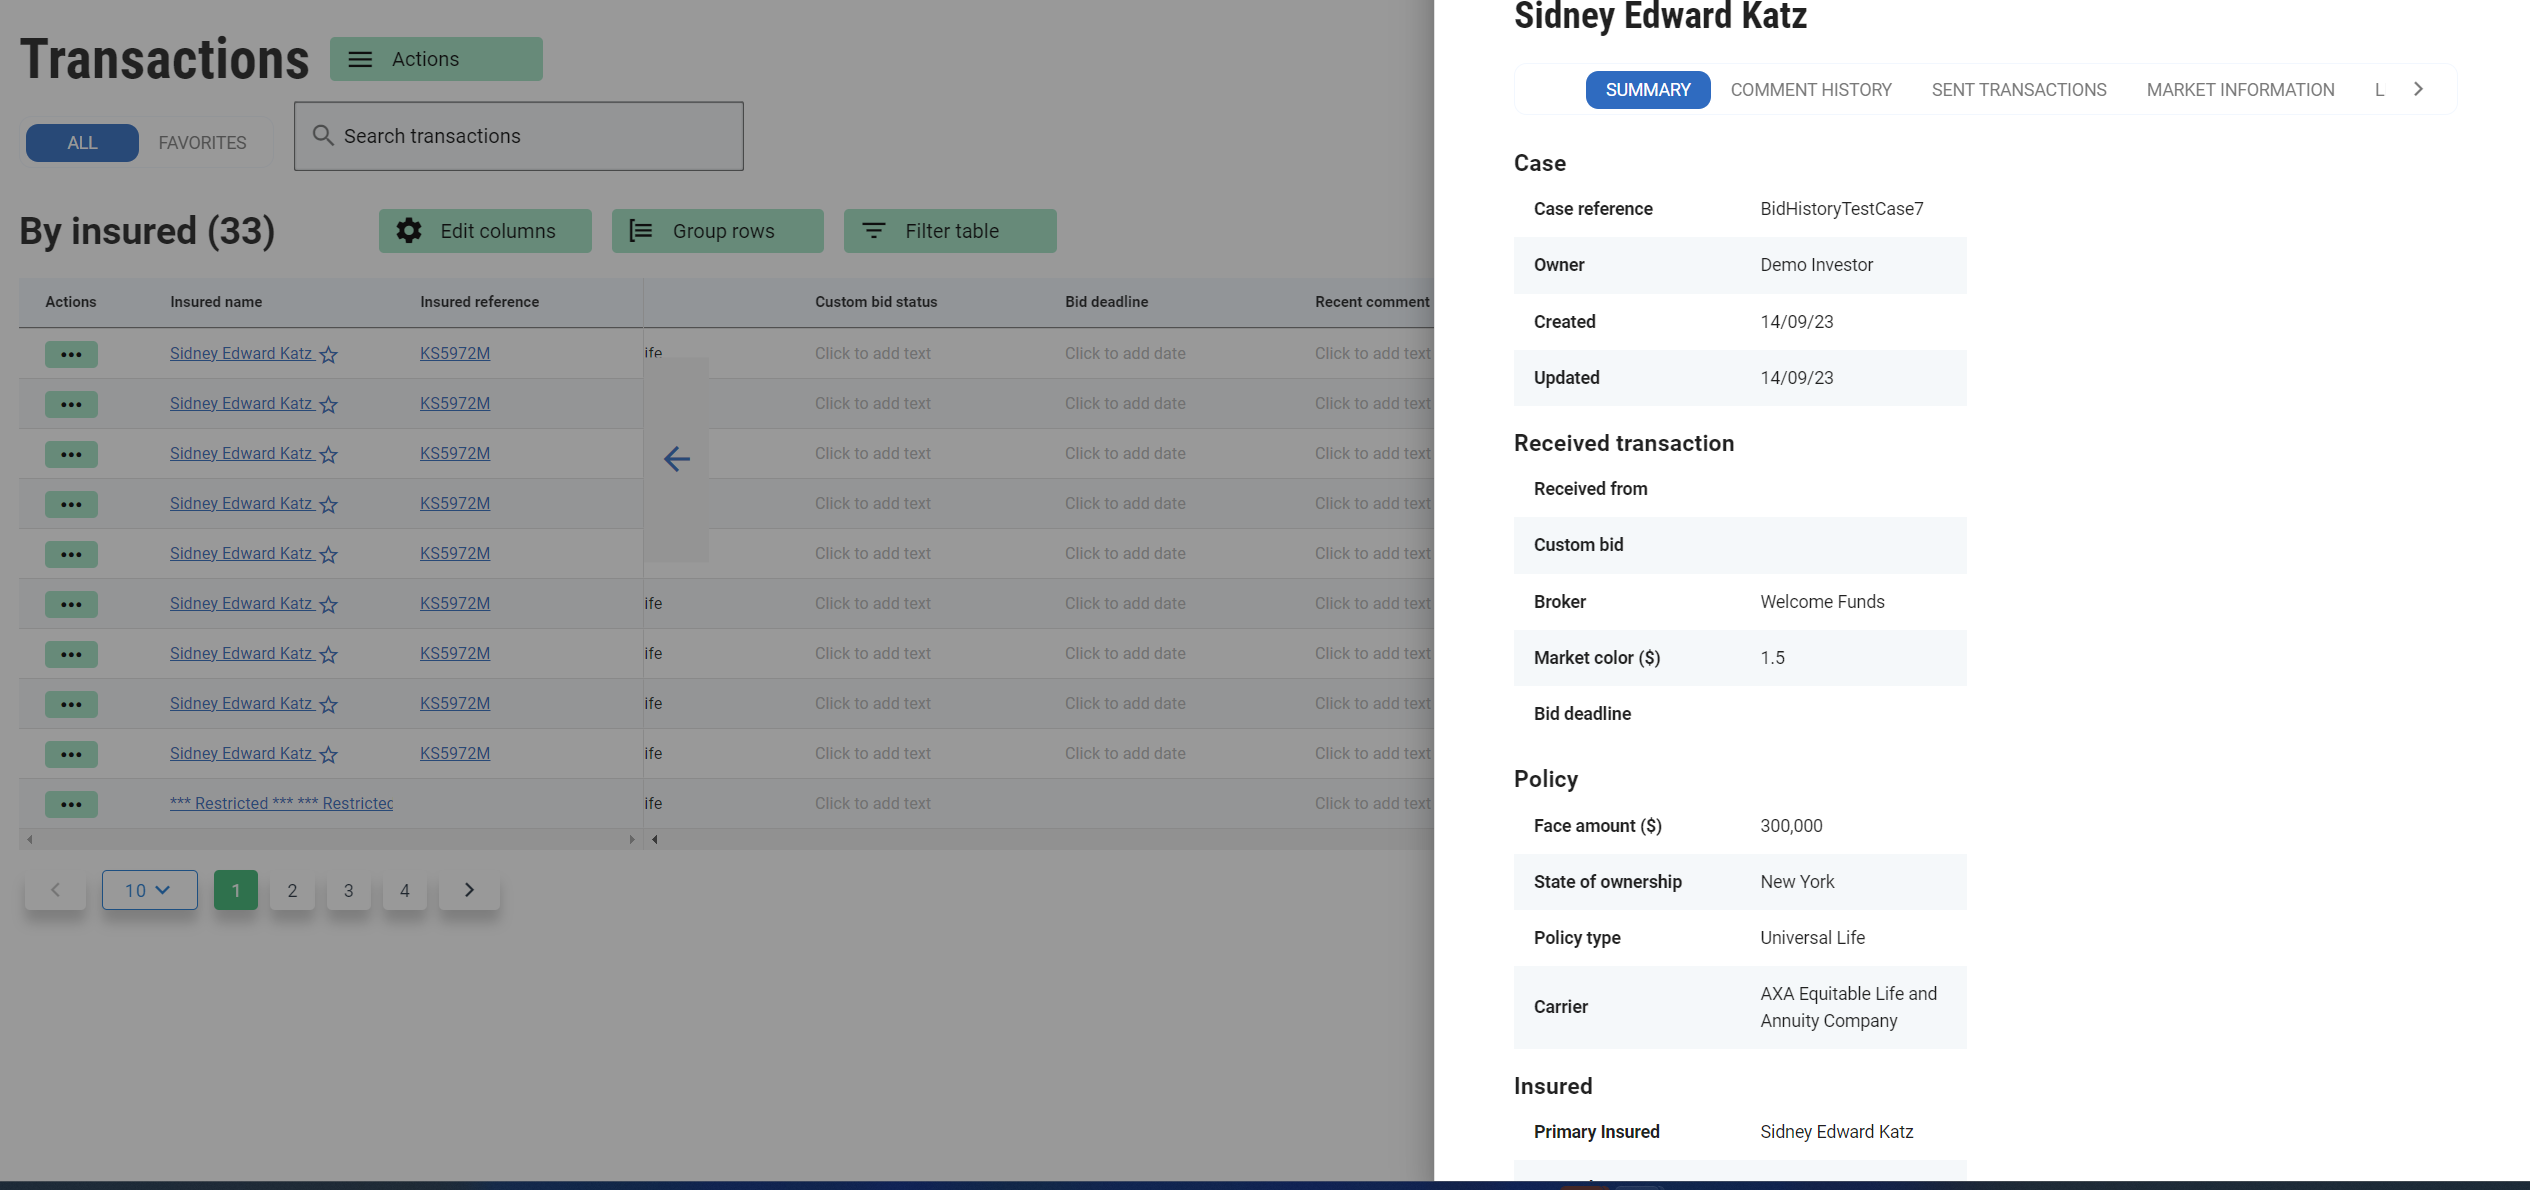
Other operations that can be perform on this page are
Adding comments
Adding/editing sent transactions or view sent transactions with history.

Adding/editing market information.
View insureds linked to transaction along with access to Insured Consolidation page.
4.2 To delete transaction
Clicking on the delete menu deletes the transaction.
Hovering the mouse upon the table displays an editable icon for editable fields. For ex as shown in the below screenshot, you can edit Face amount, Policy type, Custom bid status, Bid deadline, Recent comment, State of ownership and Market Info.
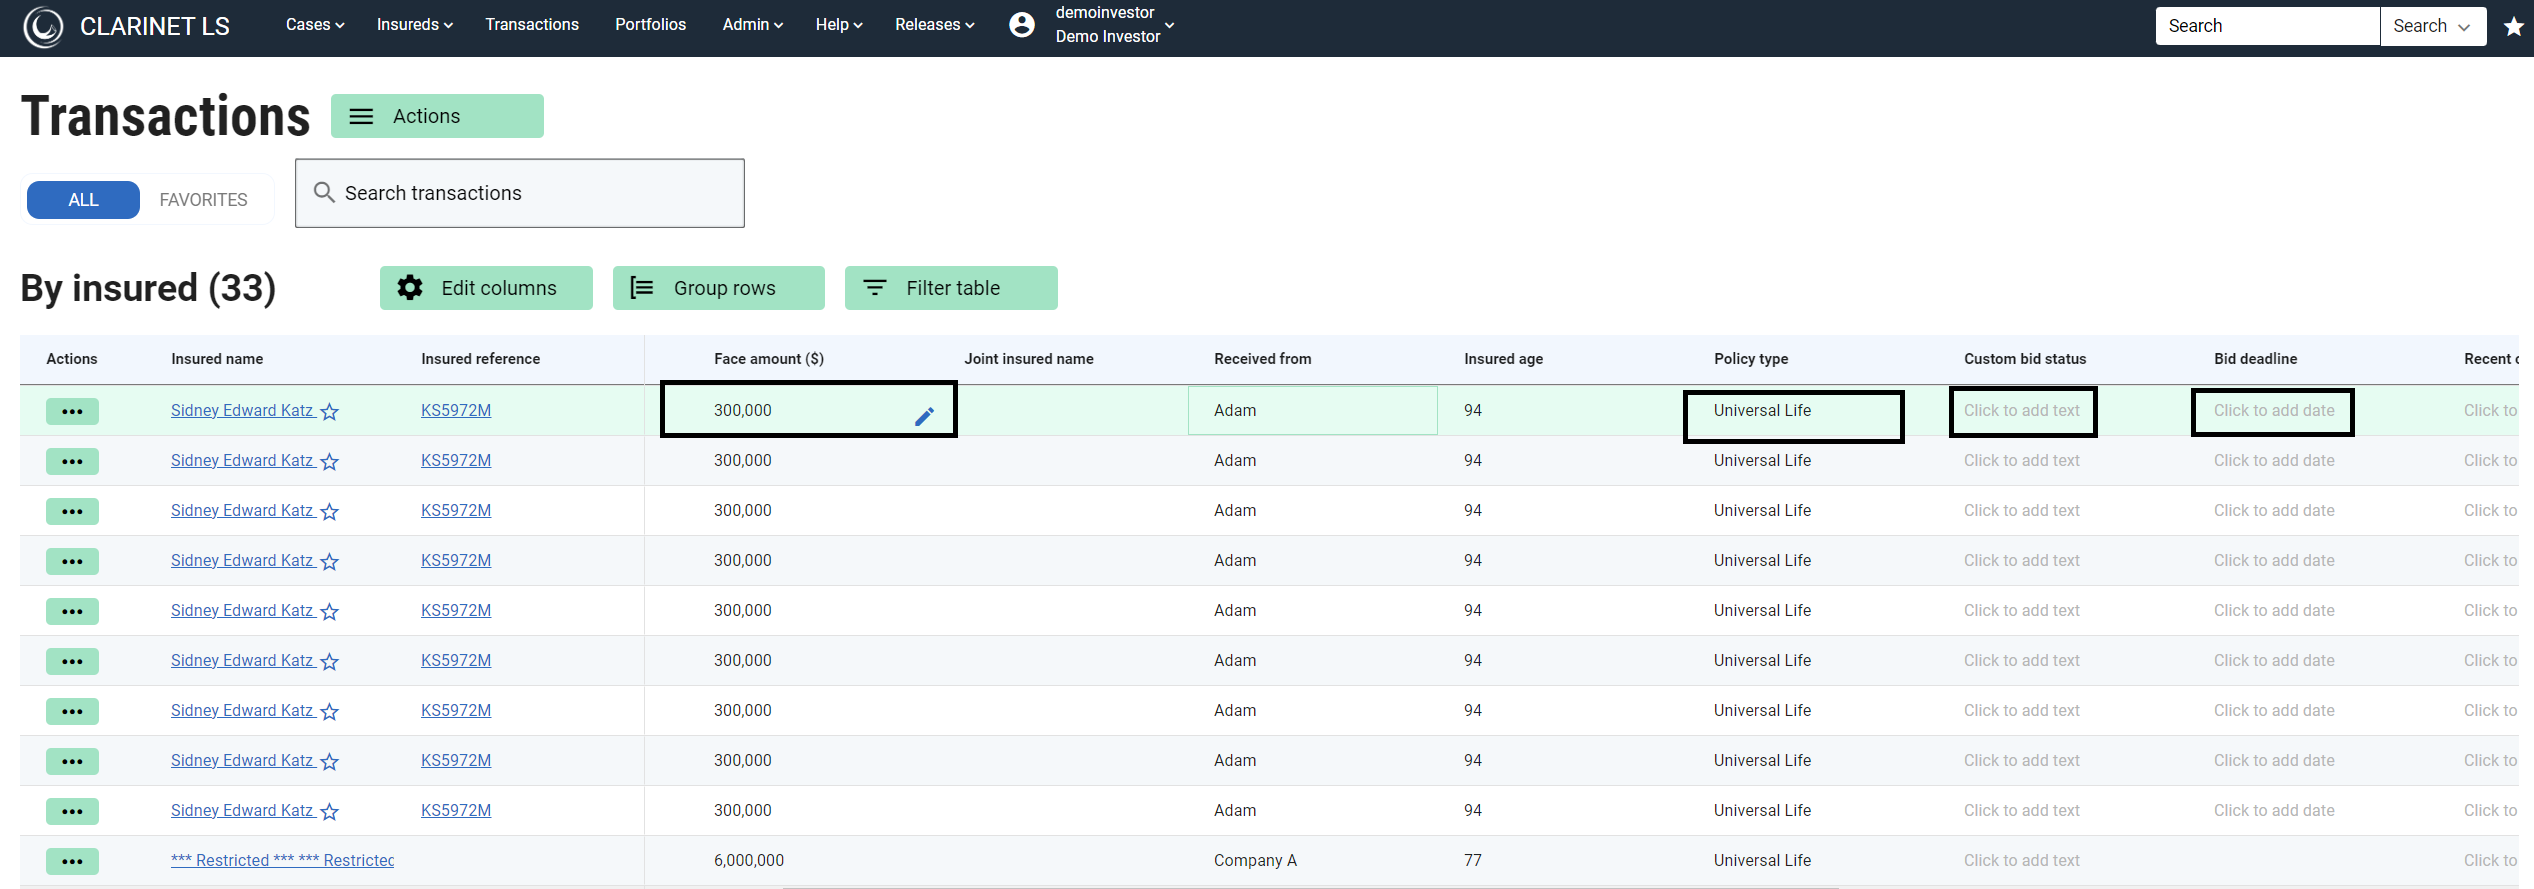
The columns displayed on the table can be edited as per your convenience by clicking on the Edit columns button and selecting/ unselecting the checkboxes for column names. However Insured name , Insured reference and Case reference are defaulted columns.
To filter transactions
The transactions table can be further filtered to display only the ones with a specific event.
The filter table button will filter the table to show only rows where the transaction has an event that has been checked. So by checking the checkbox for Bid, the table displays transactions with bids alone.
As per the screenshot, the transaction table is filtered by the “Case Declined” event. Hence case reference “TEST50” is listed.
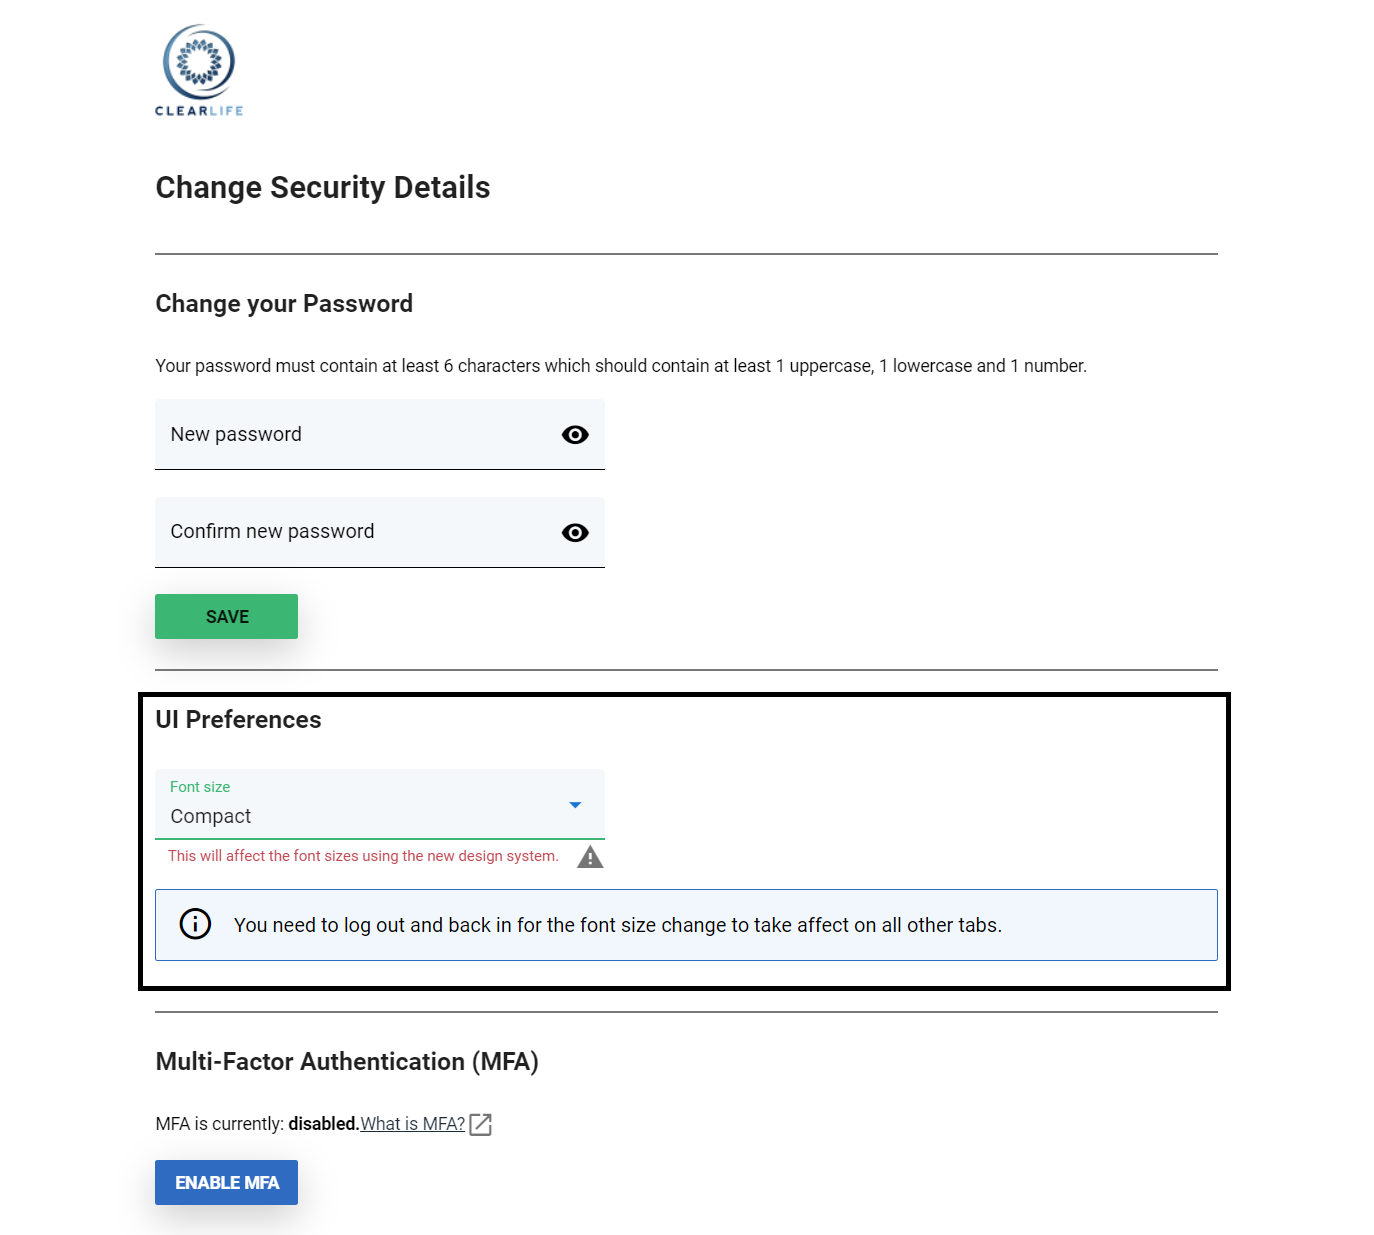
It is possible to change the font size of the transactions page using the font size user setting.
To enable the compact version
- Go to Change Security details available under the user's menu.
- Input your password.
- Select the font size to “Compact”.
- Log out of ClariNet and log back in to apply the changes.