Maturity Tracking
ClariNet LS offers a quicker way of finding out when an insured life in a managed portfolio of cases is no longer alive
ClariNet searches various information repositories on deceased individuals multiple times per day and lists out the information on the maturity tracking page.
The information can be seen from the Insured -> Insured Maturity Tracking page (this shows all matches across all of your tracked portfolios), or from an individual Portfolio's Maturity Tracking page.
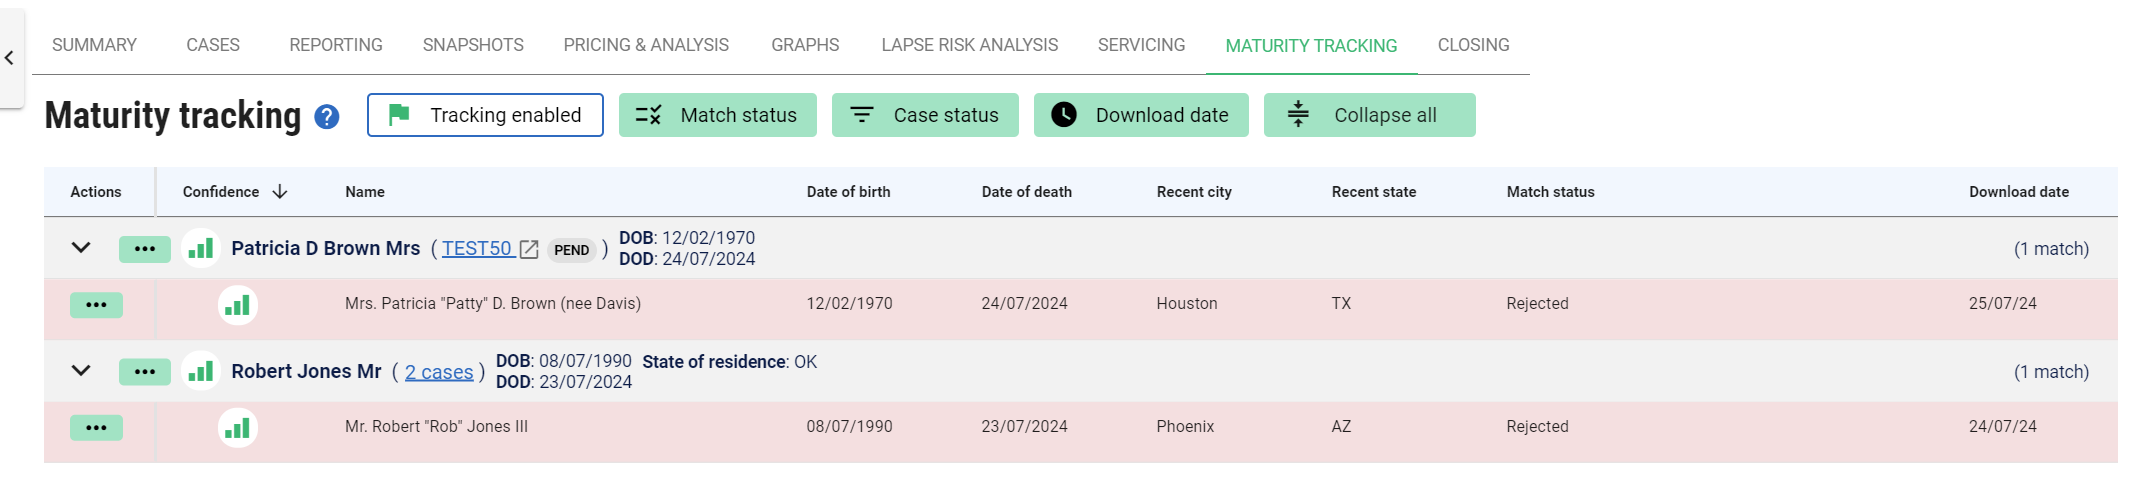
Maturity tracking page example
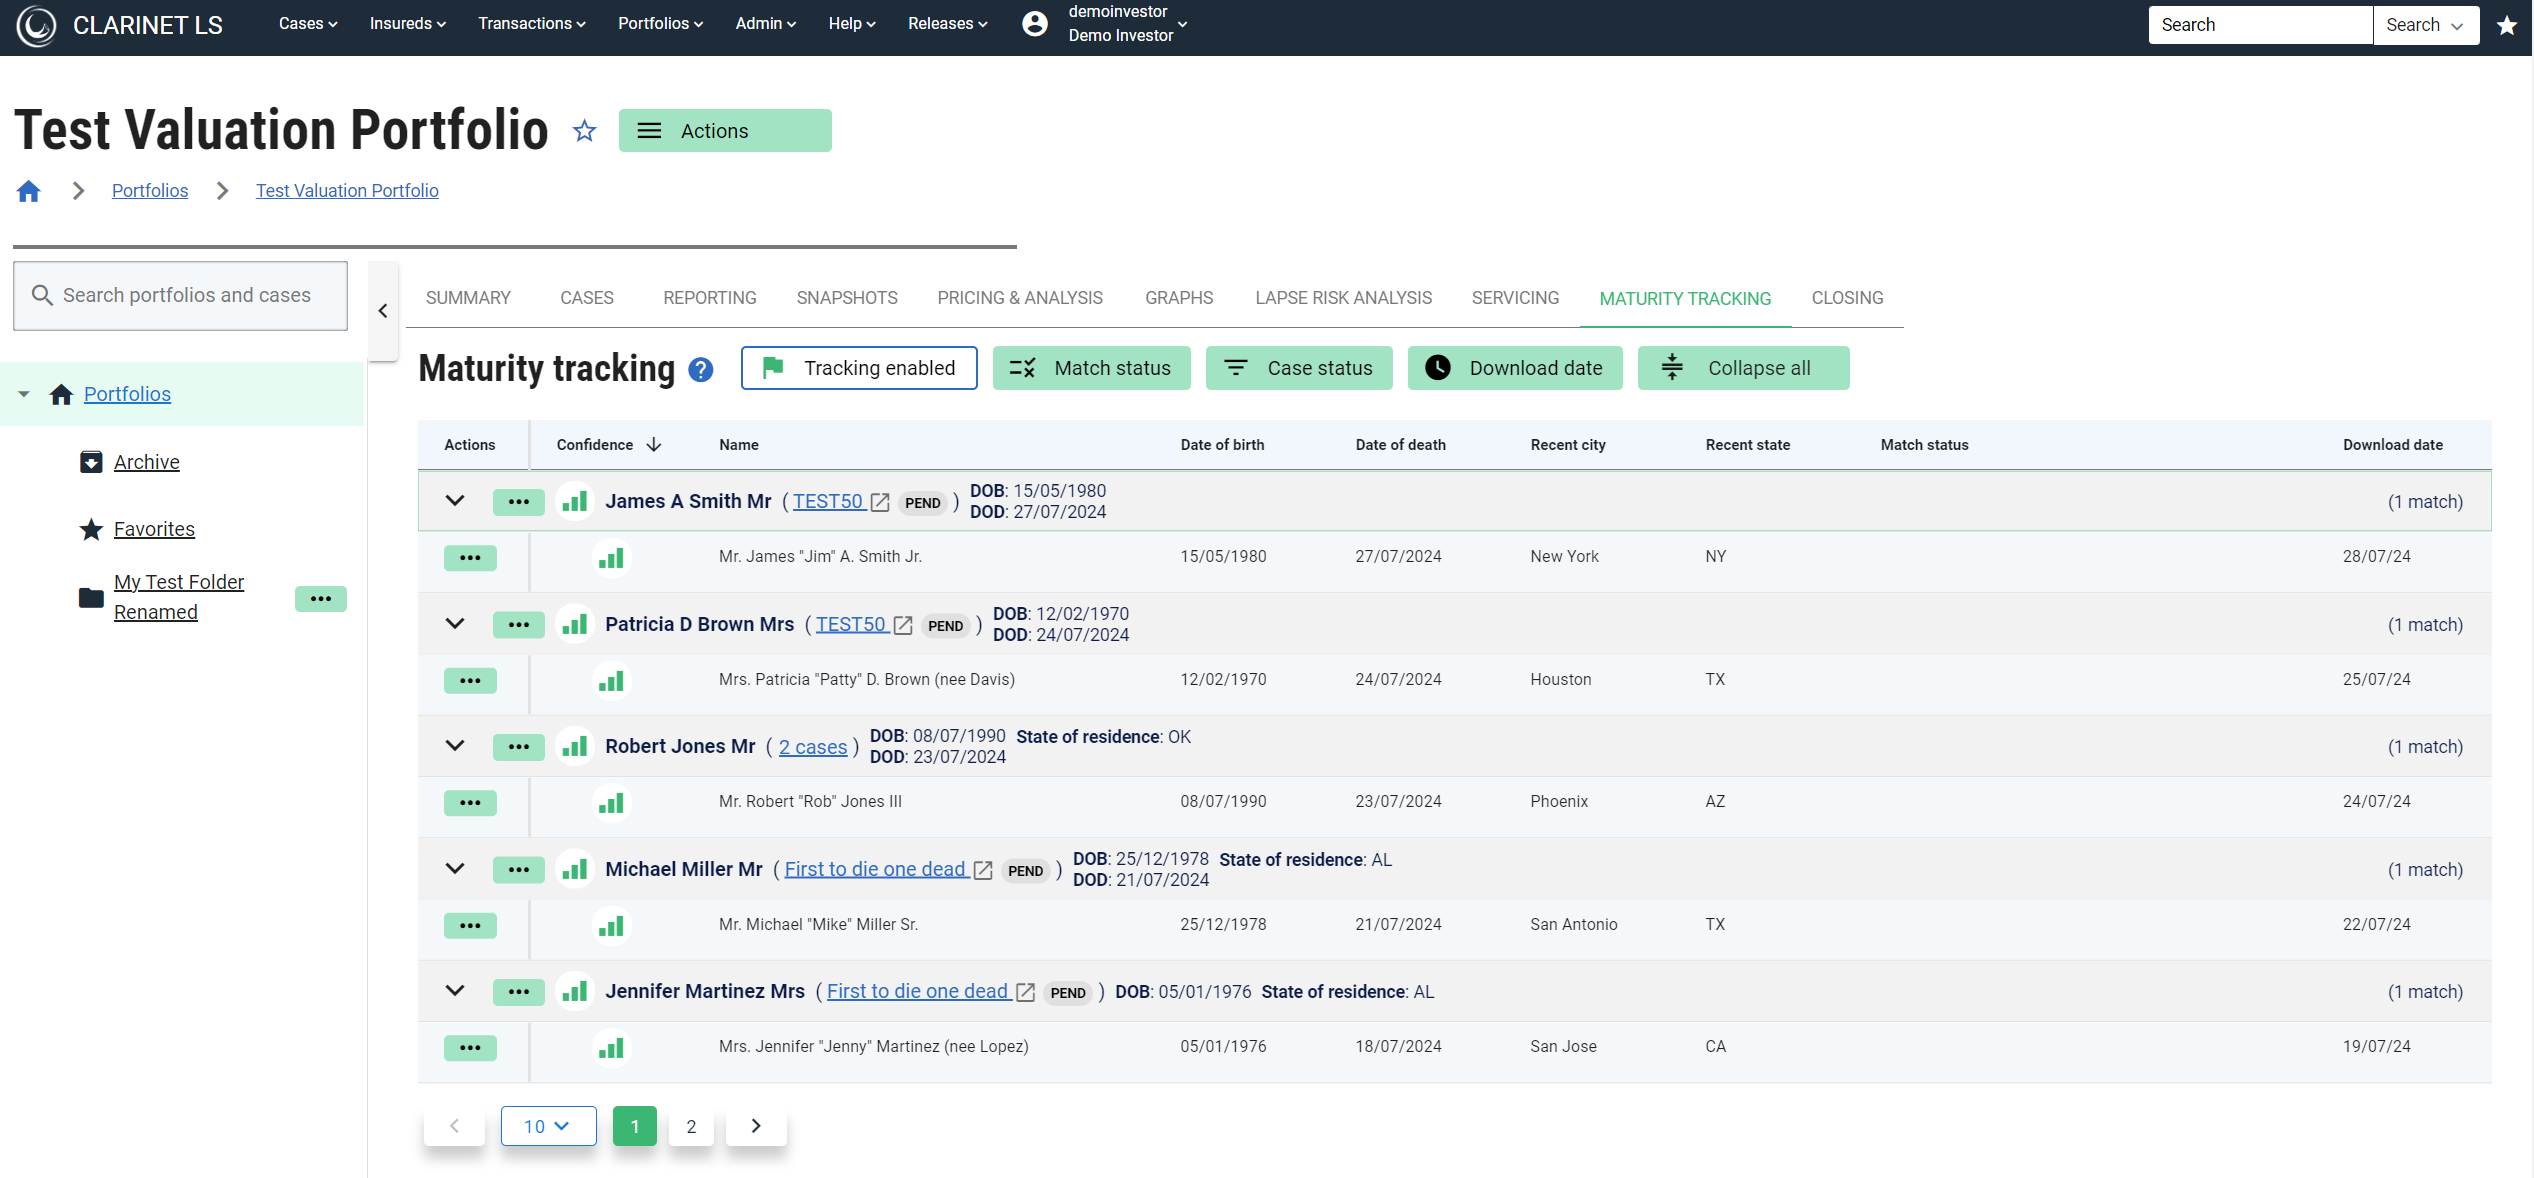
The insured name header row displays the Insured CASE REFERENCE along with the CASE STATUS, date of birth, and date of death of the Insured if applicable.
The color of the bars to the left of the potential match indicates the confidence level. Confidence is high when the color is green, which indicates that it’s a more likely match. Lower confidence is indicated by only two bars colored peach.
Permissions required to access maturity tracking
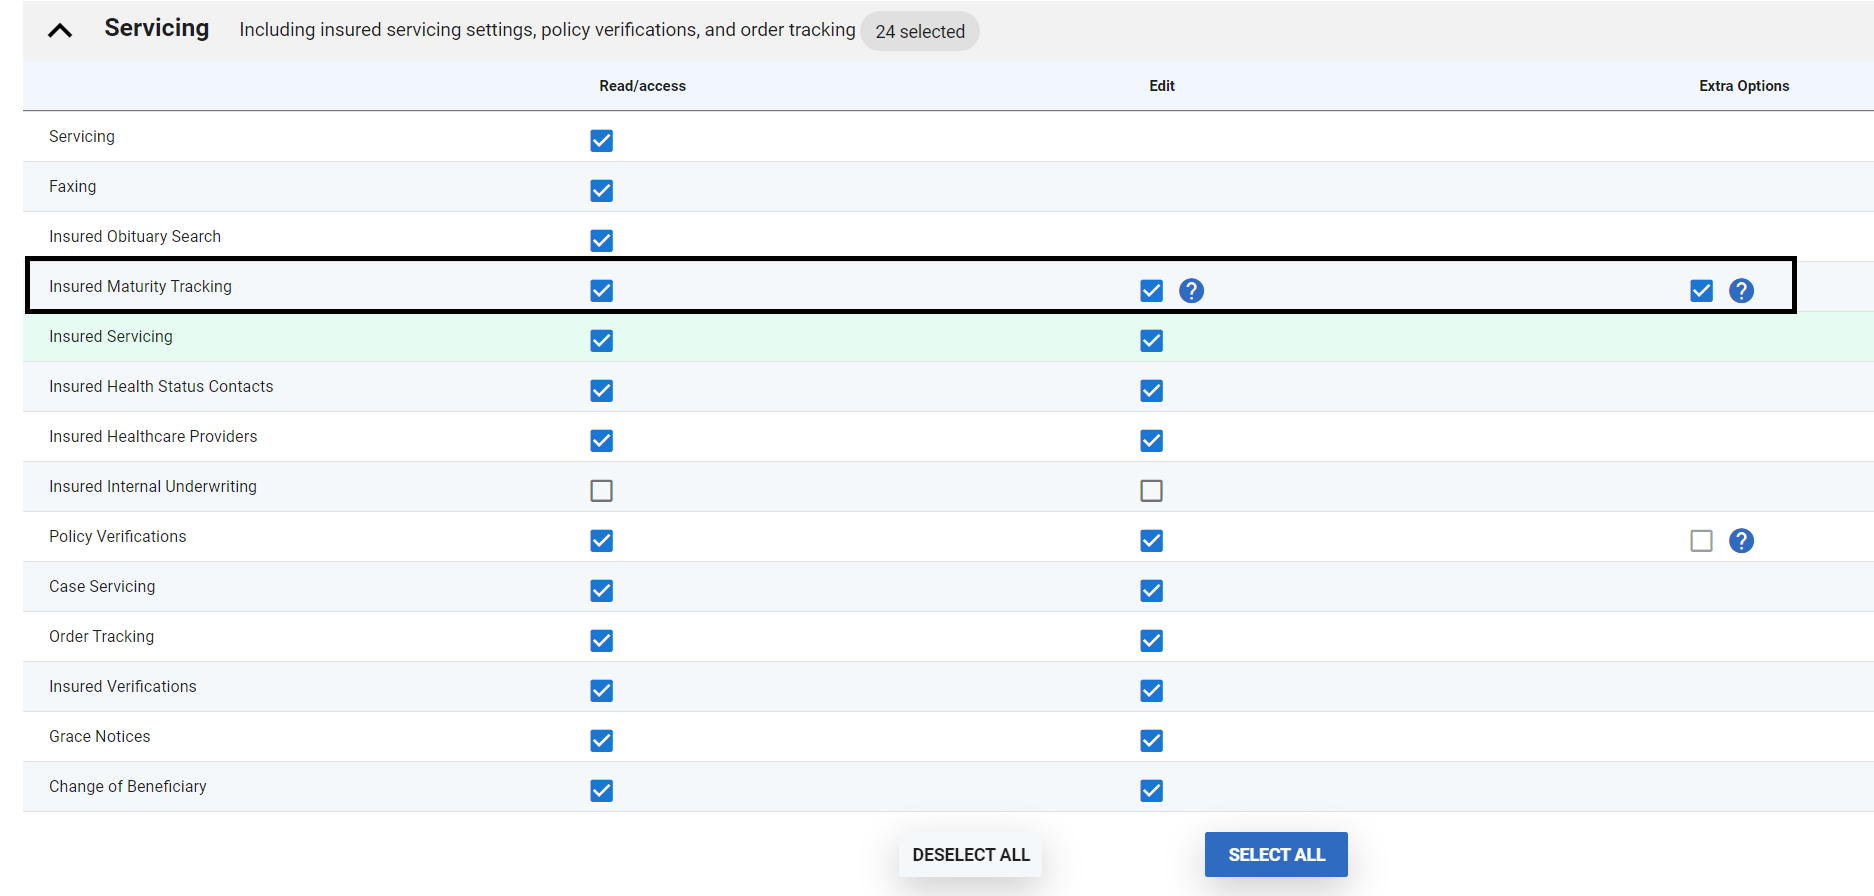
Certain permissions need to be set up to access the maturity tracking pages. As shown in the screenshot below, the Insured Maturity Tracking role under Servicing needs to be selected. Extra options allows enabling and disabling of maturity tracking for selected portfolios.
Once the above roles are set up, the maturity tracking page can be accessed by selecting the MATURITY TRACKING sub-menu for a portfolio.
Enabling Maturity Tracking for a Portfolio
Maturity tracking for a given portfolio can be enabled with the help of the option displayed on the portfolio's maturity tracking page as shown below.
Insureds will be scanned for potential maturities provided they are in at least one tracked Portfolio.
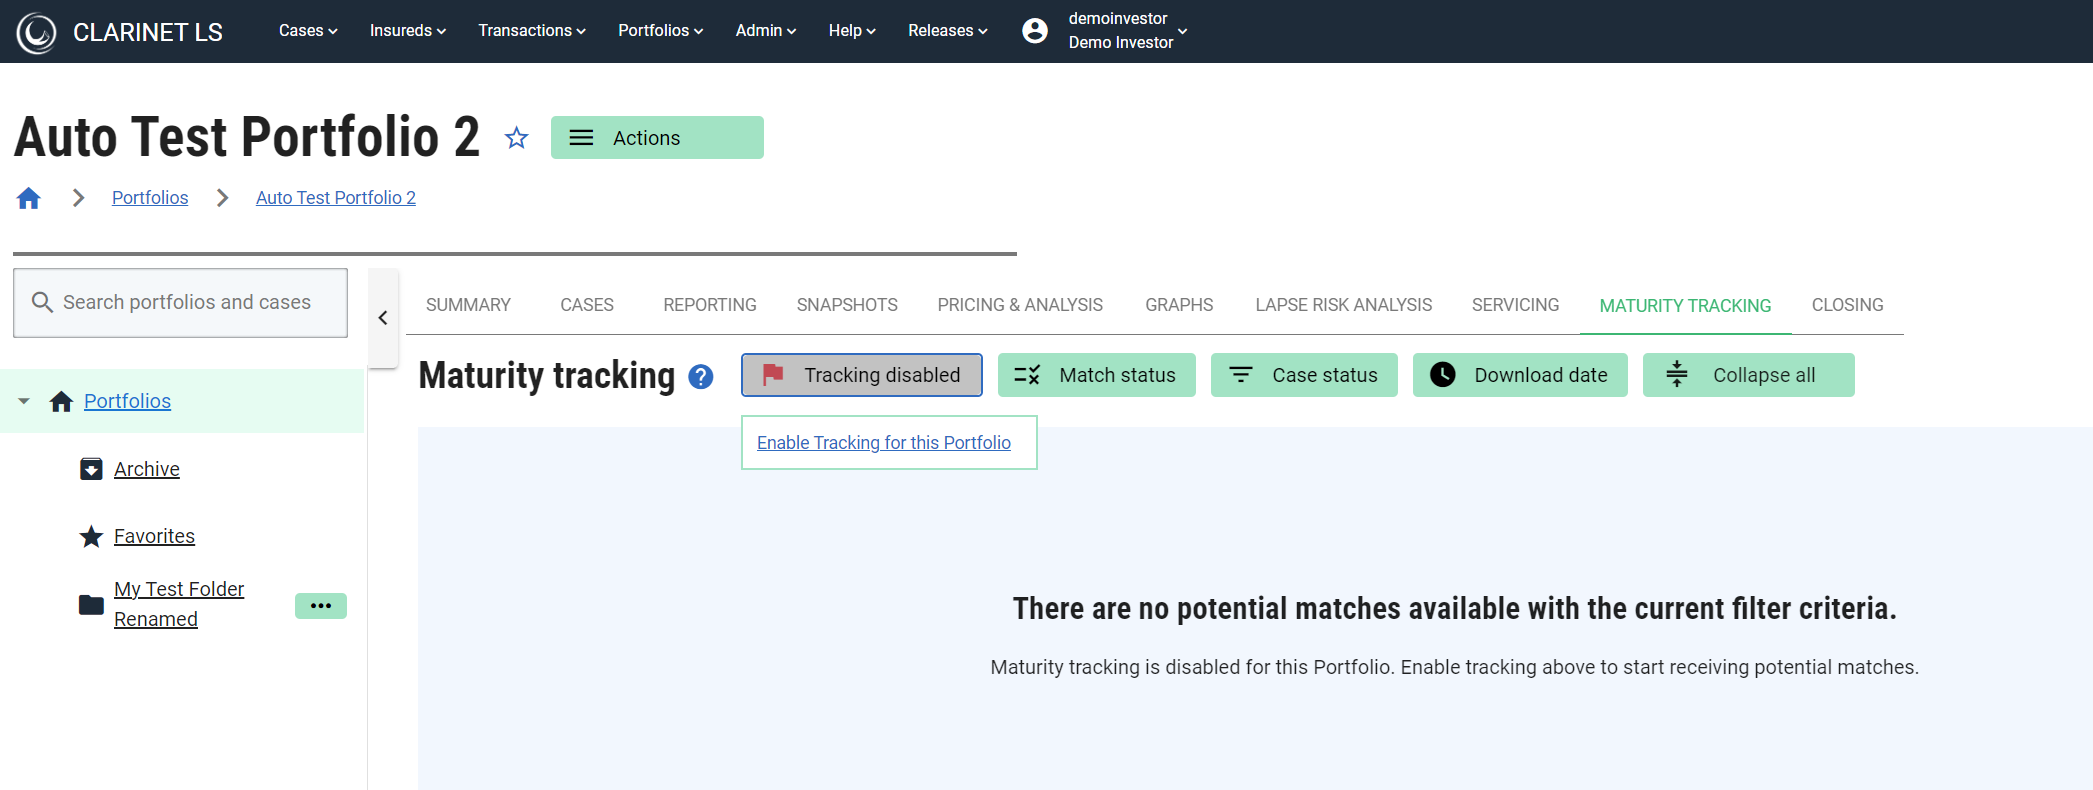
A list of potential Insured matches will be listed once tracking is enabled.
Please note that it can take up to two hours before you start seeing results for newly tracked insureds.
Filtering the matches
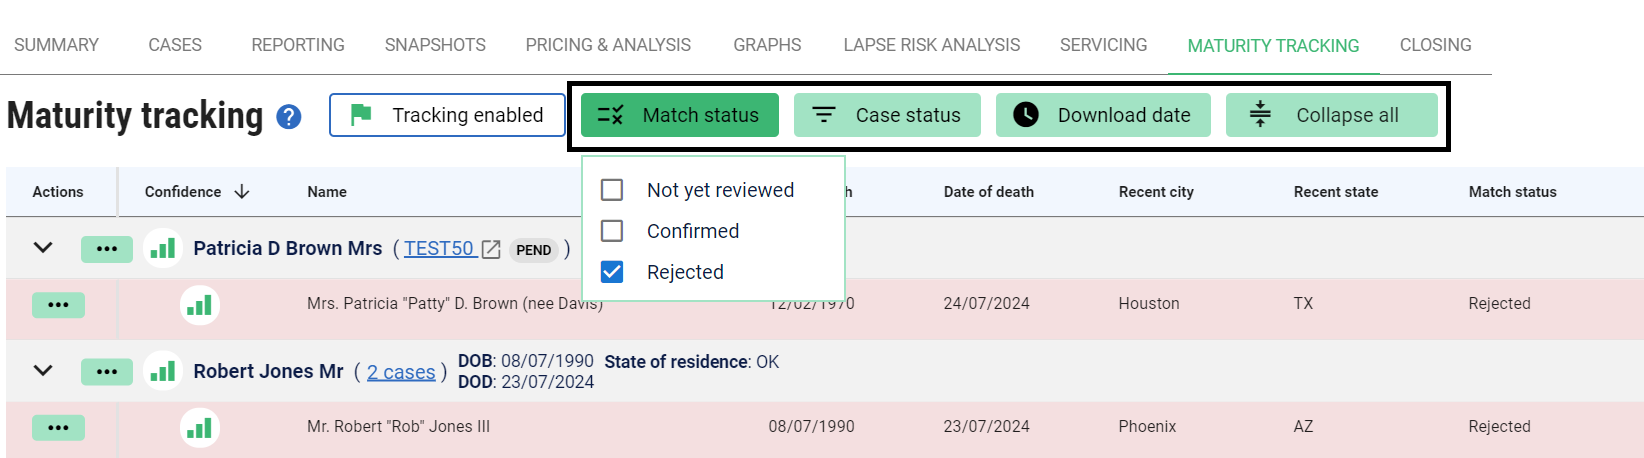
- Filters such as Match status allow you to filter the table based on confirmed/Rejected/Not yet reviewed matches.
- The table can be further filtered to show only insured matches with linked case statuses matching the selected ones.
- The table can be filtered based on the download date starting from 24 hours to 3 months.
To view a match
An example of the Actions menu for a matching Insured.

- Select the potential match for an Insured.
- Click on the Actions menu followed by View.
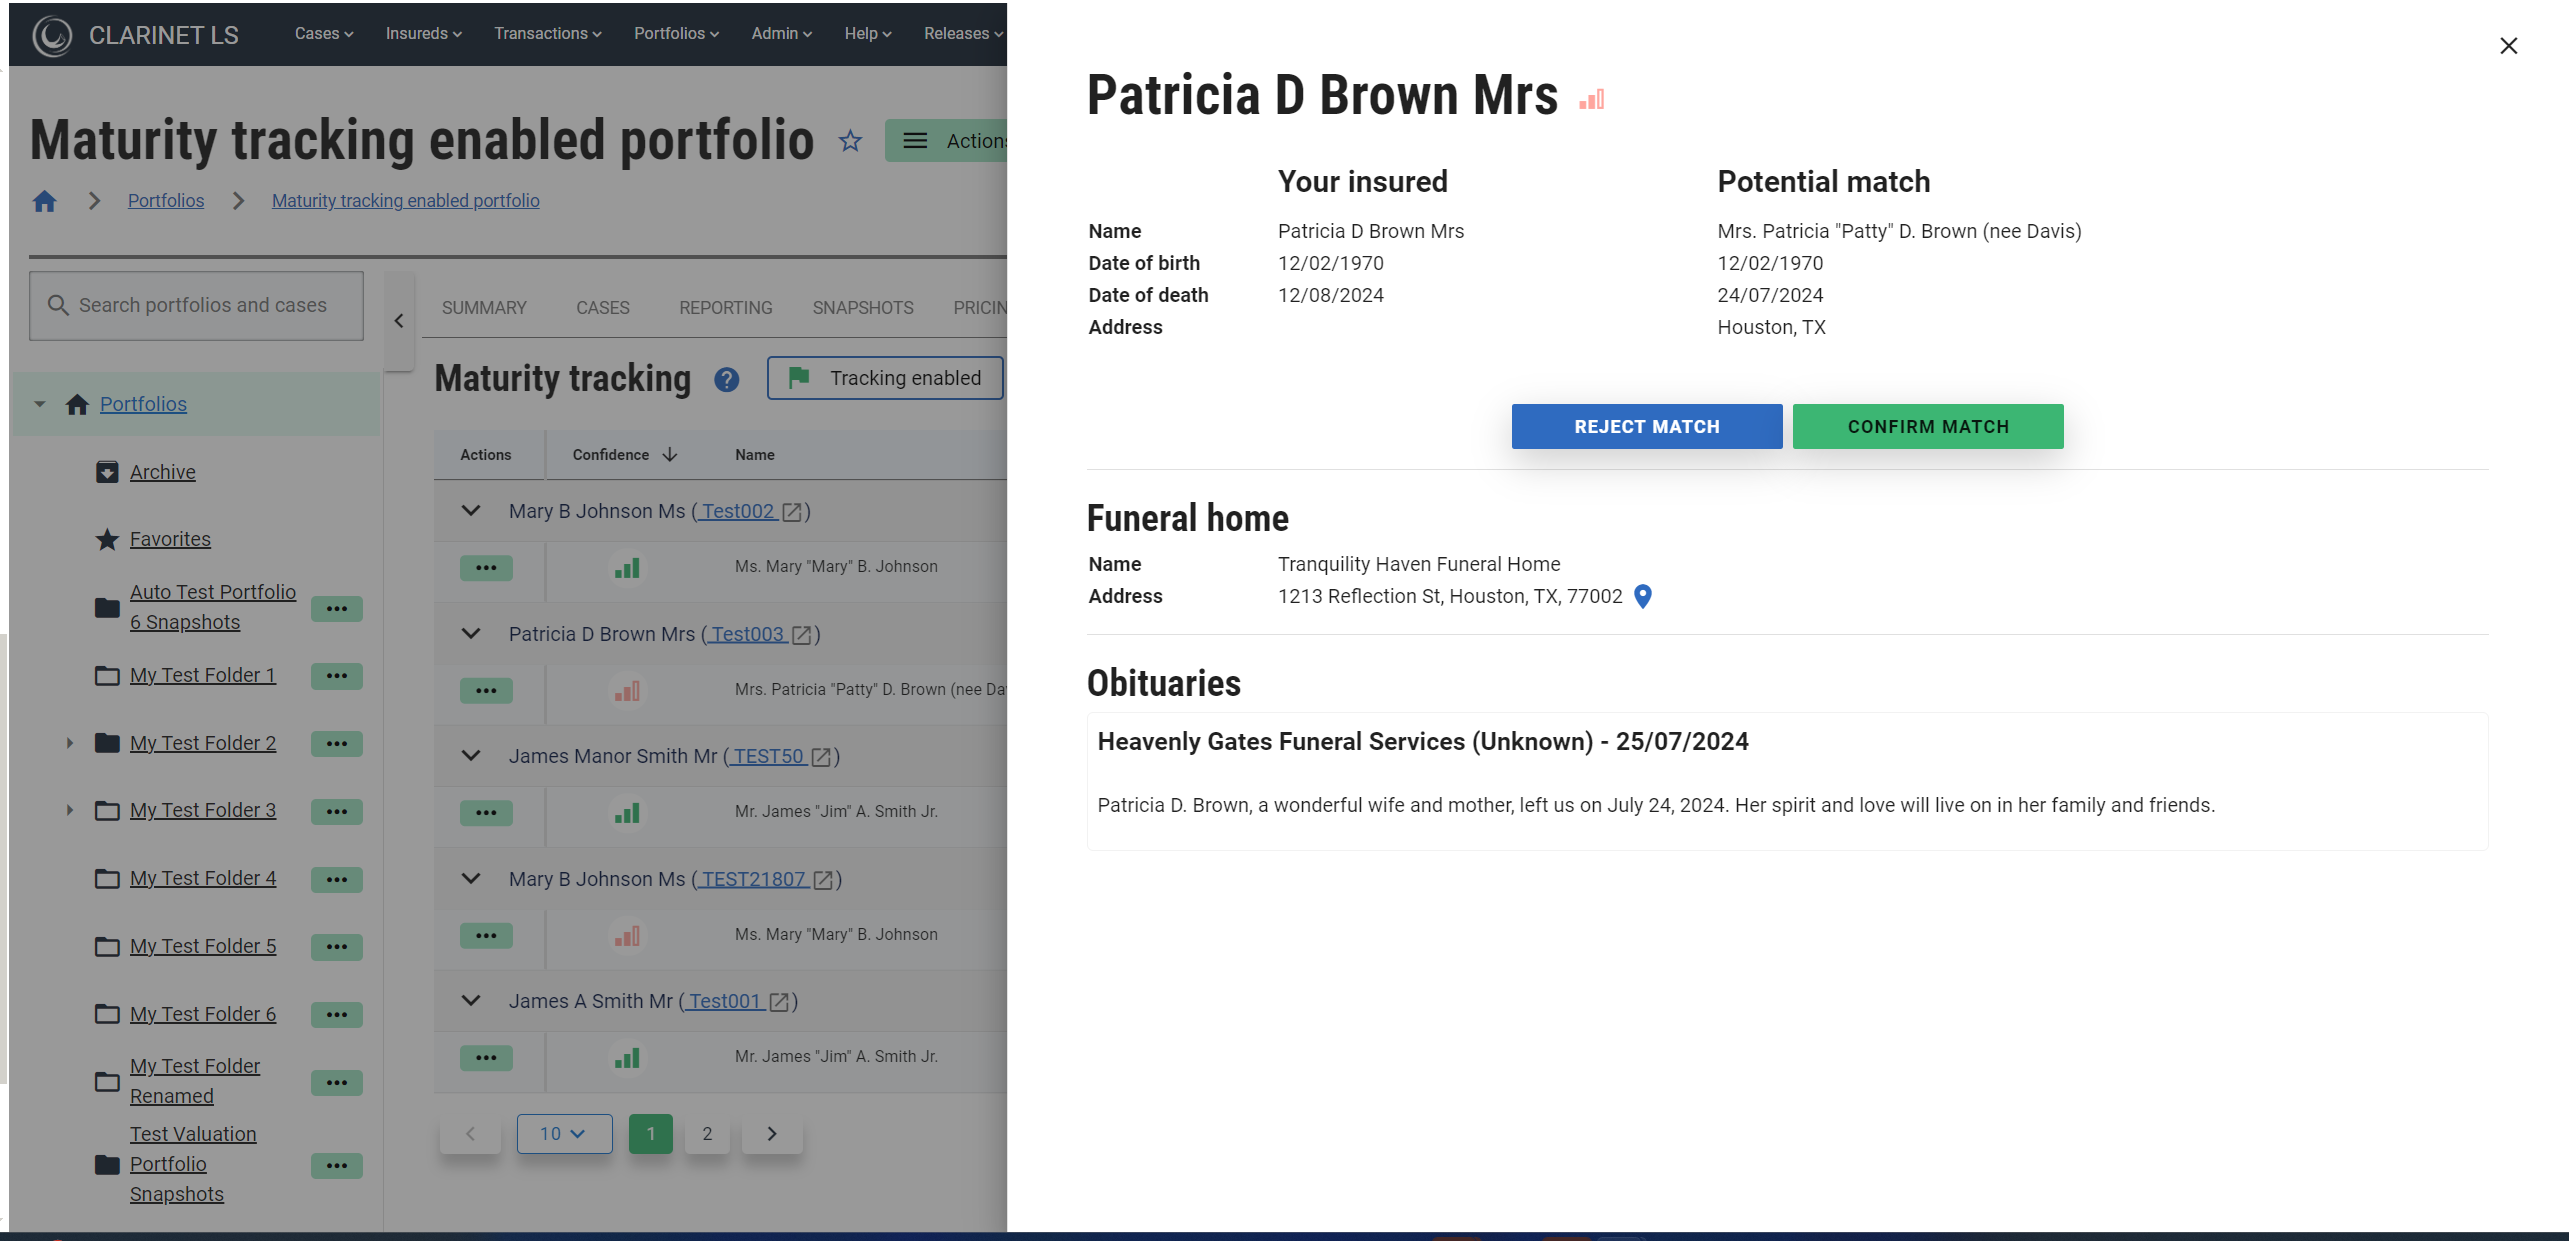
A slide-out opens on the right-hand side which displays more information to support the decision to confirm or reject a match. A match can be either confirmed or rejected on this page or from the actions menu.
Confirm match
- Select the potential match for an Insured.
- Click on the menu followed by Confirm Match.
- A modal pops out with a message that the operation will mark the match as confirmed which prompts the user to choose to confirm or cancel.
- Additionally, you can choose to set the Insured’s date of death to the date displayed for a potential match.
Reject match
- Select the potential match for an Insured.
- Click on the menu followed by Reject Match.
- A modal pops out with a message that the operation will mark the result as invalid for the Insured which prompts the user to choose to reject or cancel.
- Rejected matches will disappear from the table and can be viewed by clicking on the Match status to filter only rejected matches.
Confirmed Insureds are highlighted in green and rejected in Red
Rejected matches though rejected stay on the list and can be confirmed later if required.
To Confirm/Reject all matches
In case of more than one match and all are invalid, click on the three dots header menu as shown below to reject all matches.
