Policy Verification Templates
Overview
Policy Verification Templates let you create reusable configurations for common types of policy verification, tailored to your own workflows and requirements. ClariNet’s policy verification includes around 80 different fields, and you’re unlikely to need all of them for every scenario. Templates allow you to hide fields you don’t care about, reorder them so the most important ones appear first, and require that certain key fields must be completed.
Using Templates
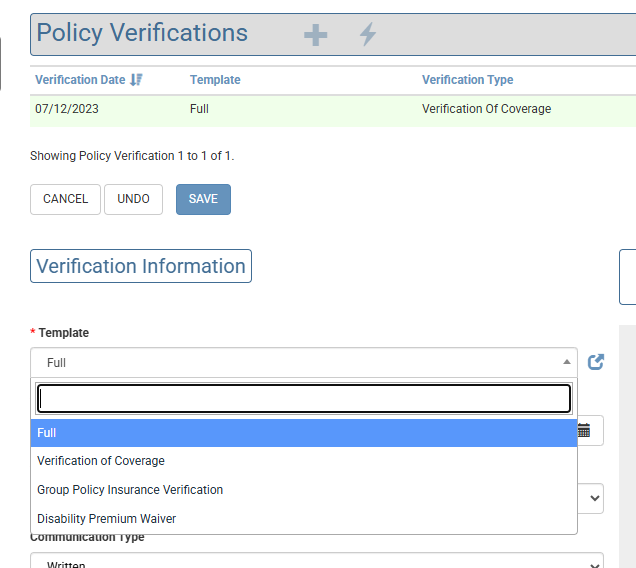
In the Case view, when creating or editing a Policy Verification, you can select a template using the Template dropdown at the top of the screen. This dropdown lists all templates available in your account. When you create a Policy Verification, your account’s default template is selected automatically. You can switch to a different template at any time, and the fields on the screen will update immediately to match the template you’ve chosen.
Excel Imports
When creating a Policy Verification through an Excel import, you can specify which template to use by including a Template Name row heading. If no template name is provided, the default template for your account will be applied when a new Policy Verification is created. If the import updates an existing Policy Verification, its current template will remain unchanged.
Policy Verification Defaults Migration
Templates replace and expand on the previous Policy Verification Defaults feature. If you had customized your defaults, those settings will be migrated into a new template labelled “Custom”. Templates include all the capabilities of Policy Verification Defaults, but also let you create multiple sets of defaults, reorder fields, and mark important fields as mandatory.
Template Administration
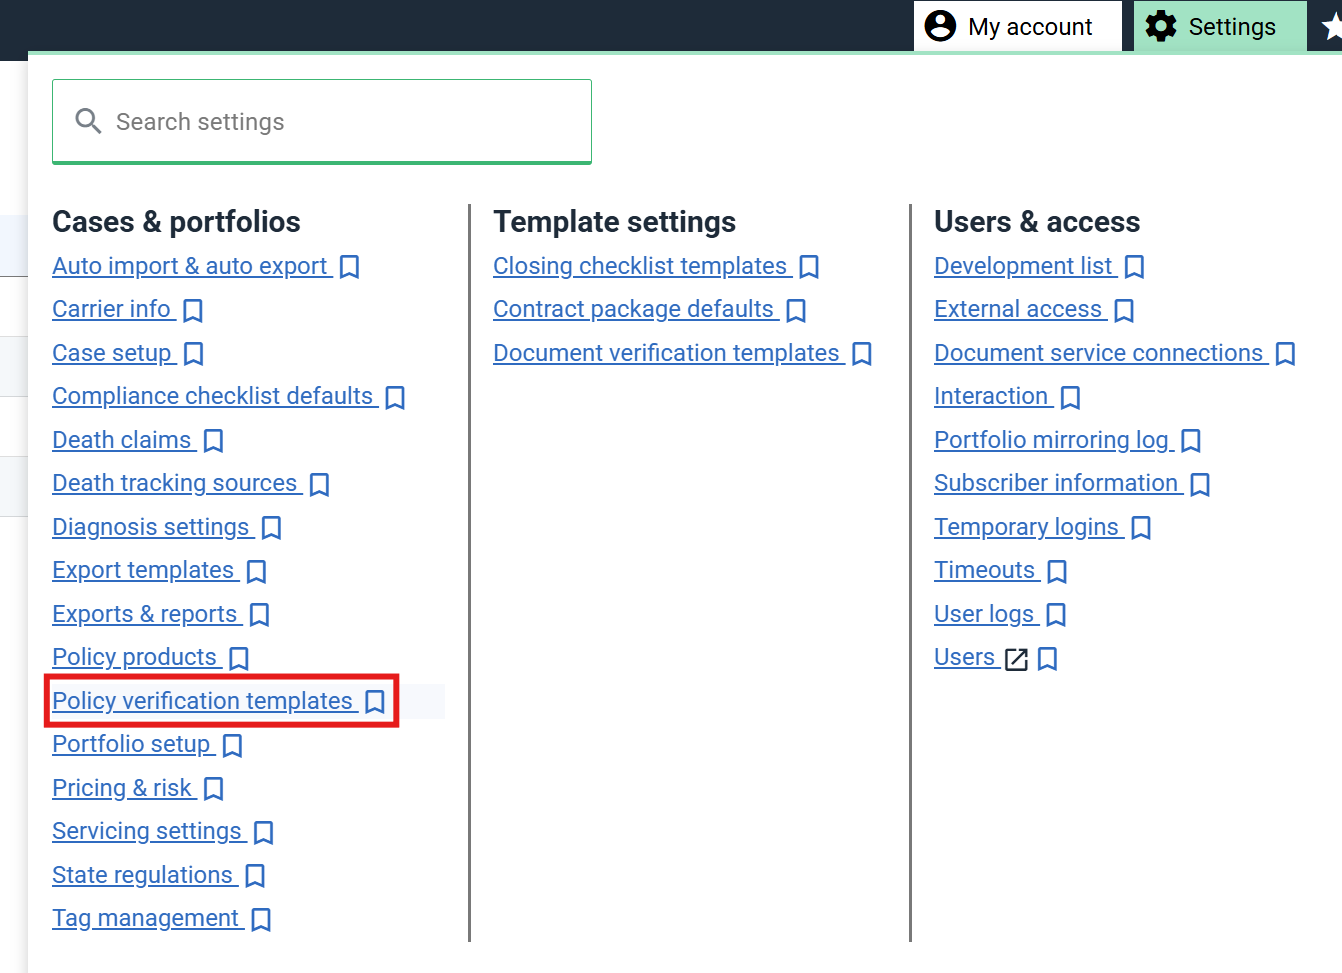
Subscriber administrators can create and edit templates from the Settings menu, located in the top‑right corner of ClariNet’s navigation bar.
This page lists all templates available on your account. You will always see at least four templates, as ClearLife provides several built‑in templates designed for common scenarios, each with a sensible set of default fields for different types of policy verification. Built‑in templates cannot be edited.
By default, the Full template is selected. It includes all ~80 available fields. If you previously used the Policy Verification Defaults feature, your existing settings will be migrated into a Custom template, which becomes your default and can be edited freely. Whenever you create a new Policy Verification, your default template is automatically pre‑selected.
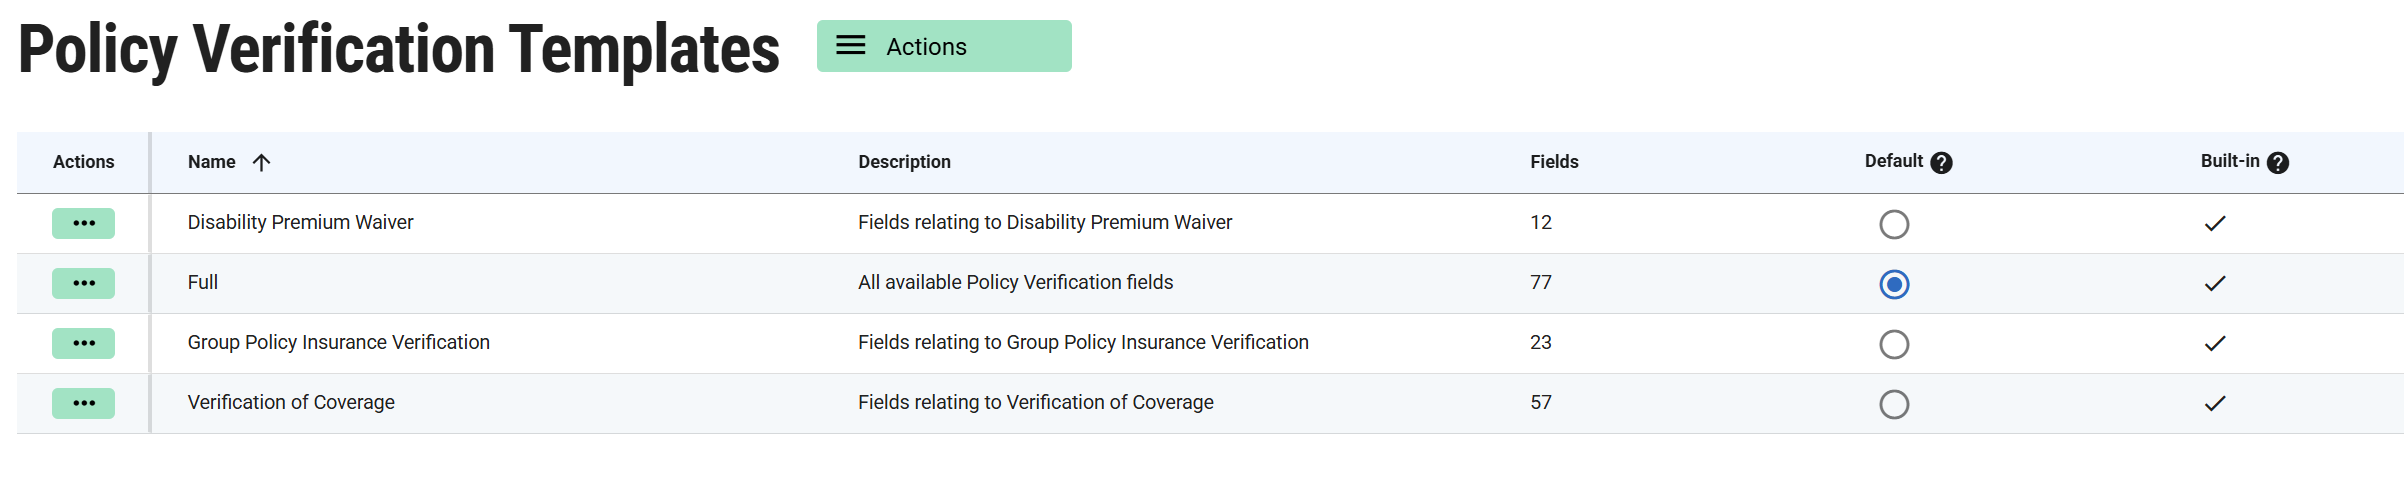
Each template has a name and a description. The name must be unique within your account and is used to identify the template. You can change the default template by selecting the Default option next to it.
Creating and editing templates
To create a new template, open the Actions menu and select Create template.
If you want to base a new template on an existing one, click the three‑dot menu next to that template and choose Copy.
To edit an existing template, click the three‑dot menu next to it and select Edit.
Remember that built‑in templates cannot be edited, but you can use Copy to create an editable version.
When you create or edit a template, a slide‑out panel appears showing the template details, as shown below. This is where you enter the template’s name and description.
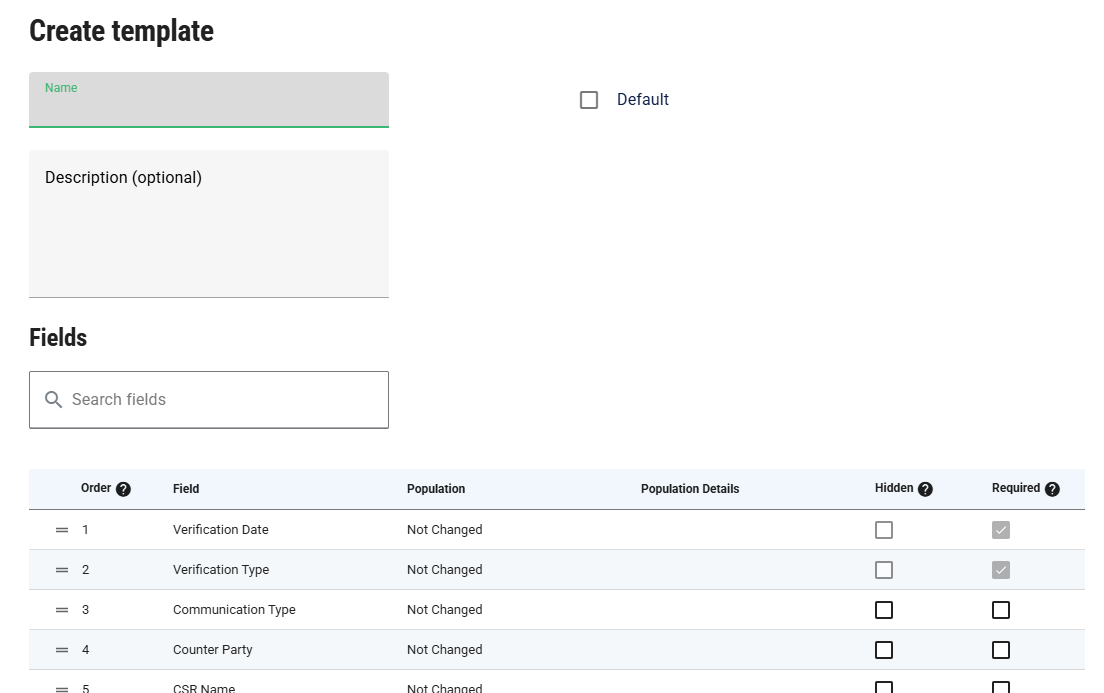
Below the template details is a list of all fields available in a policy verification. Use the Search fields box to quickly locate a specific field.
Order
This column controls the order in which fields appear when viewing, editing, or creating a Policy Verification using the template. Use the handle (the “equals” icon) on the left of each row to drag and drop fields into the desired order.
Field
This is the label of the field represented by the row. It is provided for reference only and cannot be changed.
Population
This setting determines what happens when you click Load Defaults on the Policy Verification screen. The options are:
- Not changed – no default value is applied to this field
- Copied from previous – the system looks at the most recent Policy Verification (chronologically) and copies the value from that field into the current one
- Fixed – a fixed value is used to populate the field. When selected, you must enter the value in Population Details. Depending on the field type, this may be a number or a text value.
- Calculated – a calculated value is used to populate the field. When selected, choose the calculation type in Population Details. A predefined set of calculated values is available, including the following (availability depends on the field type):
- Policy Face Amount
- Last Date from Payment History
- Last Amount from Payment History
- Previous VOC Total Paid to Date Plus Last Amount from Payment History
- Current Date
Hidden
Determines whether the field is visible. Certain key fields—such as the verification date and verification type—cannot be hidden.
Required
Determines whether the field must be completed before the policy verification can be saved.